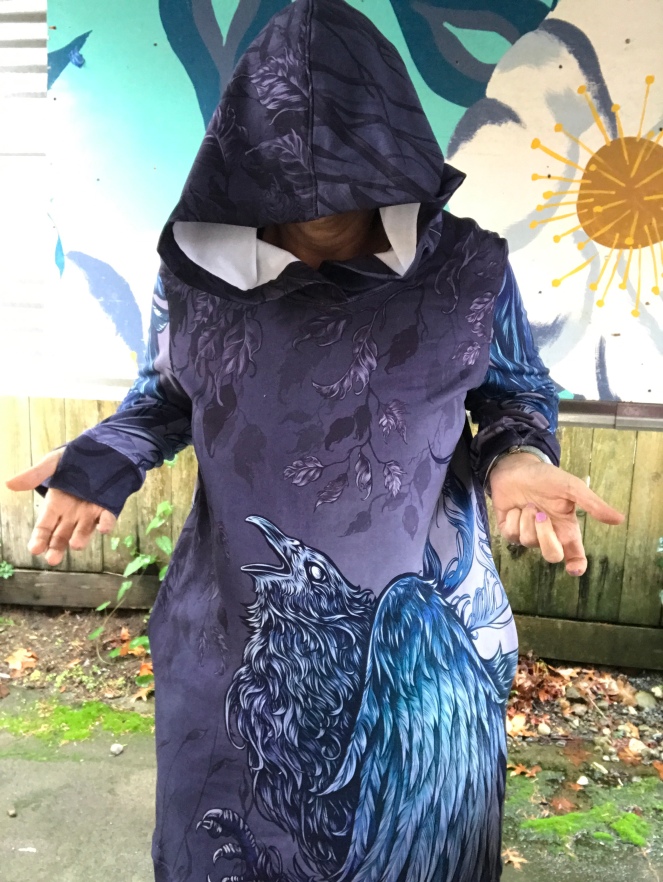
I’m super happy with how it turned out. The pattern is McCalls 7061which, as you can see, is intended to be lounge wear/pajamas…. but I like to say that patterns are just a guide… they aren’t set in stone.
I purchased this fabric from The Styled Magnolia a few months back. It’s two panels in their Cotton Lycra French Terry fabric, which is AMAZING!!! I actually purchased three panels, the third though was in their Endurance XC which I made into leggings and will blog about as soon as I remember to take pics.
Anyhoo – the French Terry fabric is thick enough to be made into hoodies, and my original idea was to make a jacket with this fabric. But after thinking about it I didn’t want to chop up the fabric so much that you would lose the image of the crow. So, I dove into my patterns and decided this long sweatshirt/hoodie was perfect… with a few modifications.
I added about 6 inches to the length (actually I added about 10″ and then cut off 4″ because it was a little too long), and added side pockets instead of putting the original kangaroo pocket. I think a kangaroo pocket would have covered up the crow… and accentuated my belly (no thanks). I also added thumb holes to the cuffs – because I do like having my hands warm.
Can we talk about the hood though?? For the love of all that is sewn – I don’t know why the hood is so large…
…. but I can see how it could come in handy when I meet the Fellowship of the Ring crew.
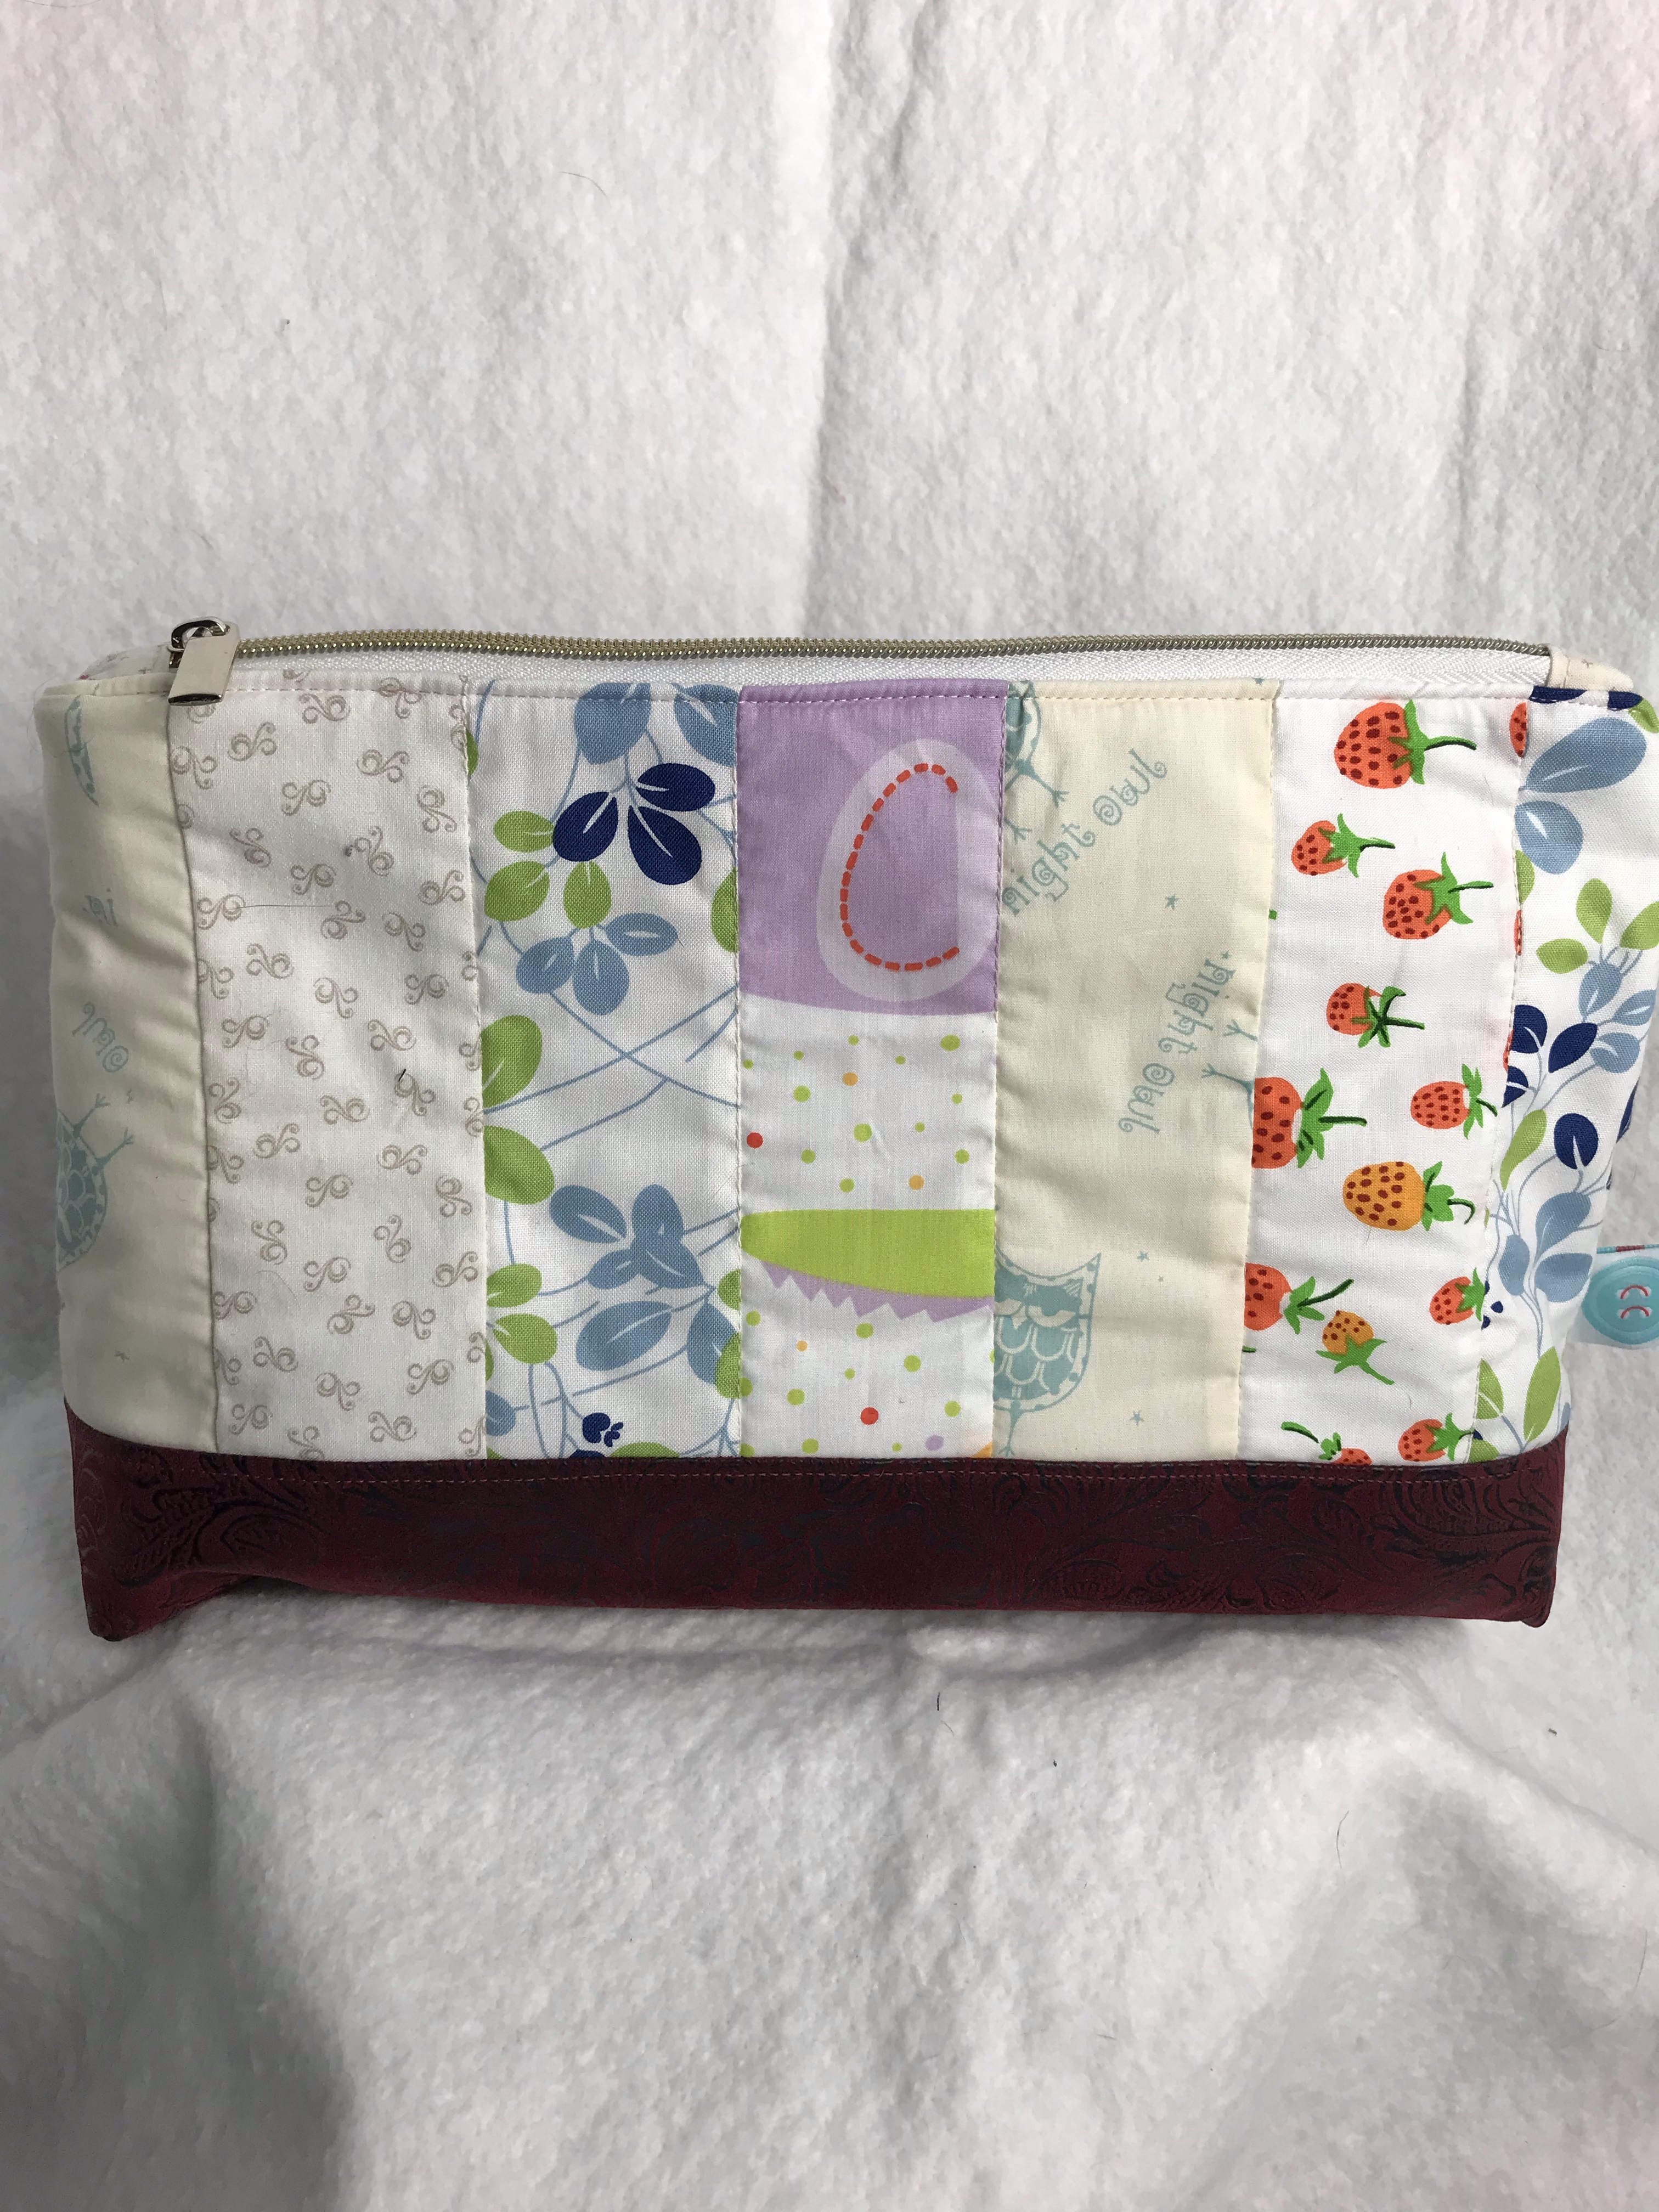
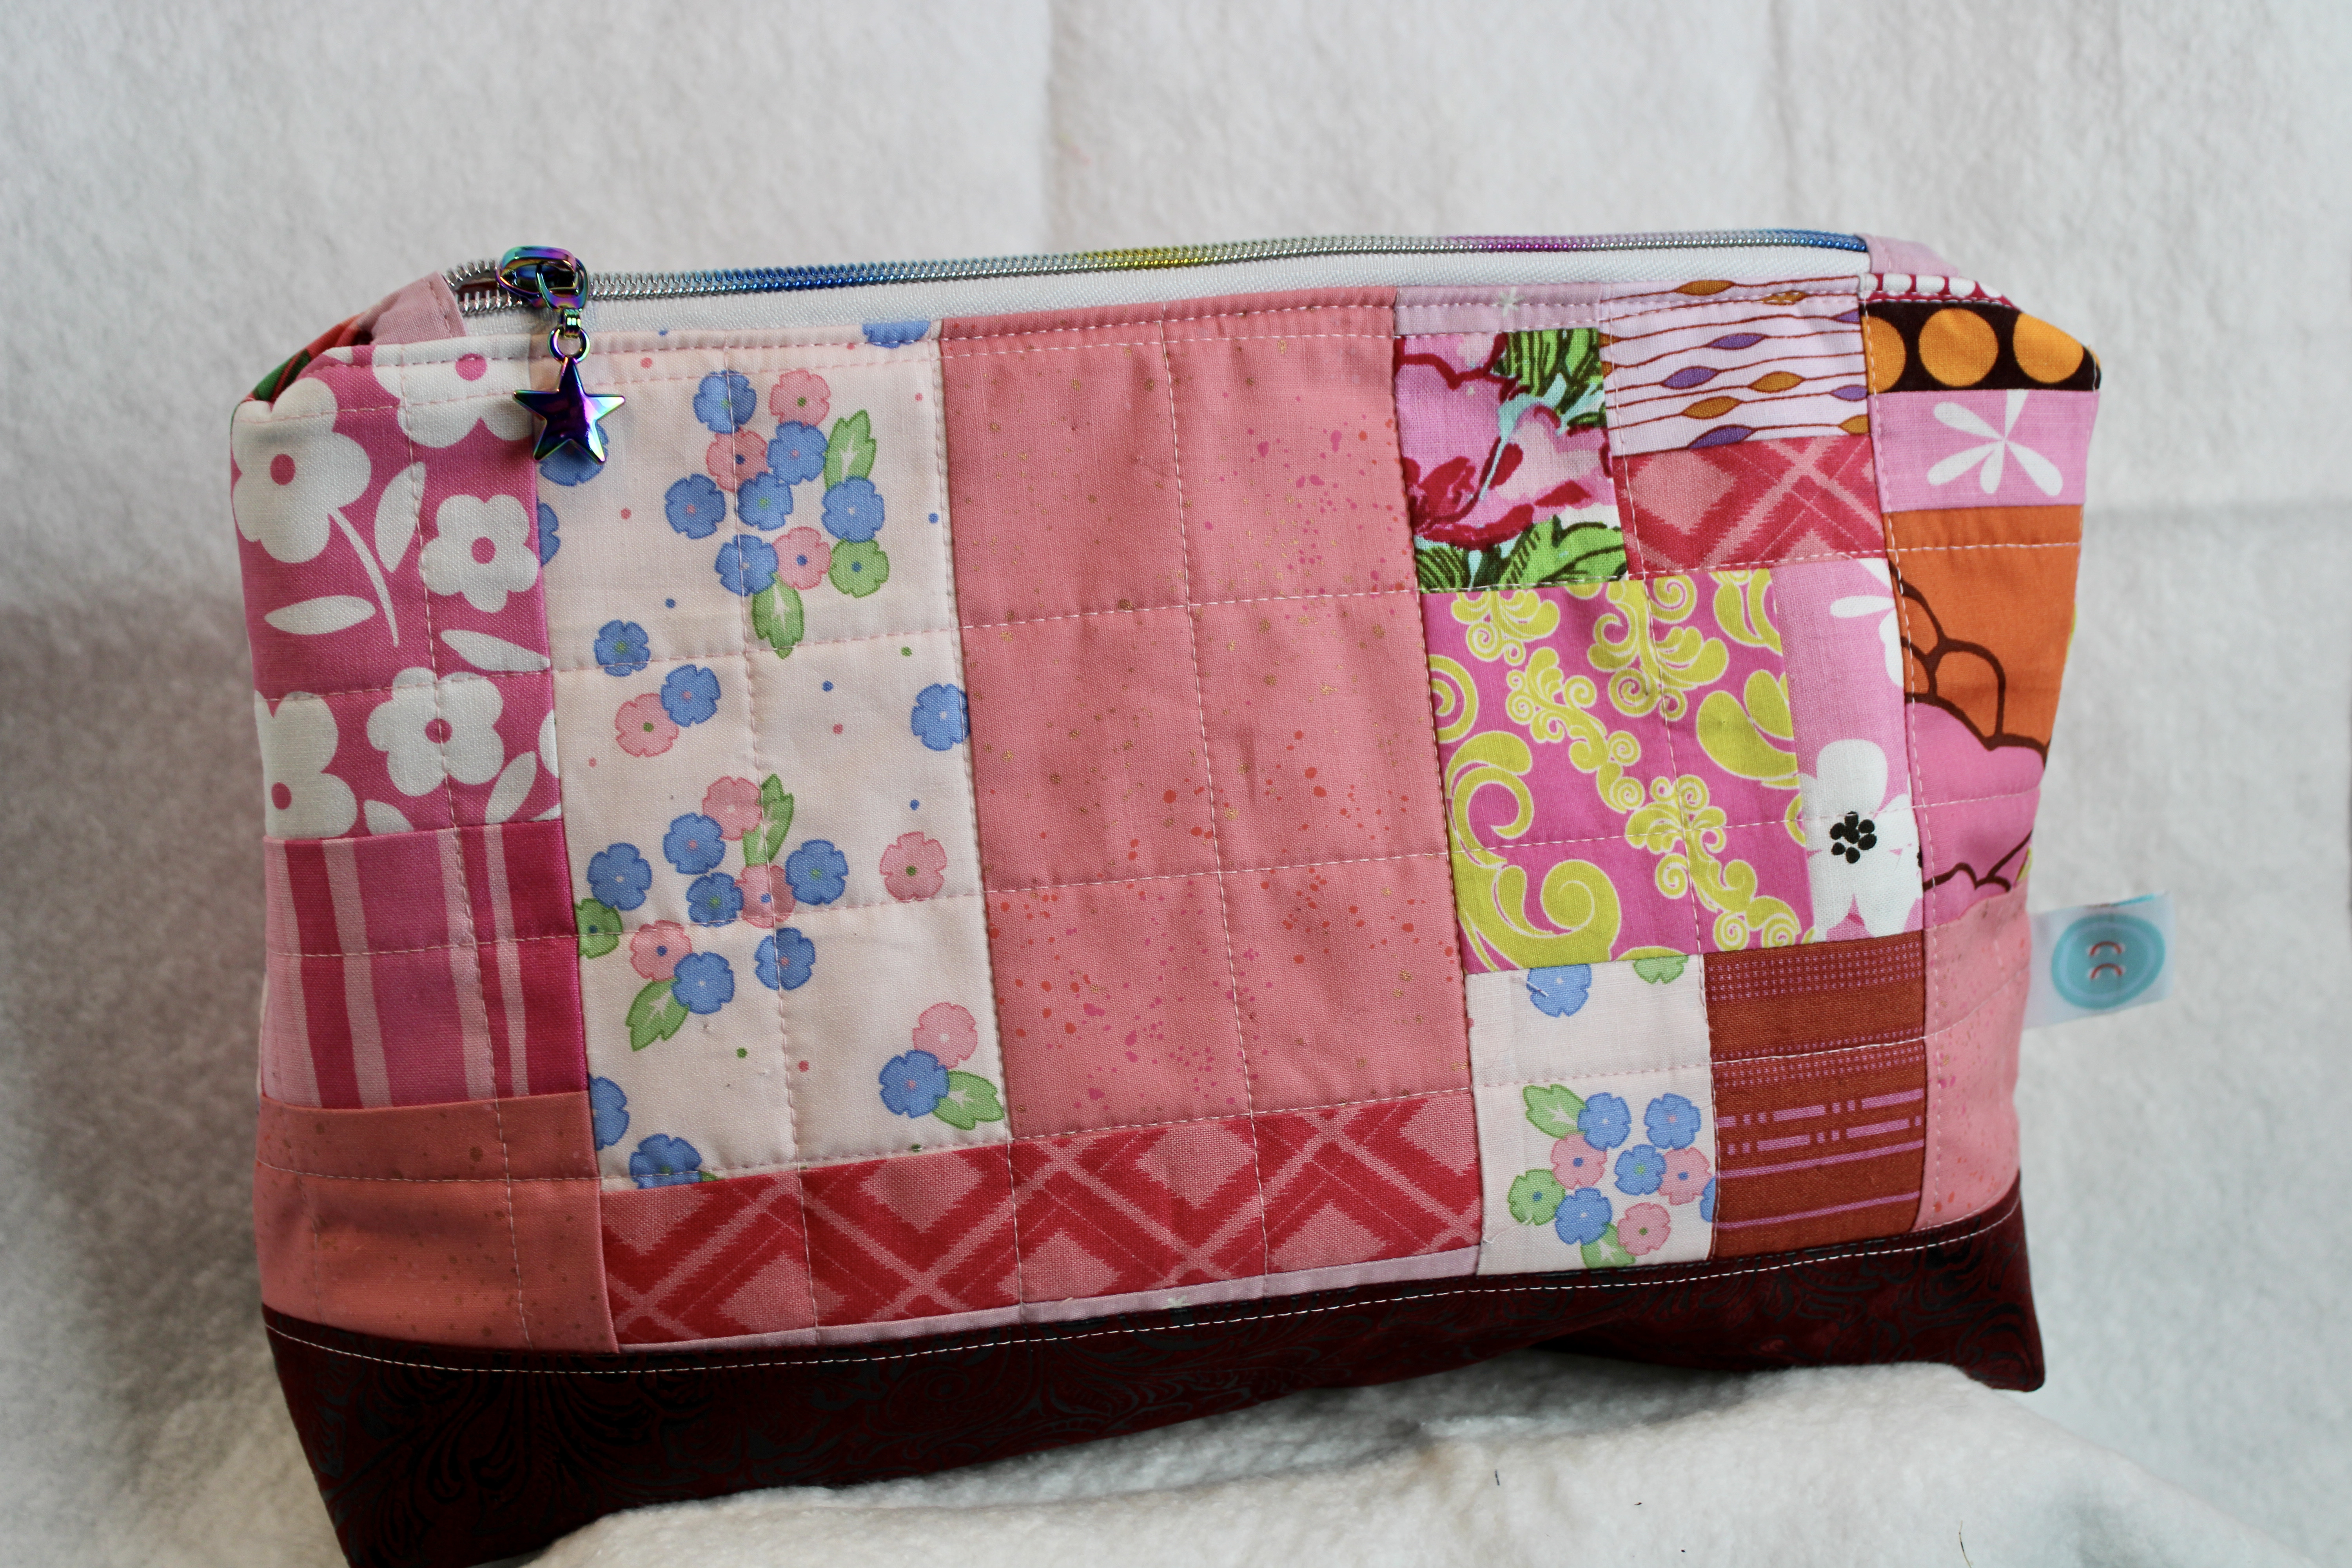
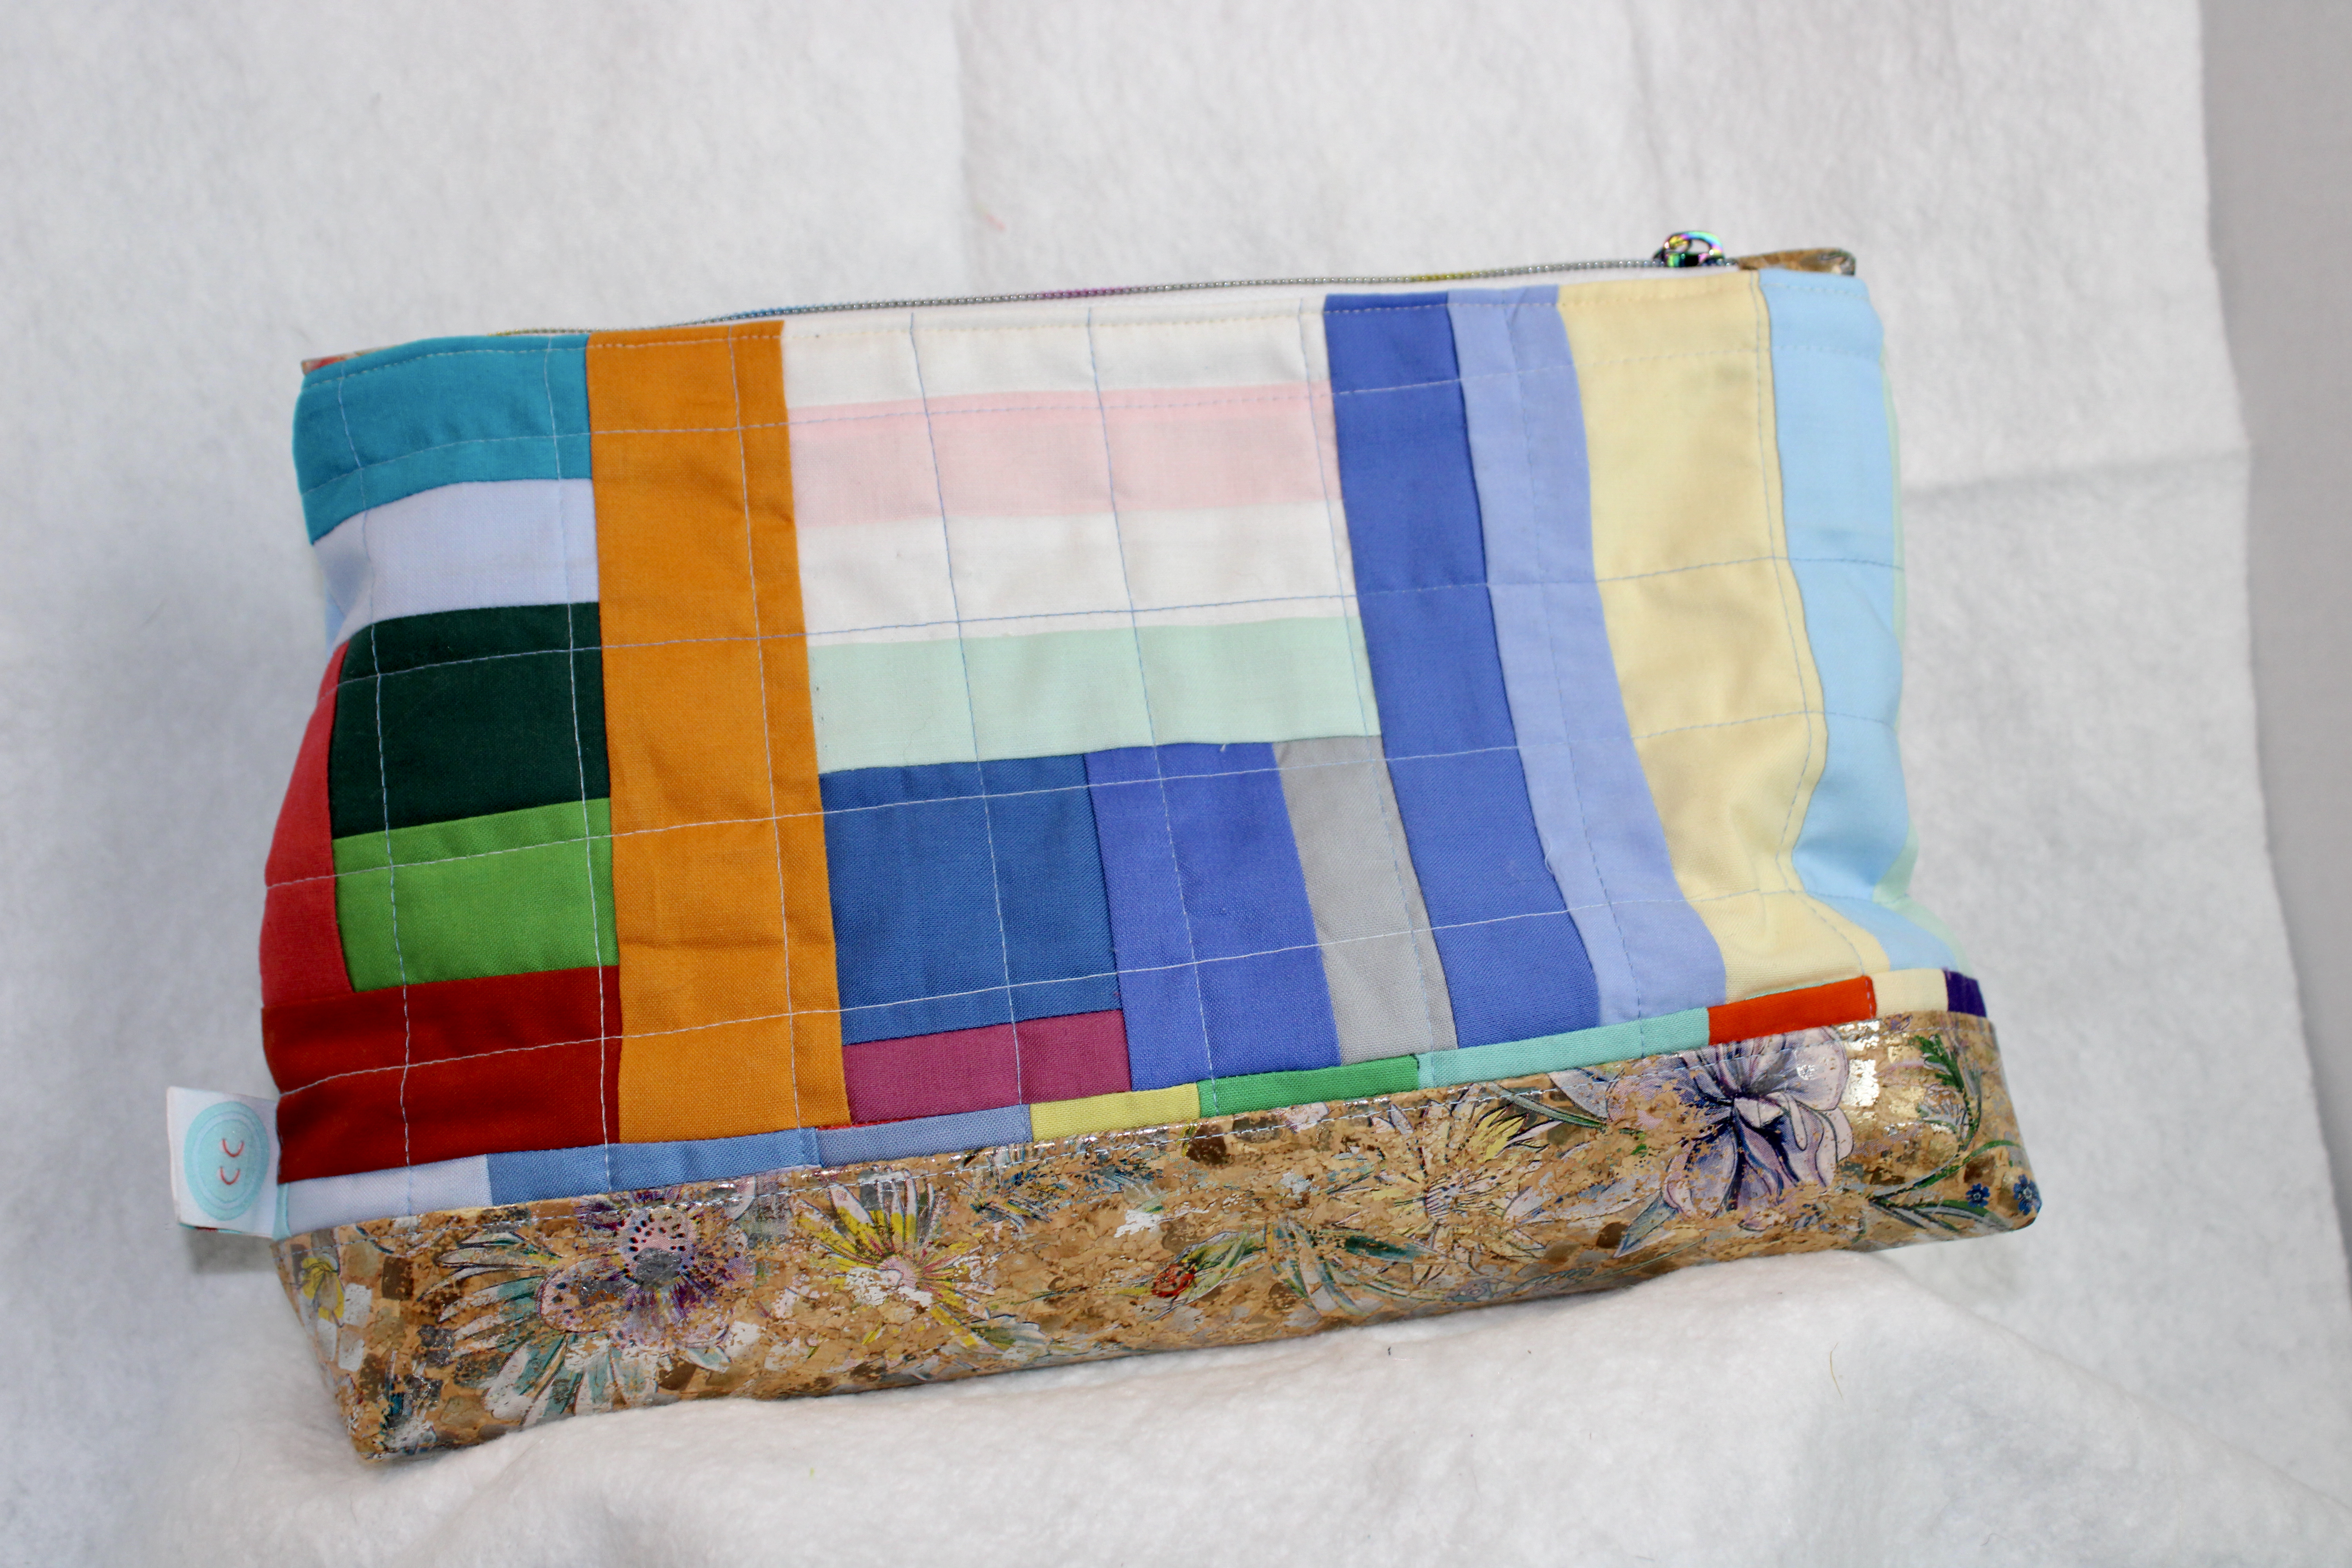
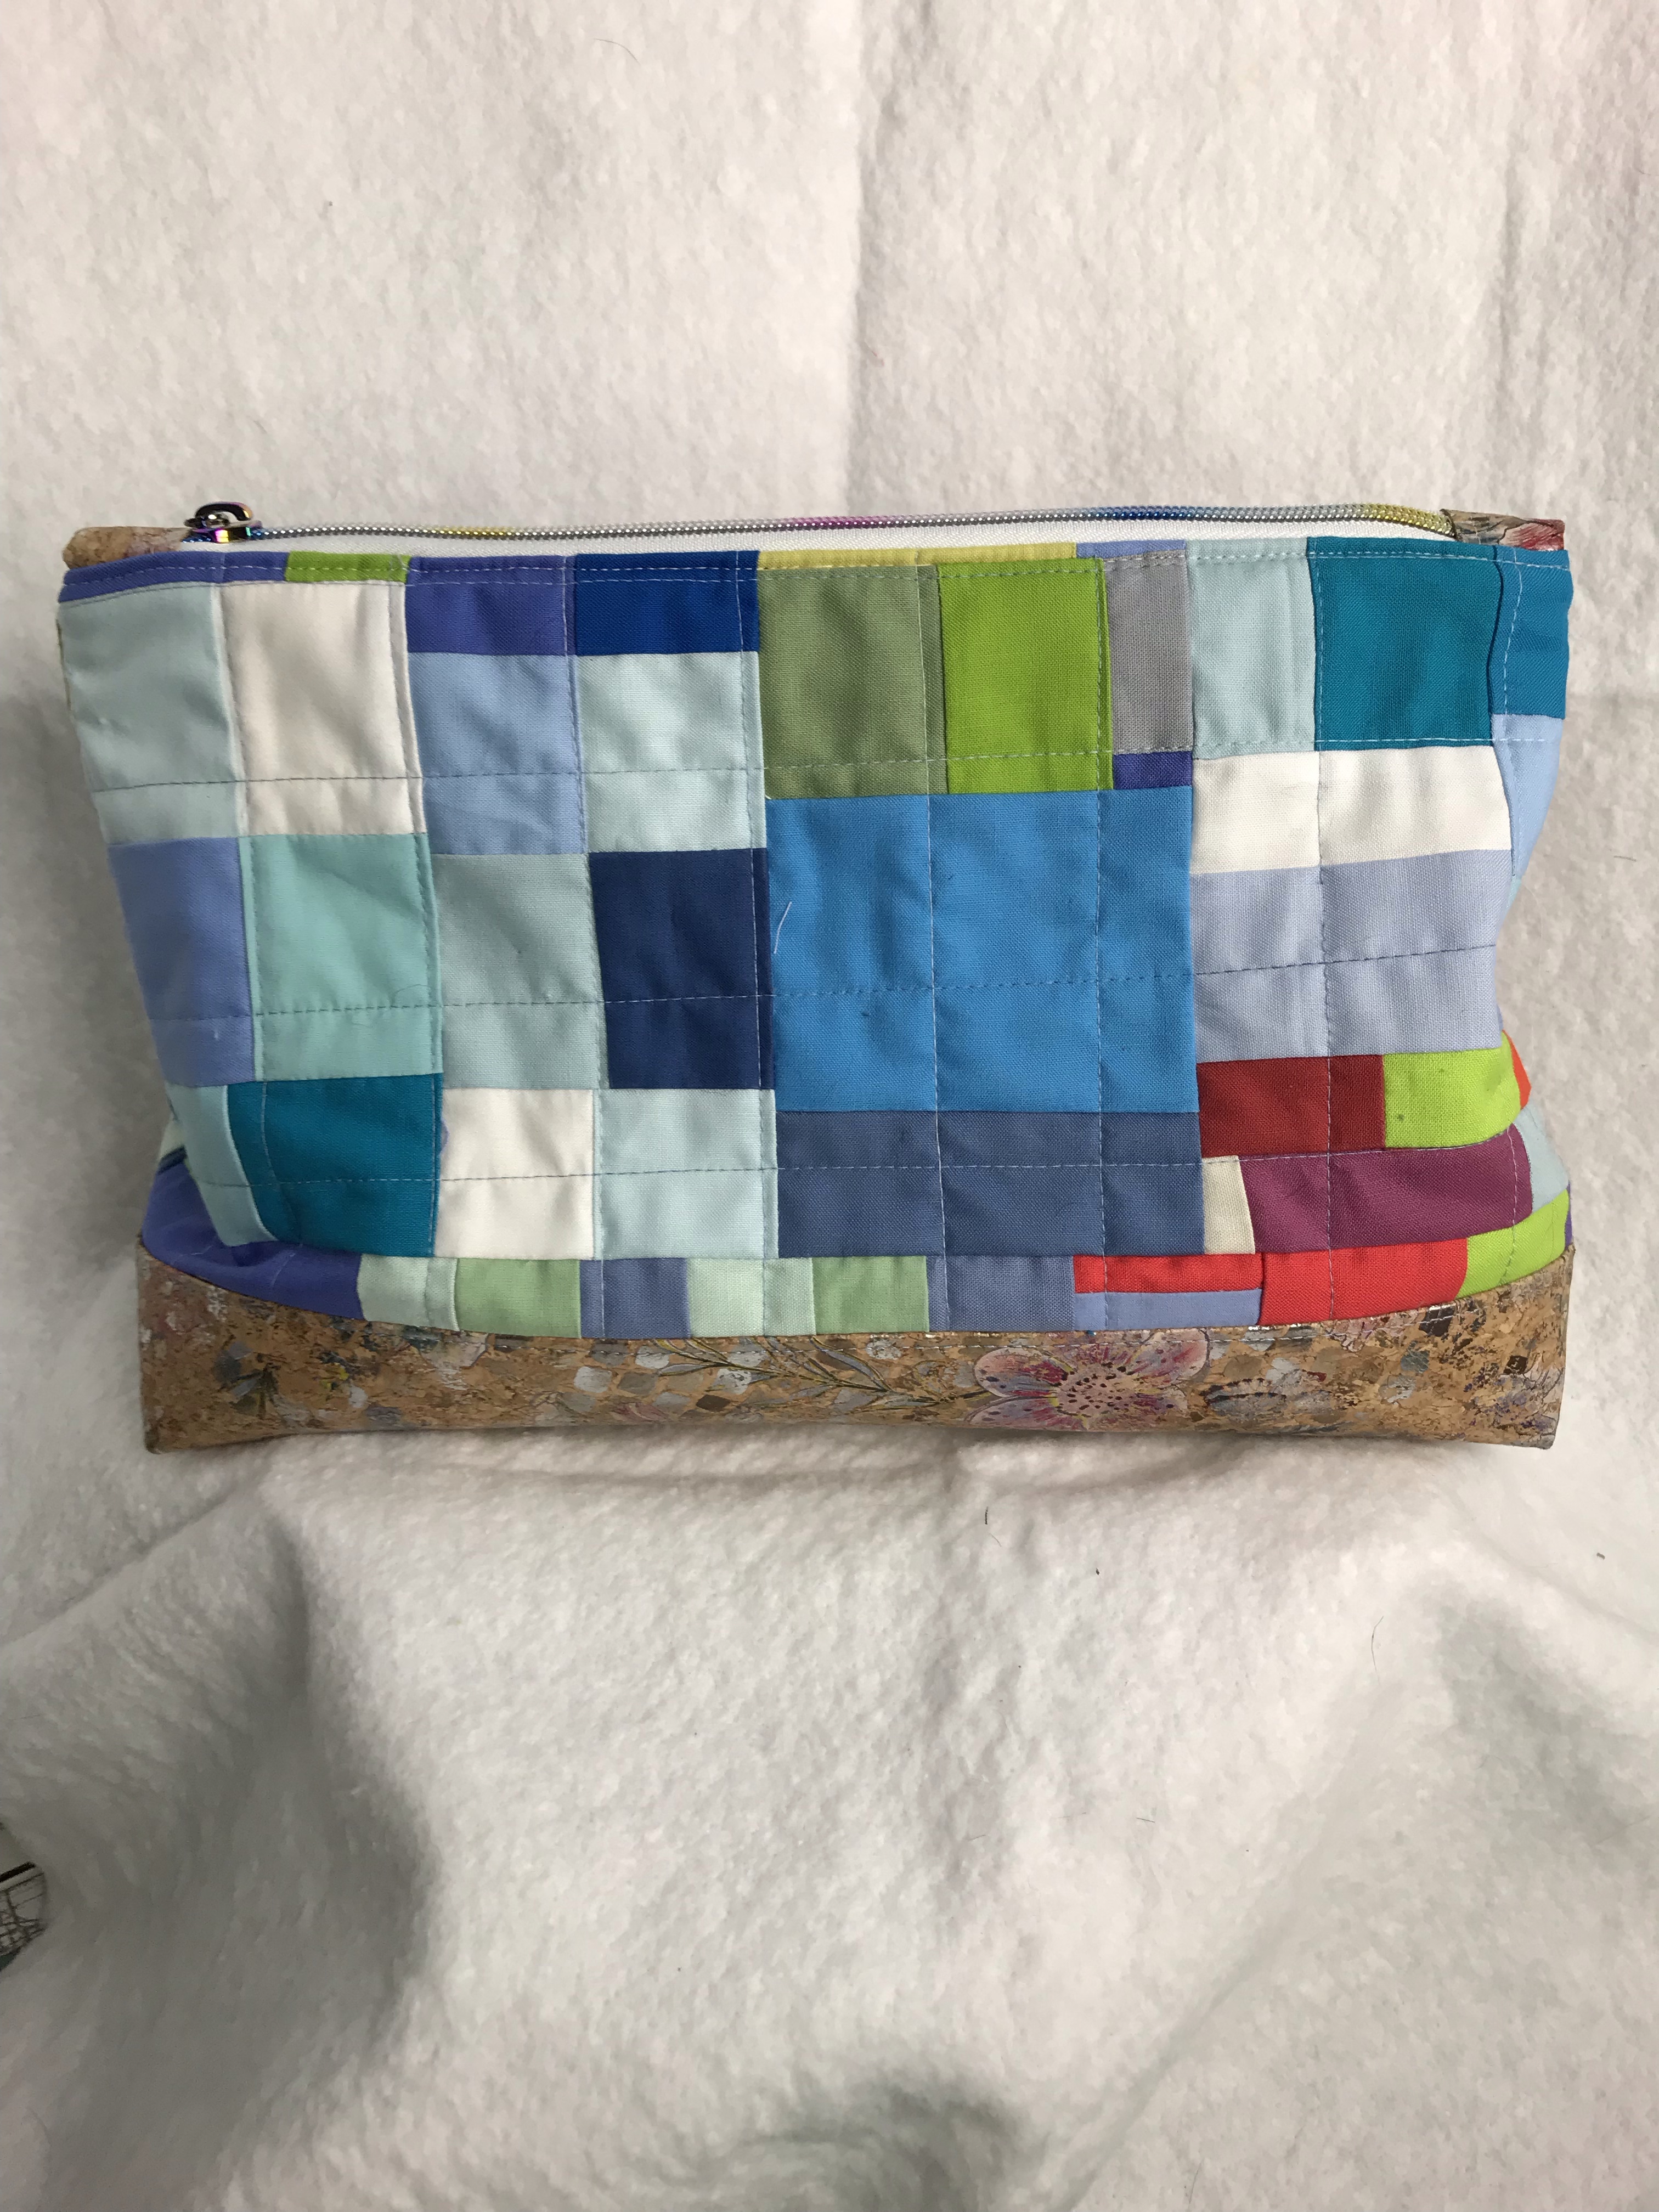
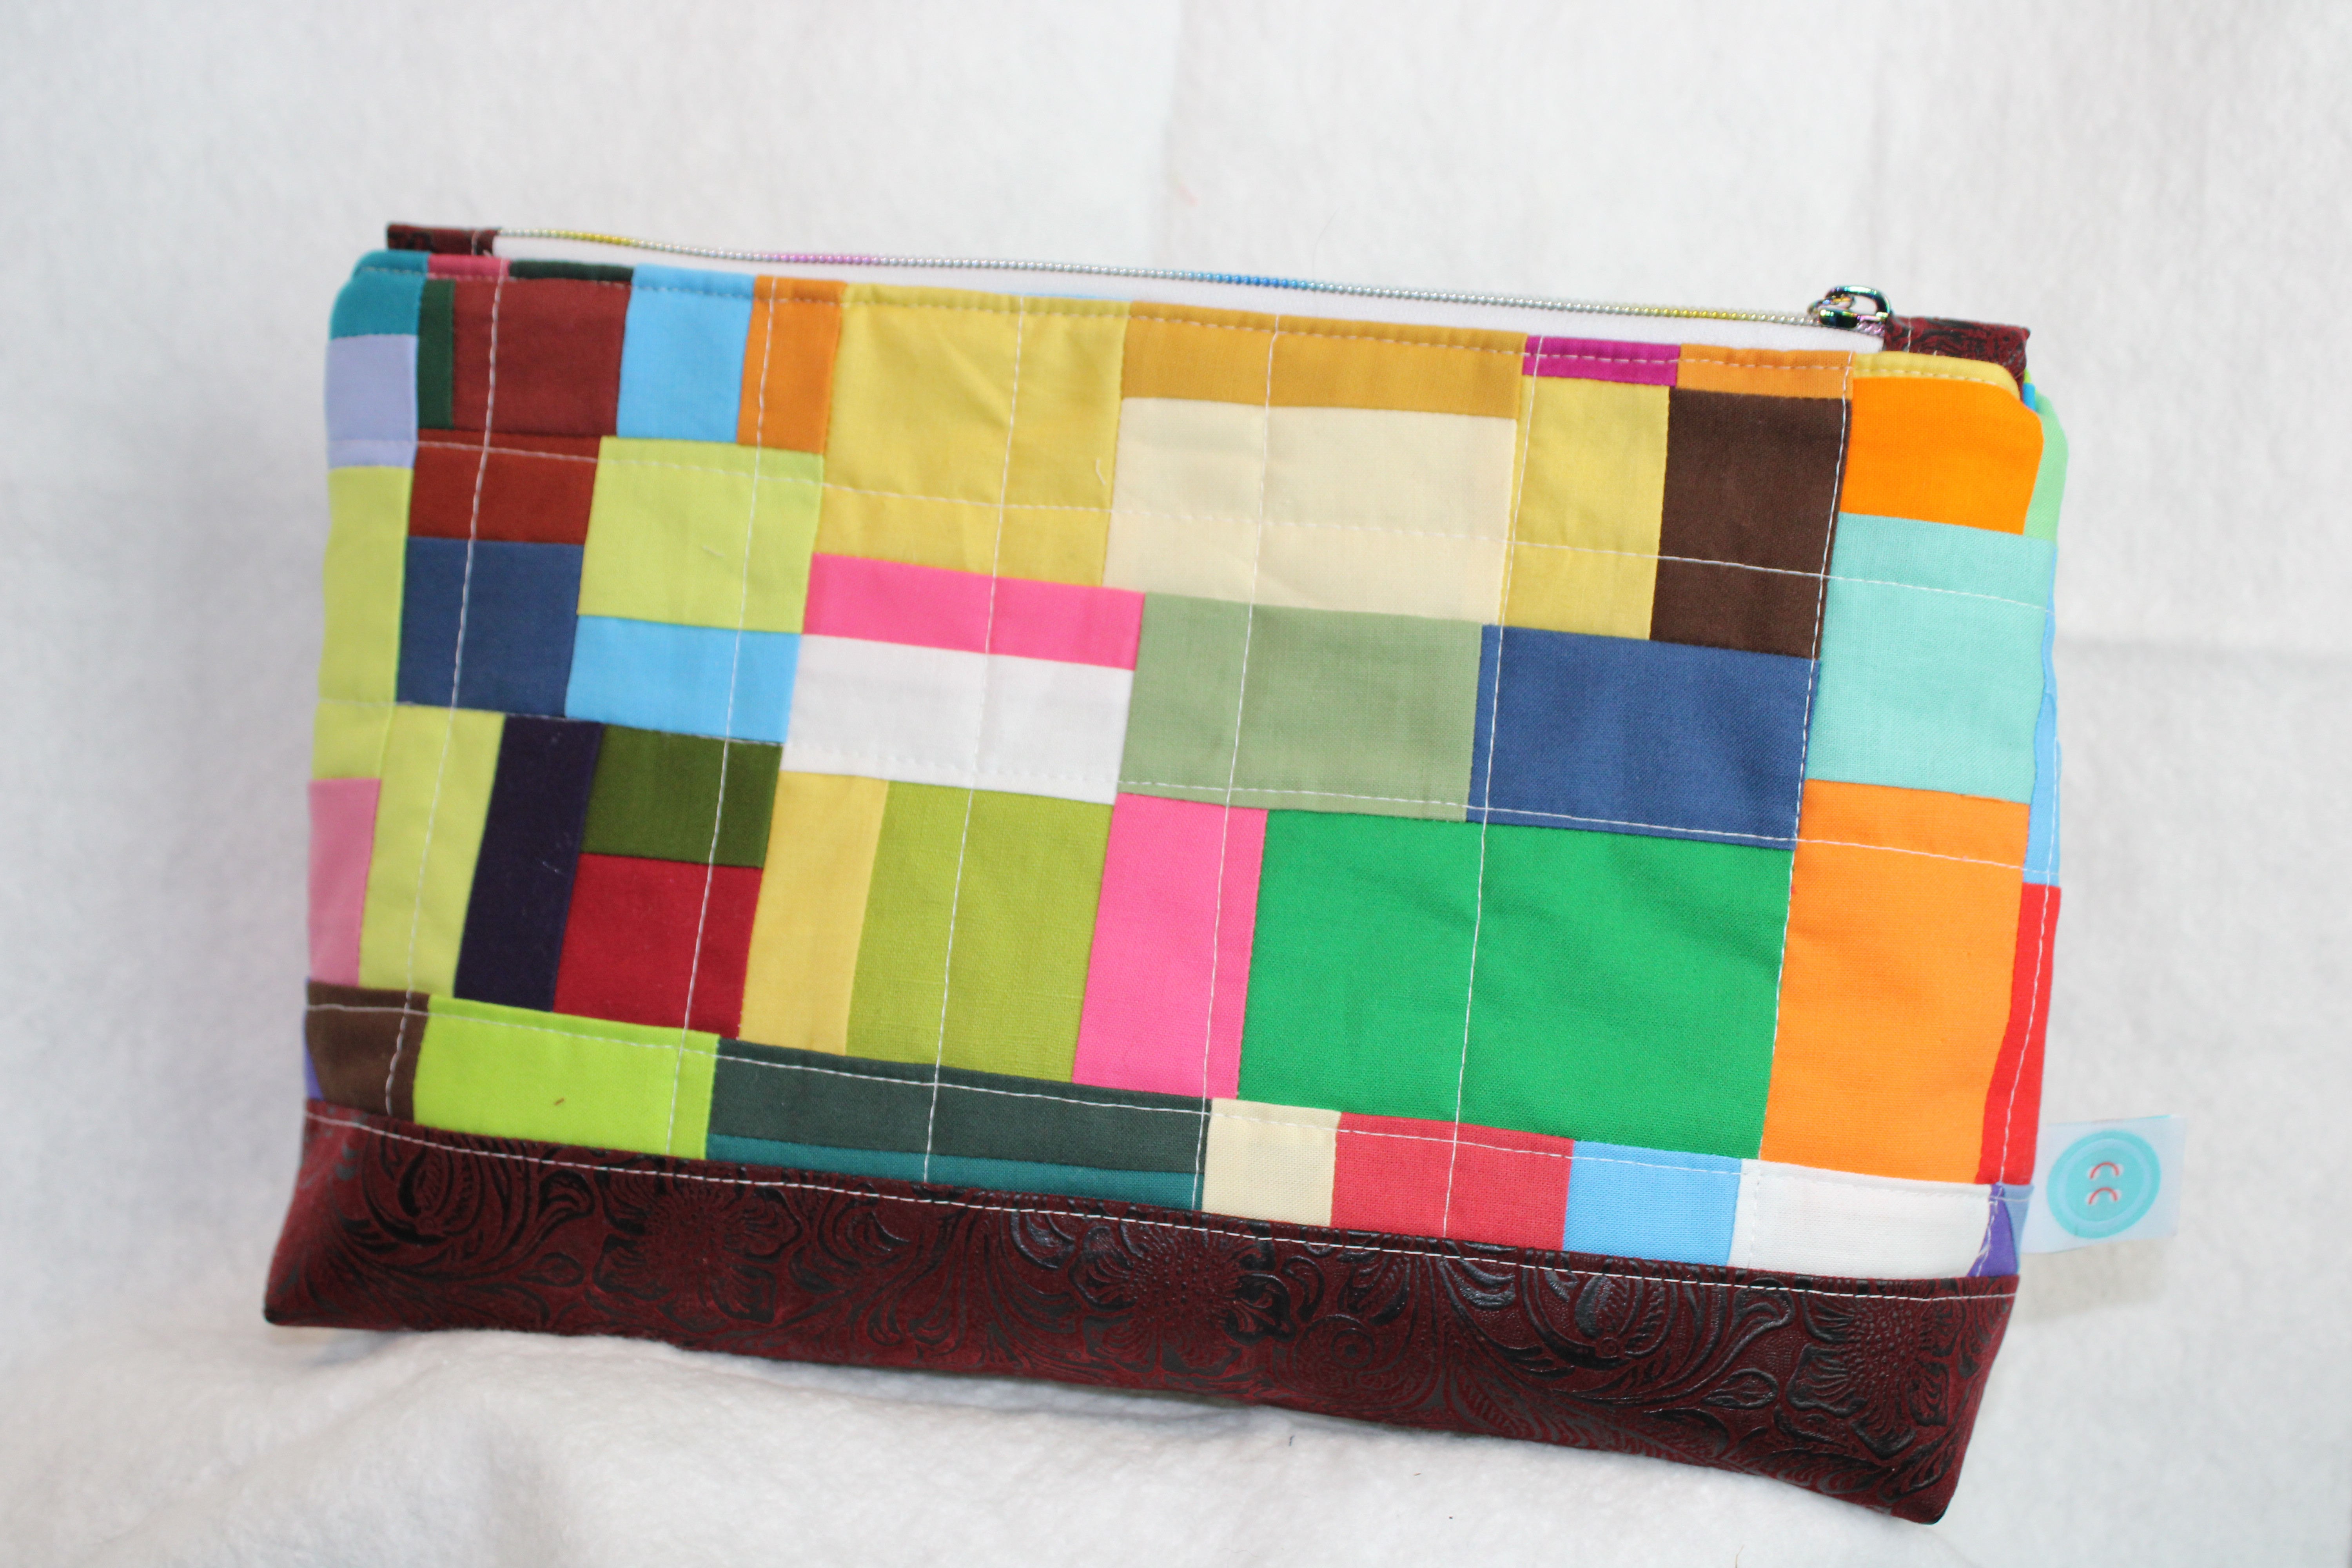
A few weeks ago I told you about my quest to use up all my scraps in an effort to organize and use up my out of control fabric stash. I’m happy to report I have been plugging along on that effort and tonight finished up the last of 23 zipped pouches using just what I had in my stash. (I should be proud, but part of me is embarrassed).
To make each bag I sewed smaller scraps of fabric together and created a larger piece of monochromatic fabric – which I liked the look of a lot. I can quickly tell which colors of fabrics are my favorite by the number of bags I was able to make using that color. (hello blue).
Remember my Lard Butt jacket?? The scraps I used for that jacket made 3 pouches, a quilt (which I’ll blog about later) and I STILL have scraps left over! SO MANY SCRAPS!! However, I think the bags made of just solids fabrics are some of my favorite.
I also had some larger chunks of fabric that I didn’t have the heart to cut into so I made smaller bags. This pink bulldog/terrier one is probably one of my favorite. And as much as I love this cowboy fabric it felt good to finally make something with it after holding onto it for 8 years!
All of these pouches are listed on my Etsy page…. and after I sew a few other things on my long list of things to sew, I’ll be back to scrap busting and making more zippered pouches (or ?)!
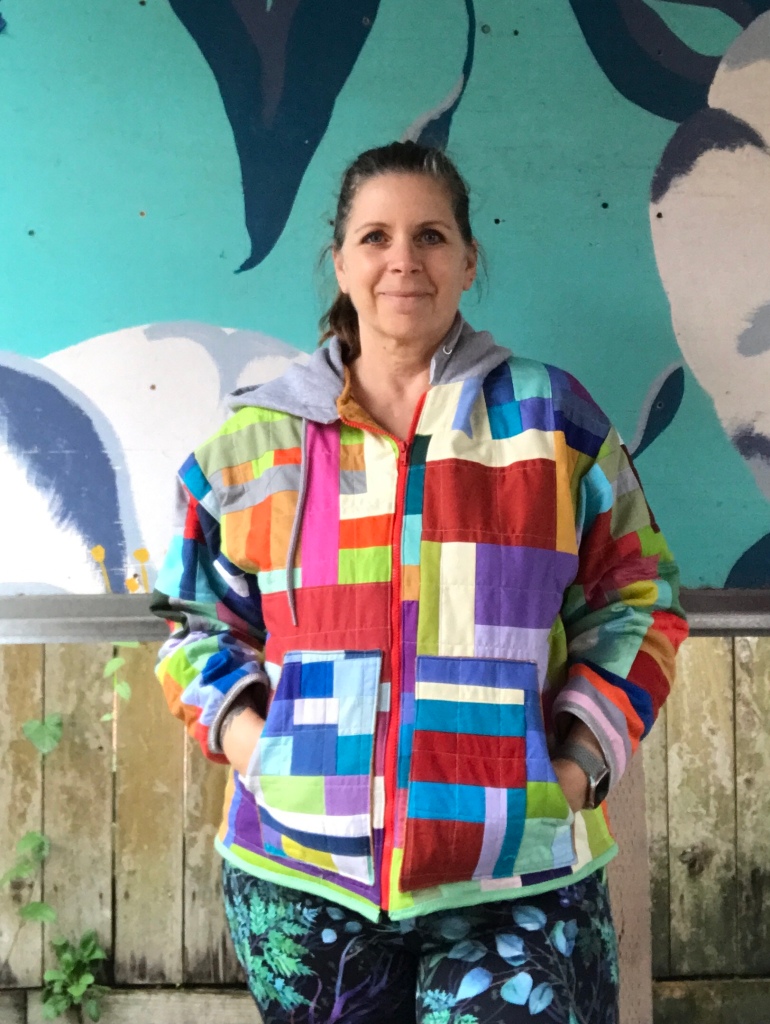
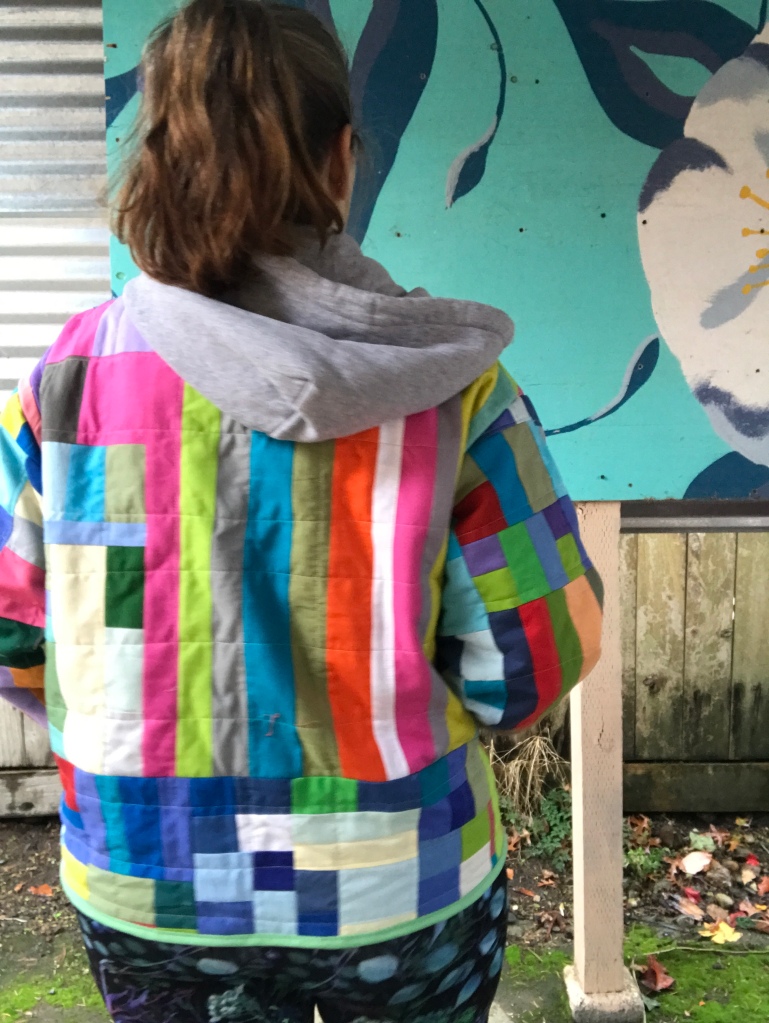
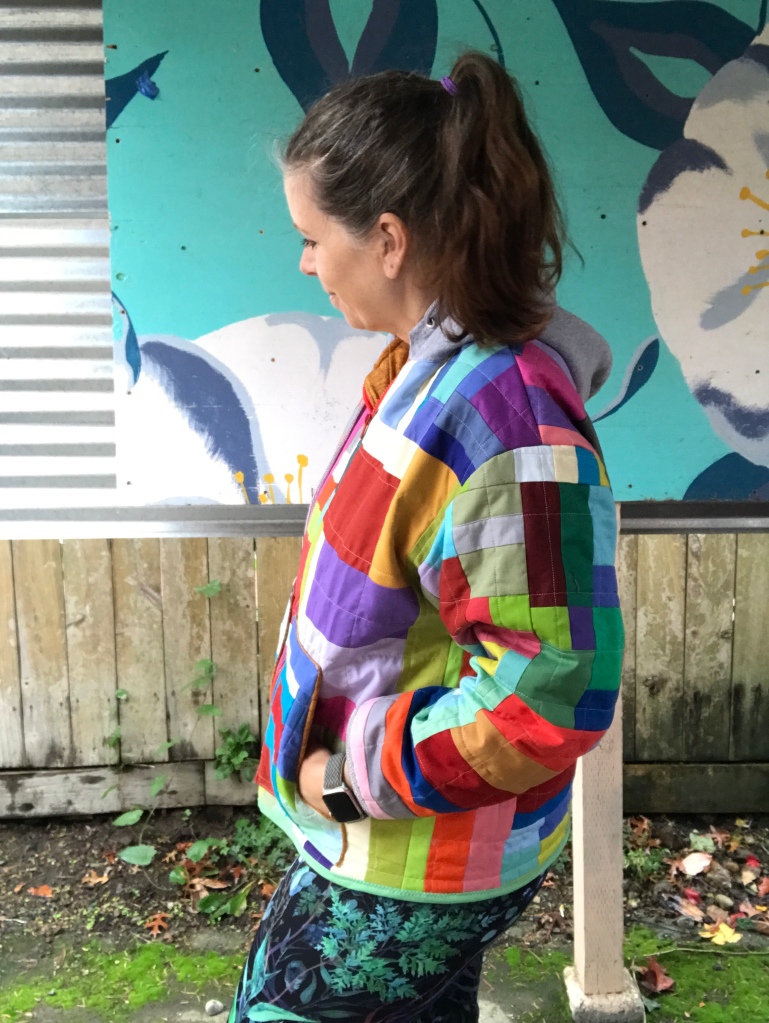
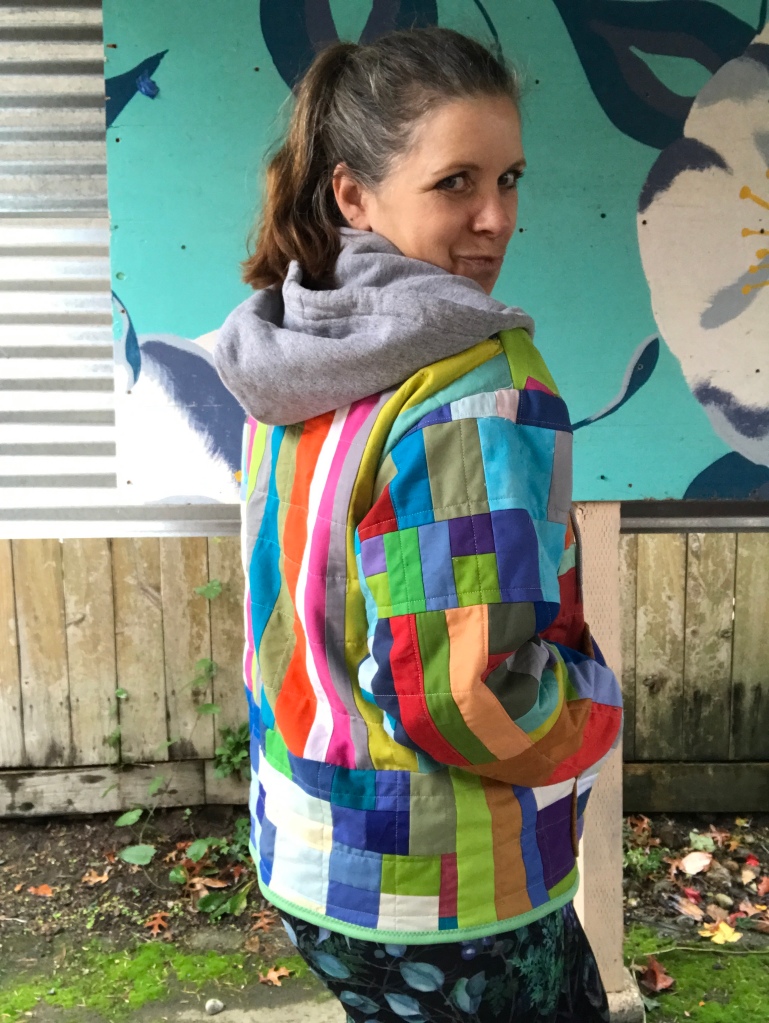
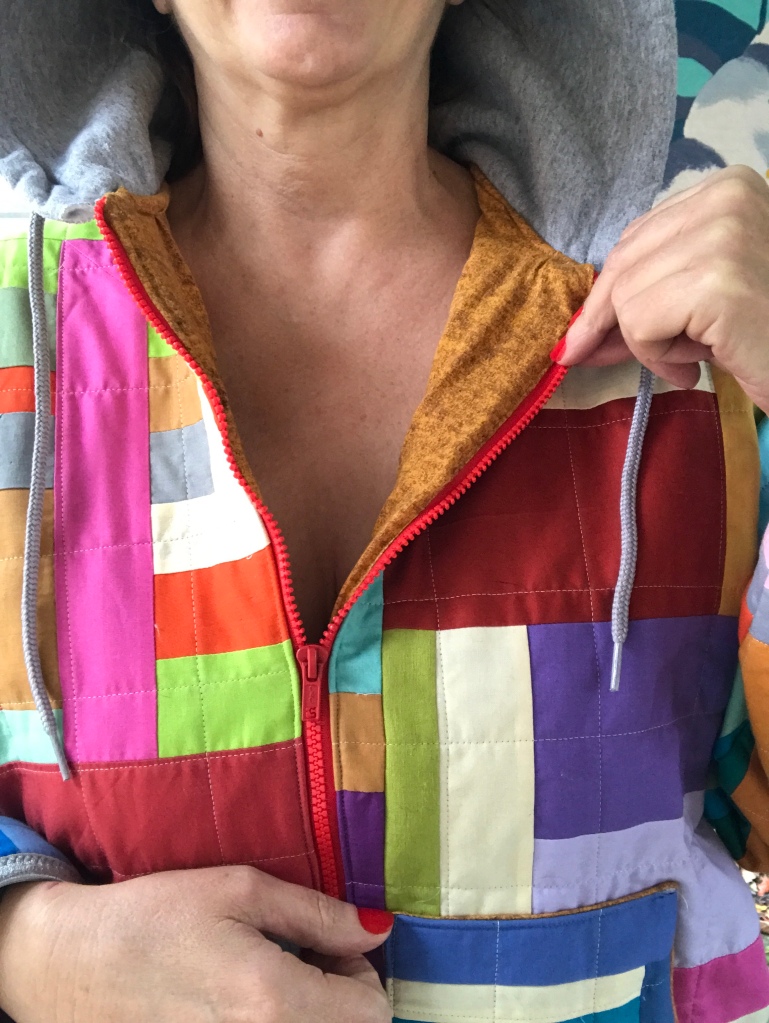
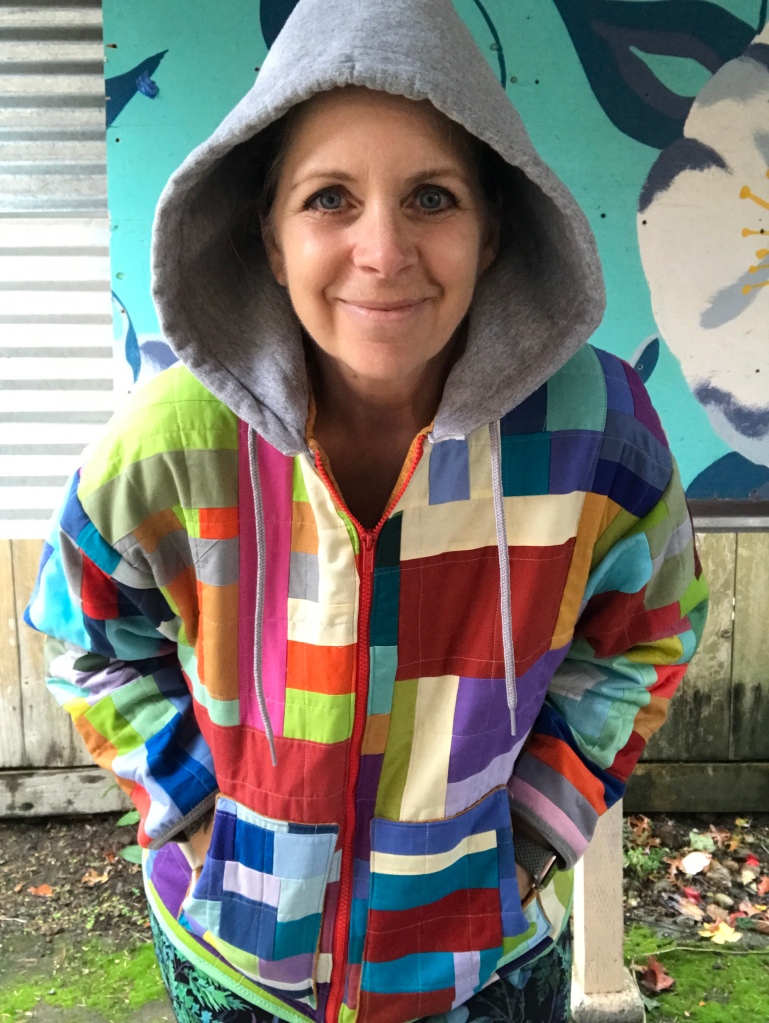
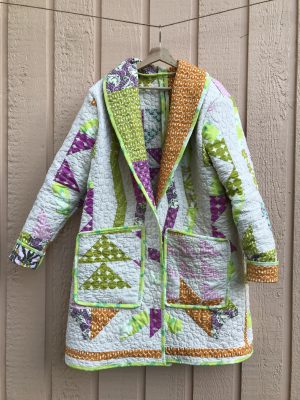
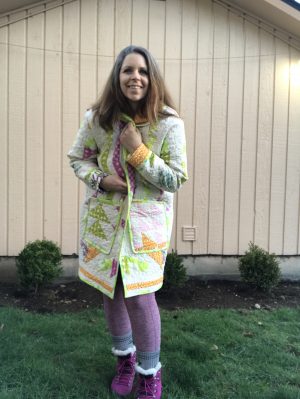
Every once in a while I make something that I am super proud of…. This jacket is one of those items!
It started out a gray hoodie that was 2x too big and had Lard Butt XXXL written across the front. Let me explain…. There is a fun run here in Seattle called ‘Lard Butt’ because it’s only a mile and they serve donuts and beer. Sounds fun right? Well it was and I got caught up in all that fun and decided to buy a sweatshirt 3x too big to memorialise that fun!….. and then never wore it because … well…. Having a XXXL “Lard Butt” sweatshirt really isn’t that funny outside of that fun run.
So the sweatshirt went in my sewing room because I thought one day I would make Sweet Grace a dog sweater from it. However, after I came across my 100th bin of scraps while cleaning out my sewing room I decided I would sew some of the scraps to the hoodie and make a quilted jacket that are all the rage in the Quiltisphere these days.
I REALLY wish I would have taken pics as I went along but it’s one of those projects where I wasn’t sure what I was doing until I was doing it! I started by cutting the hoodie up the Center to open it up…. And then I removed the pocket(s) (there were now two of them since I cut it open), took off both sleeves, and finally the hood, so that I could lay everything flat.
I then started sewing cotton scraps together until I had pieces large enough to cover the different sweatshirt pieces. I then quilted the scraps down to the sweatshirt pieces and trimmed them down to size.
I used the new pieces to cut out the lining fabric which was some knit fabric I had for a few years… I think at one time I was going to make t-shirts, but decided that the fabric didn’t have enough stretch in it…. But it was perfect for this project. Finally, I added a zipper, sewed all the pieces back together and attached the lining!
I decided to leave the hood gray, as it reminds me that it was once something I was embarrassed to wear outside the house…. And now it’s not!
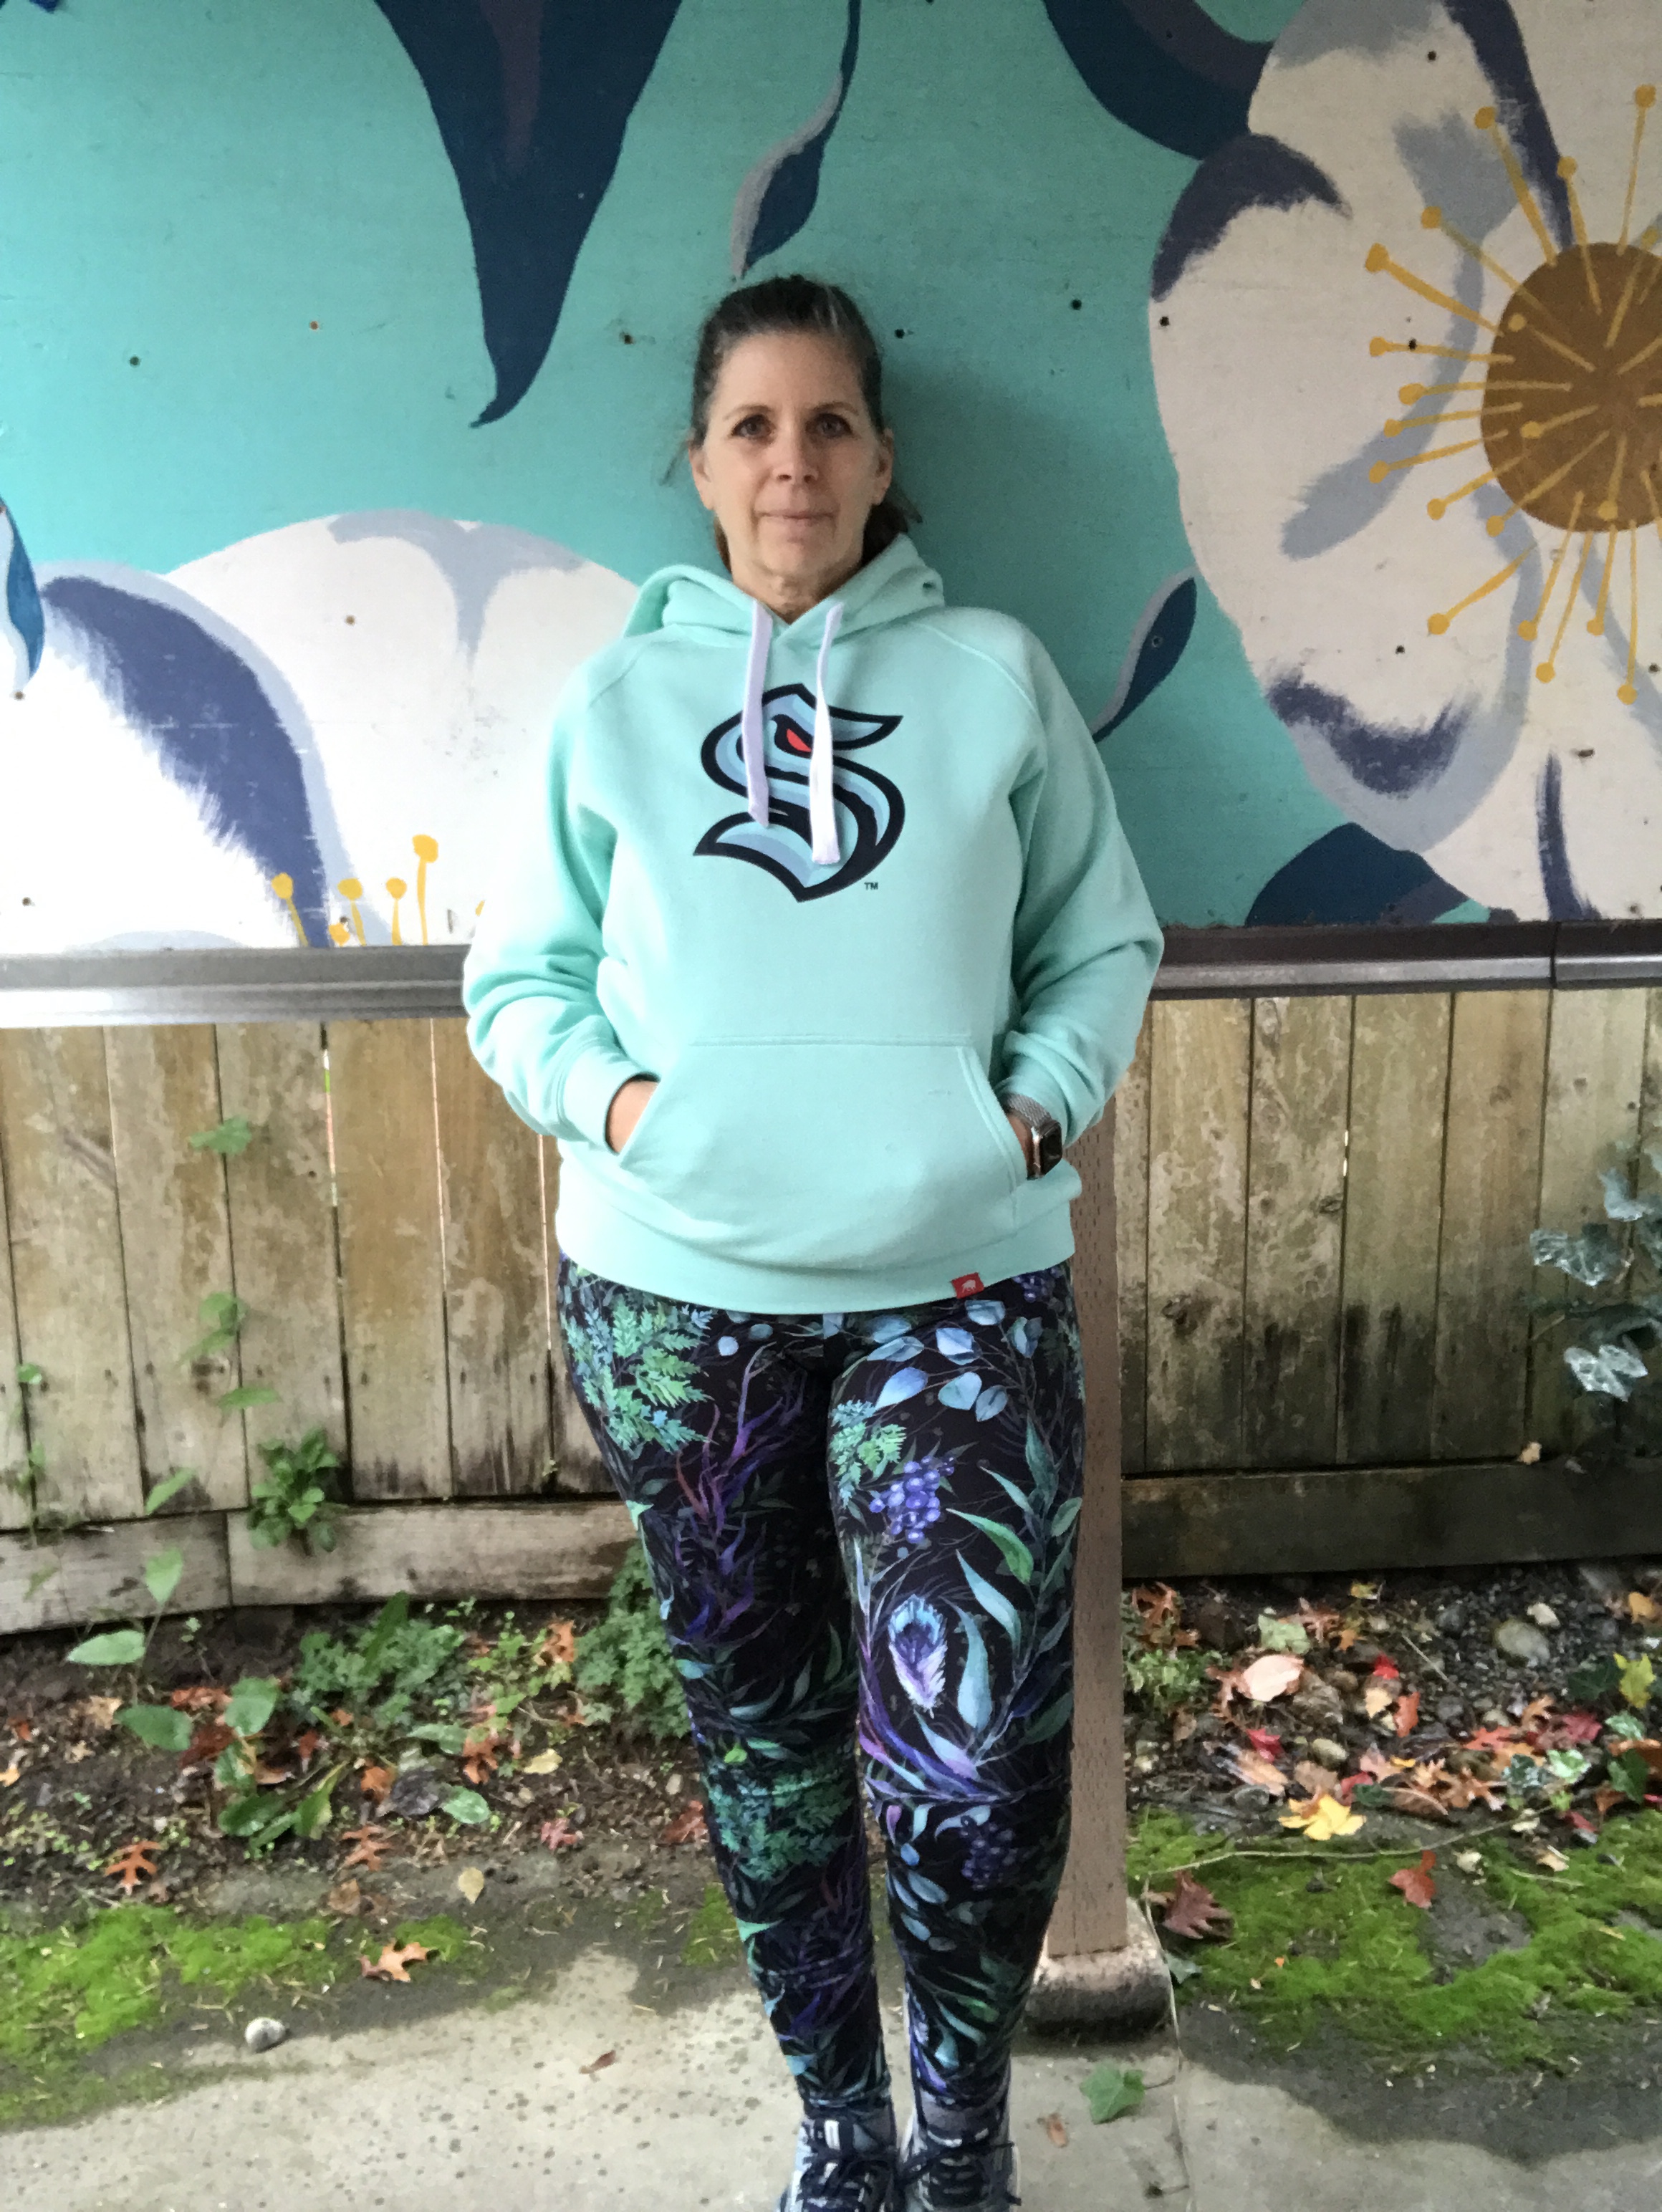
I love leggings, even before the pandemic I was living in leggings outside of work. I have lounge leggings, leggings that I wear outside the house (other than working out), and of course workout leggings.
I’m pretty proficient at making them, in fact the hardest part for me is finding the right fabric. I’m pretty picky when it comes to workout leggings, the fabric has to have wicking, without being suffocating… and have the right amount of ‘grab’.
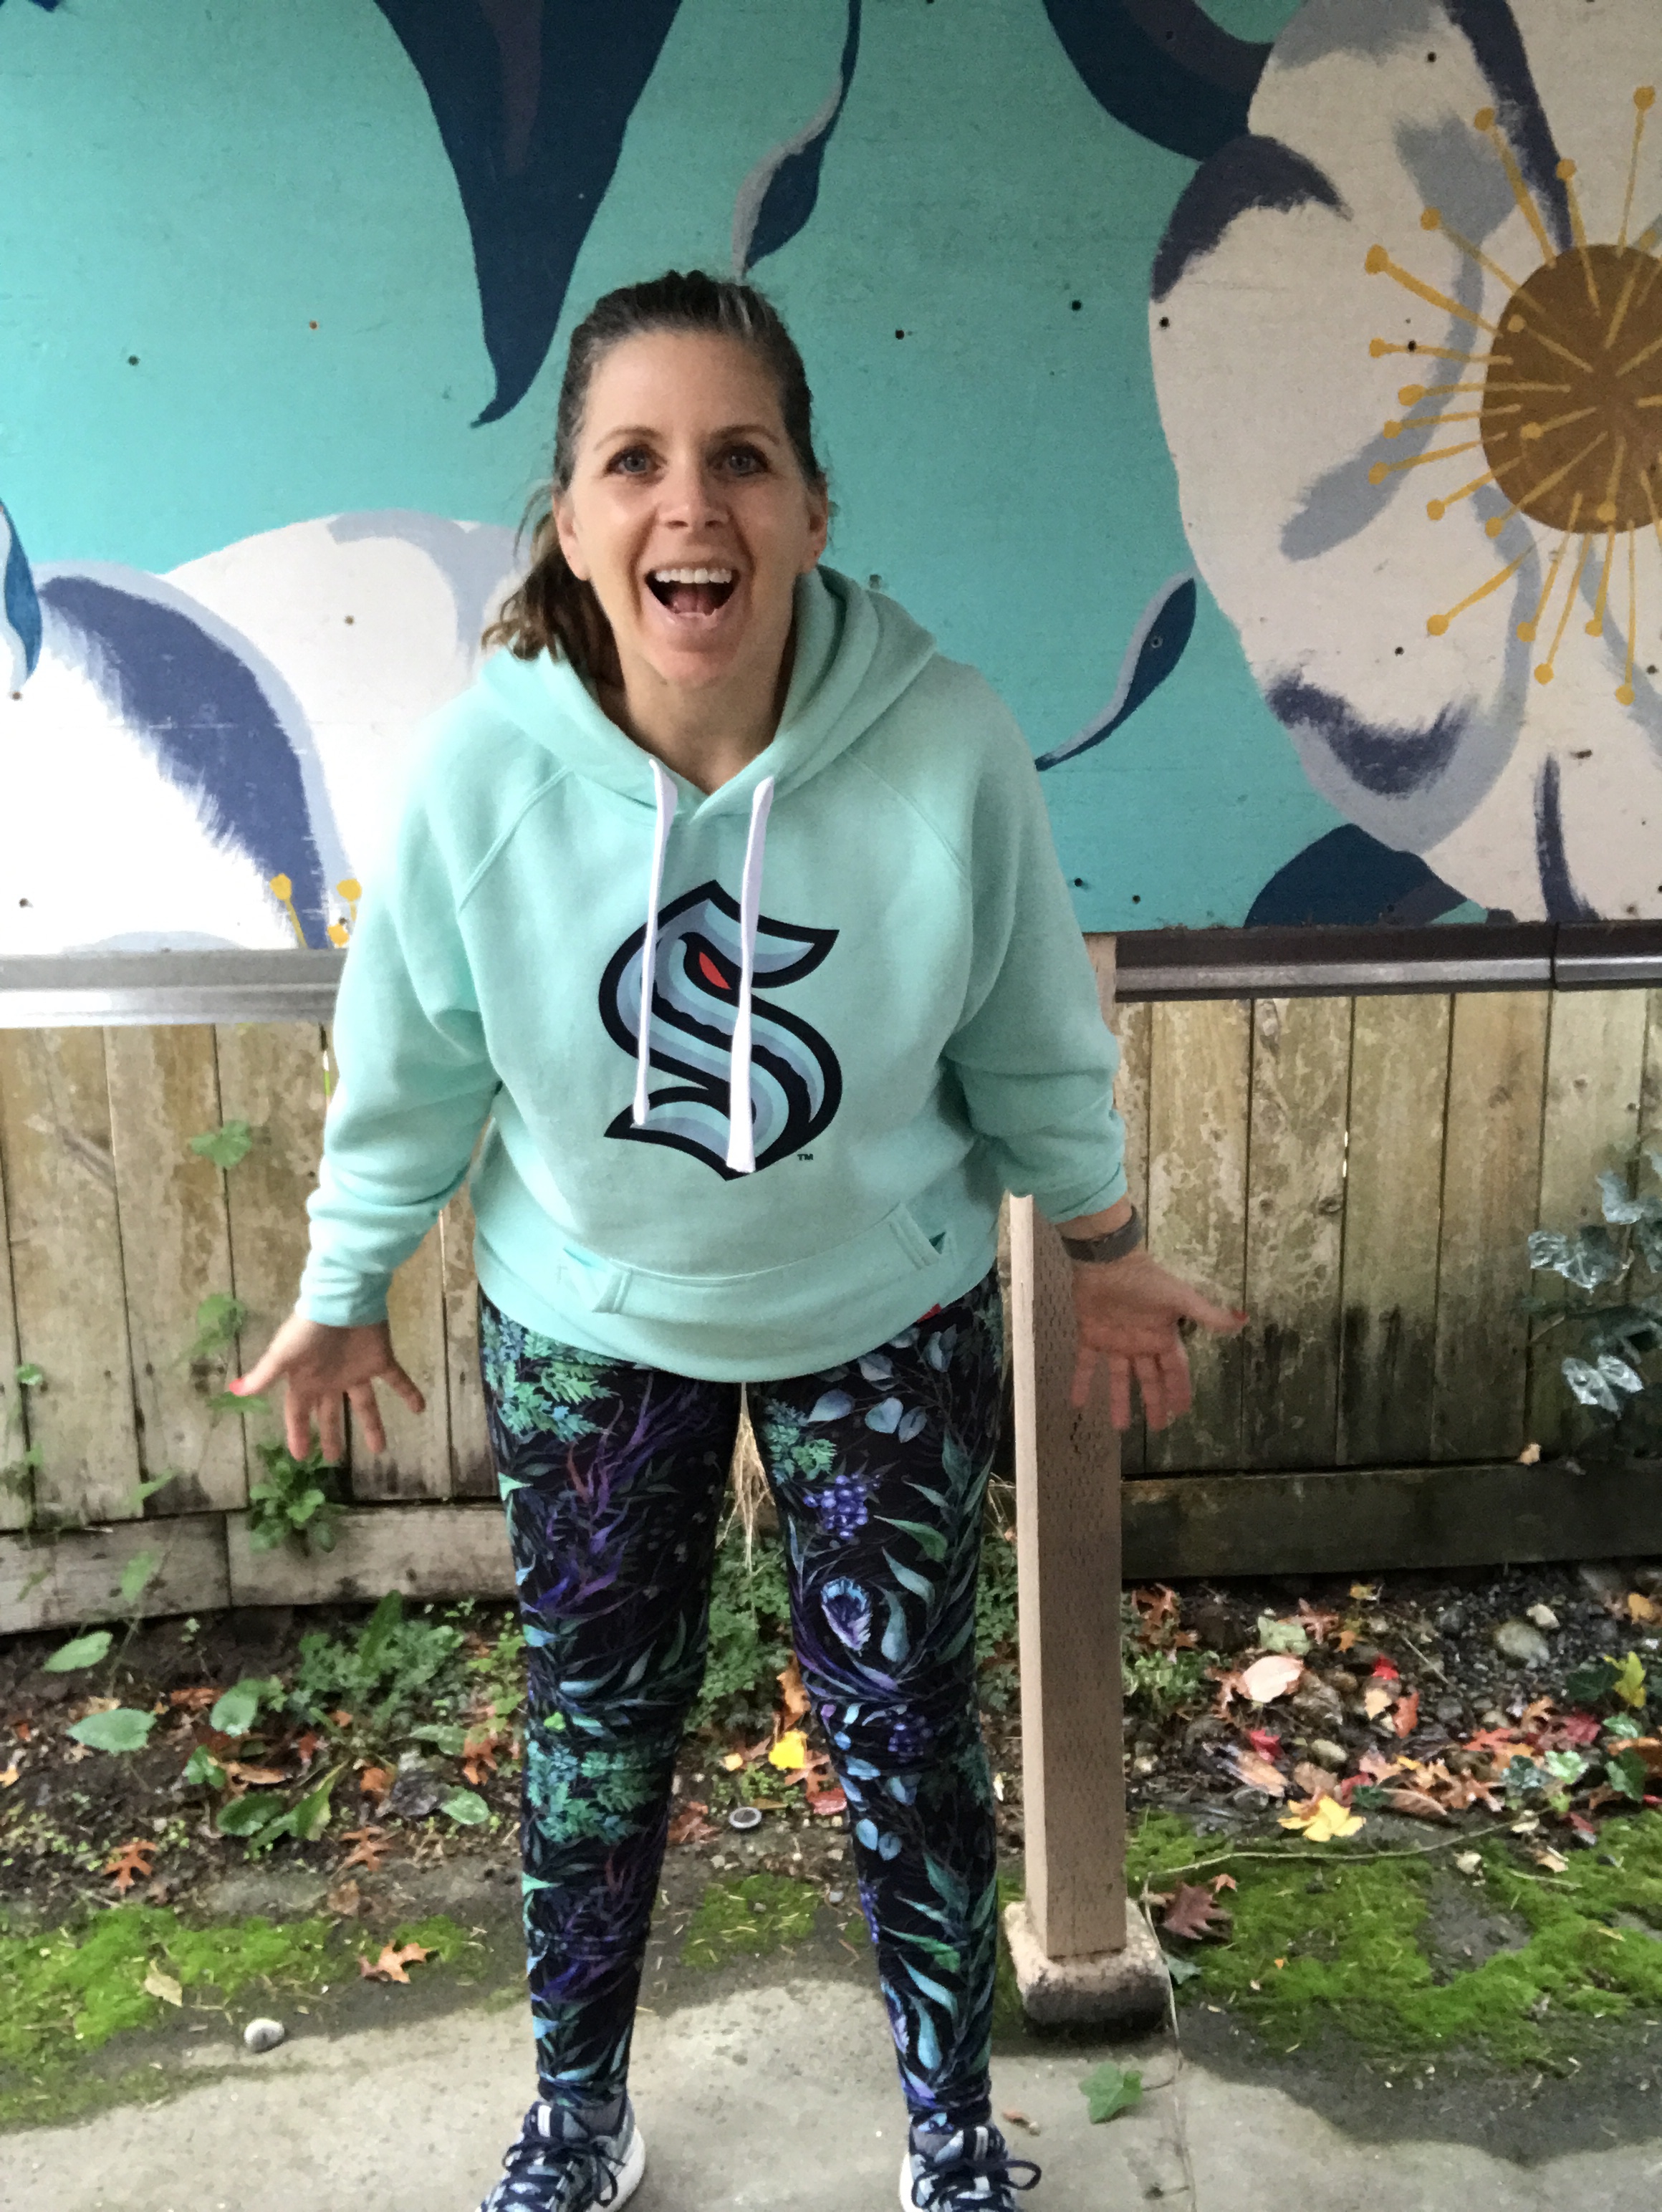
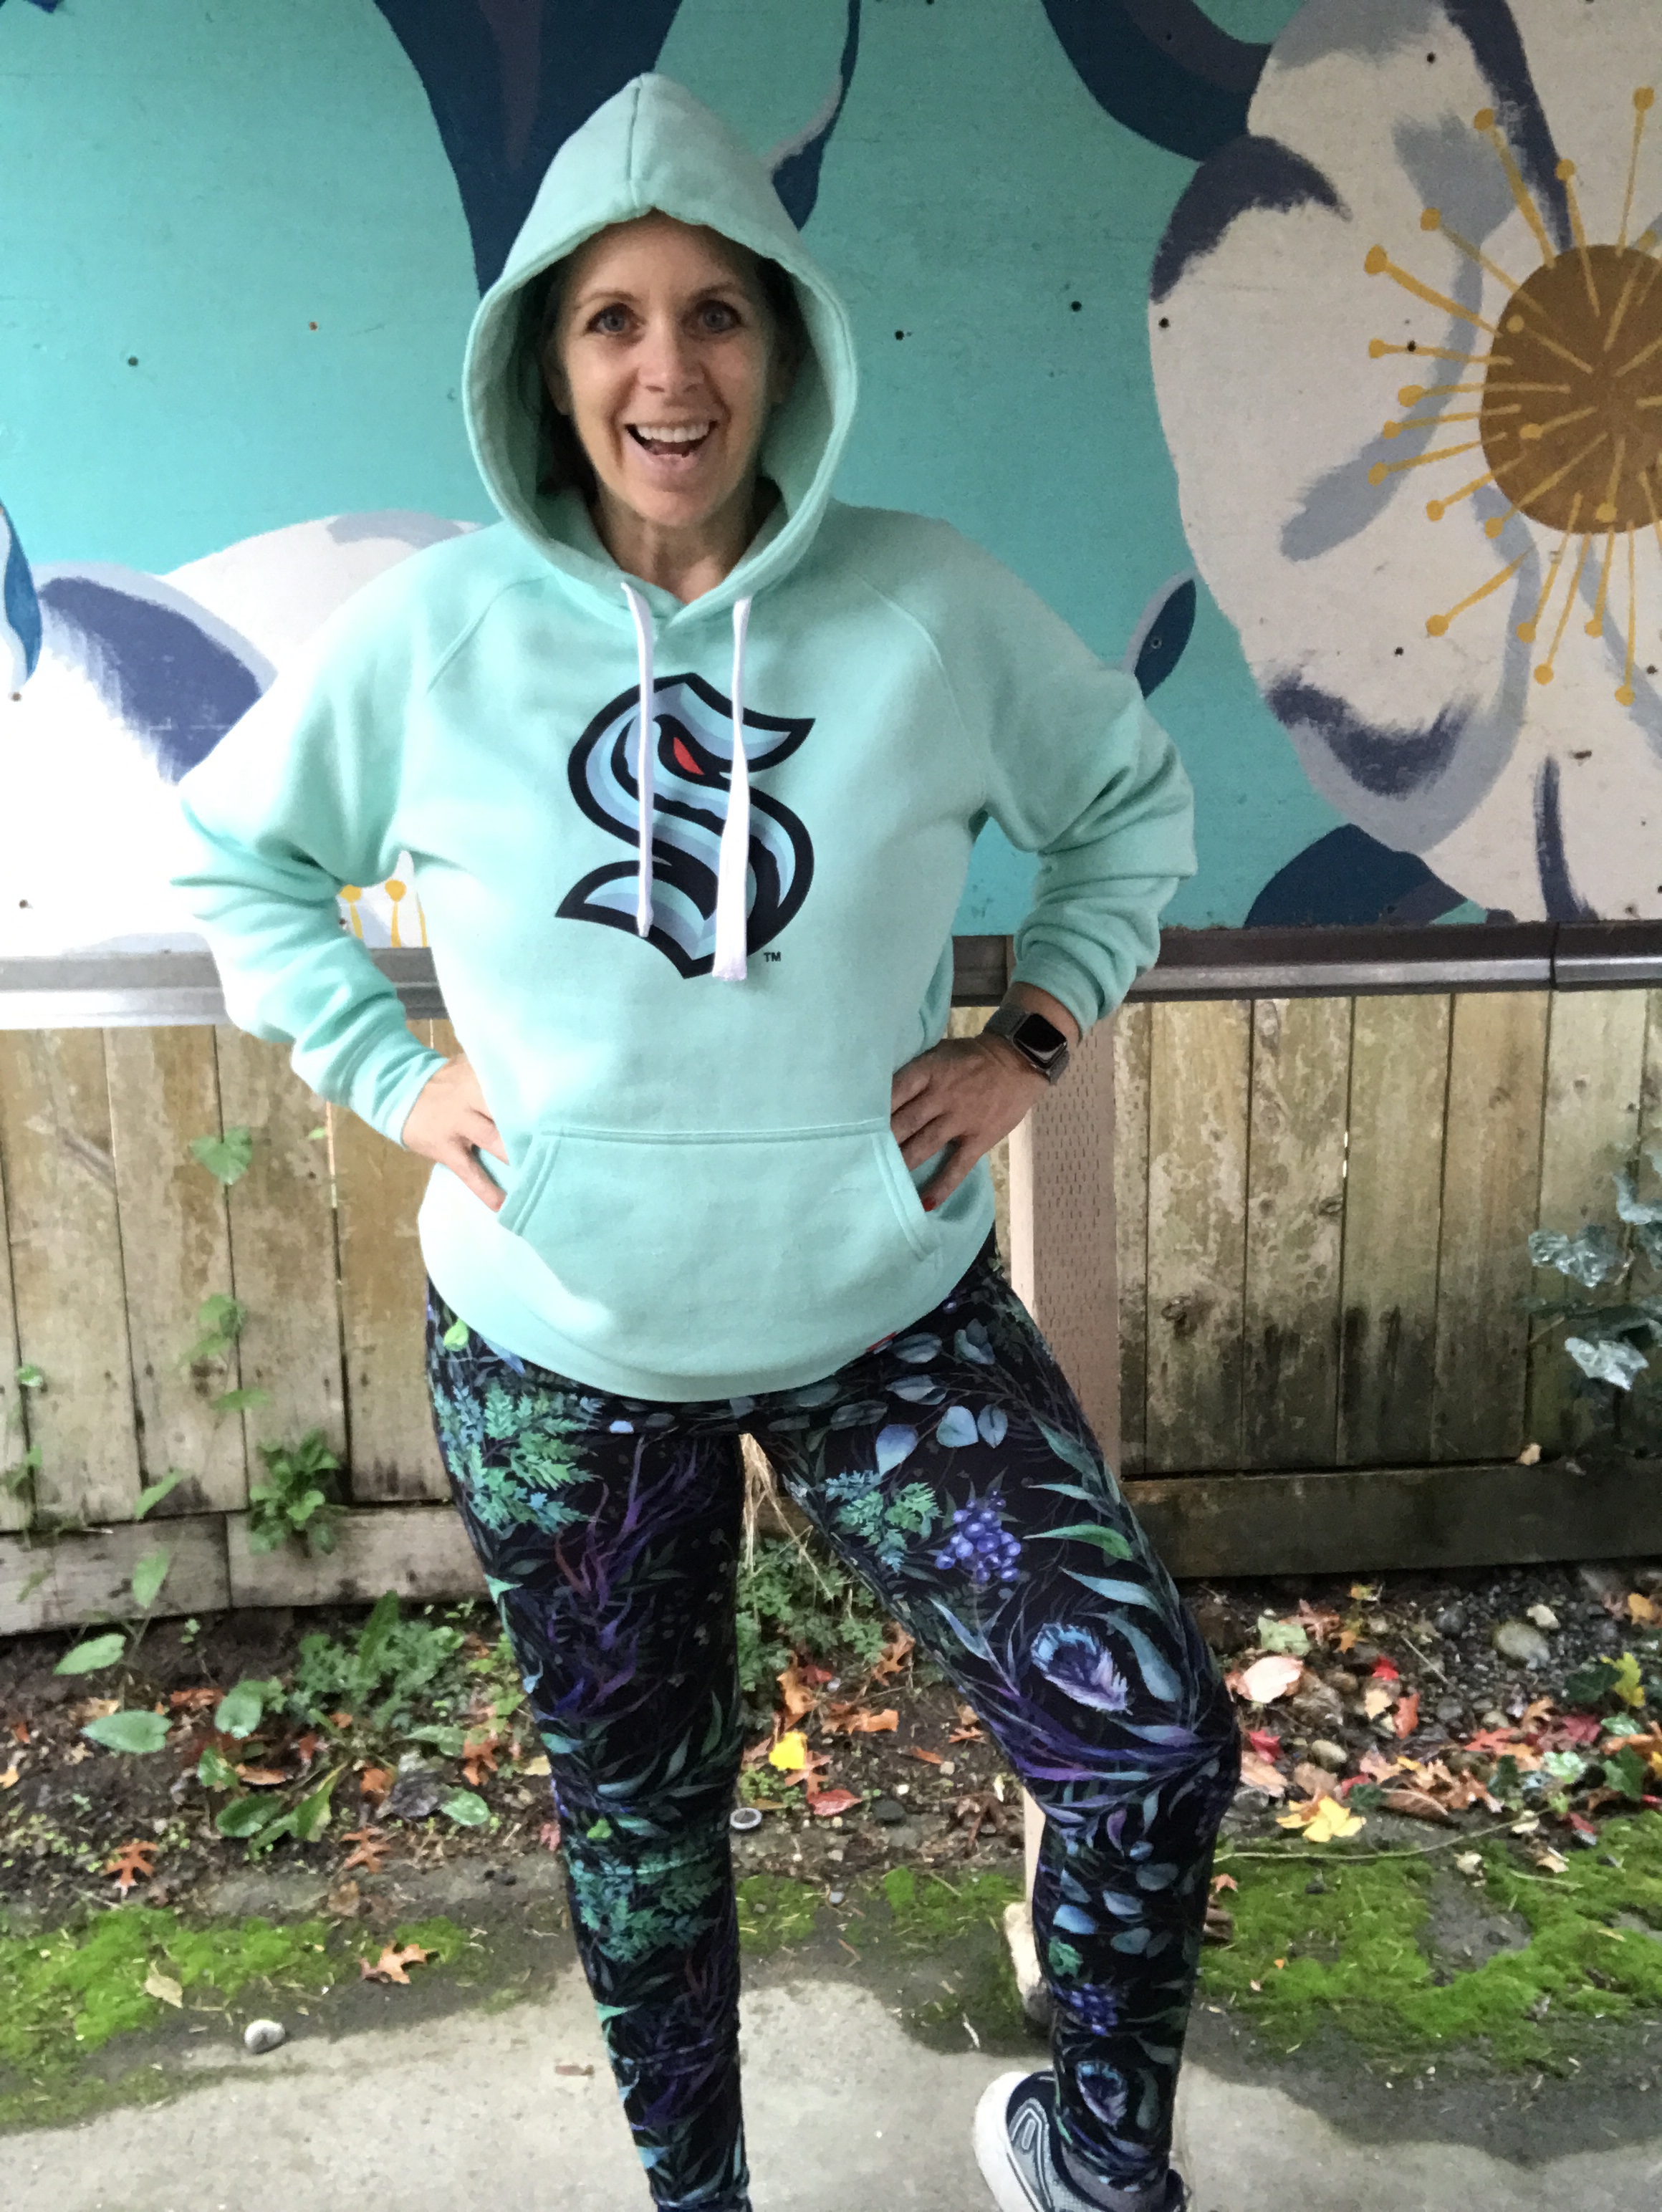
After I finished the first round of the Whole 30 Fabric Challenge one of my first purchase was this Arete fabric from GreenStyle Creations which is a new fabric that I was curious to try. The pattern is “Botanical Bliss” which is so pretty and feels so nice! The blend is Polyester/spandex, it has a nice hand to it and is ‘squat proof’… very important these days!
Left side
Back side
Right side
The best thing about this fabric is it matches my Seattle Kracken sweatshirt (Go Kracken!!) which was a happy surprise! And, can I toss out there that aqua is my favorite color and for that alone I love our new hockey team!
The pattern I used for these leggings is the Simpatico Leggings also from GreenStyle Creations. The pattern comes in three lengths which is nice as it saved me from having to add length like I typically have do. The other modification I usually make is a ‘full butt adjustment’ (otherwise they tend to ride low in the back)… but since this was the first time I made these leggings I wanted to see how they fit before I made the modification – and so I would know how much I needed to add. To my great surprise these leggings fit great in that area – no FBA needed.
I also like how the pattern allowed more room in the calf area which most leggings I’ve made don’t account for. I noticed by having that extra allowance in the calf I don’t have bagging between my calfs and ankles.
I have more fabric on the way so more to come – soon!
This past summer I participated in @Pinkmimosabyjacinta #whole30fabricchallenge – the premise being to use up 30 yards of fabric in your stash, and not to buy any more fabric until you do. I had so much garment fabric that I had been hauling around that it felt great to finally cut into it and make all those items I have been putting off for one reason or another. By the time I was done I had sewn up so much fabric that I could finally ‘see’ what I had left and confident in my decision on whether to keep it (because I knew I would use it), or let it go (admit that I would never use it).
I was happy to see that there is second #whole30fabricchallenge because this time my goal is to use up 30 yards of this:
This is about 80% of my quilting fabric. I made fabric bins to sort the fabric by color, but even doing that the bins are overflowing and I’ve had to put some fabric in bags and bins underneath the hutch. My sewing room is not as large as the one in my old house so I’ve struggled to ‘store’ it all AND I had to make space for my home office at the start of the pandemic which added to the storage issues.
At any rate, my goal this go around is to make a bunch of zippered pouches (at least 30) to use up all the bits and pieces of fabric I’ve accumulated. I’m realizing I have a real issue with throwing away ANY usable pieces… the smallest I’ve found in my bins so far is about 1″ x 1″… of course that was Tula Pink fabric so I can see why I saved it.
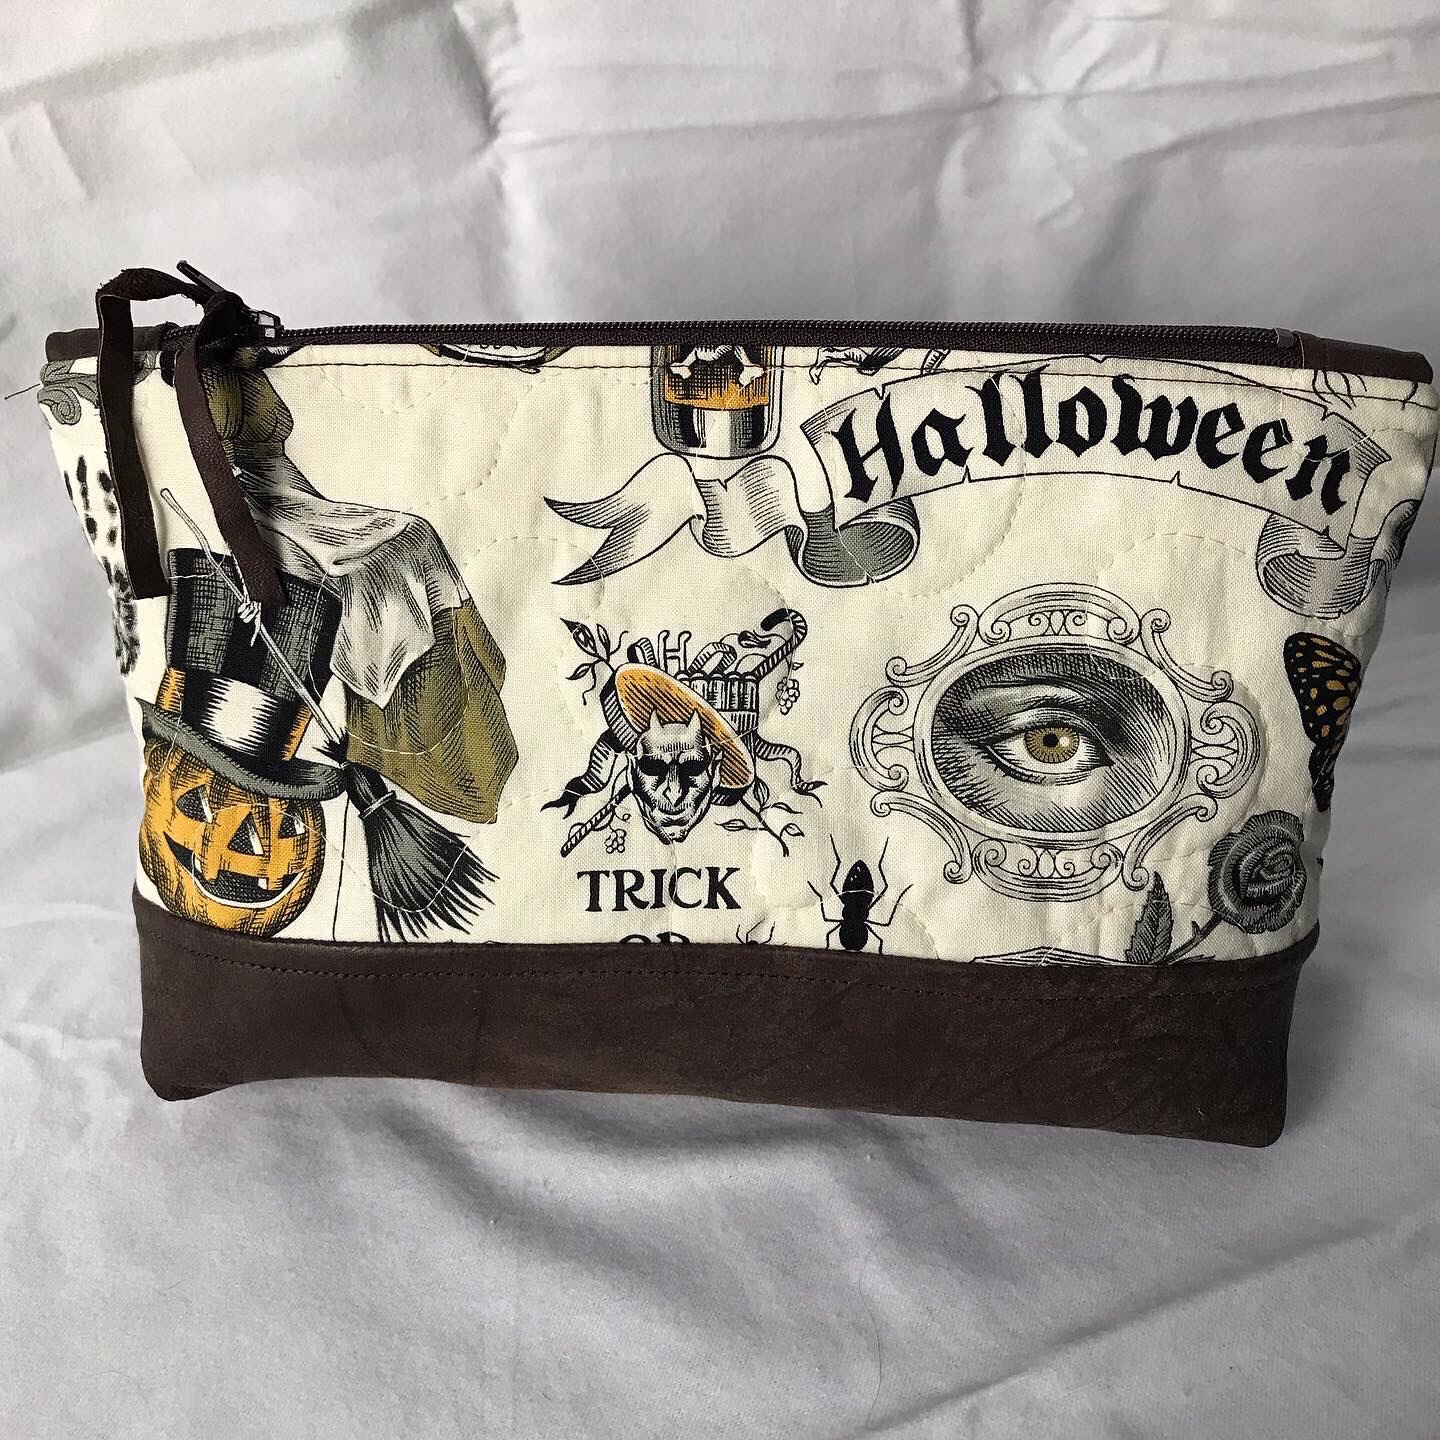
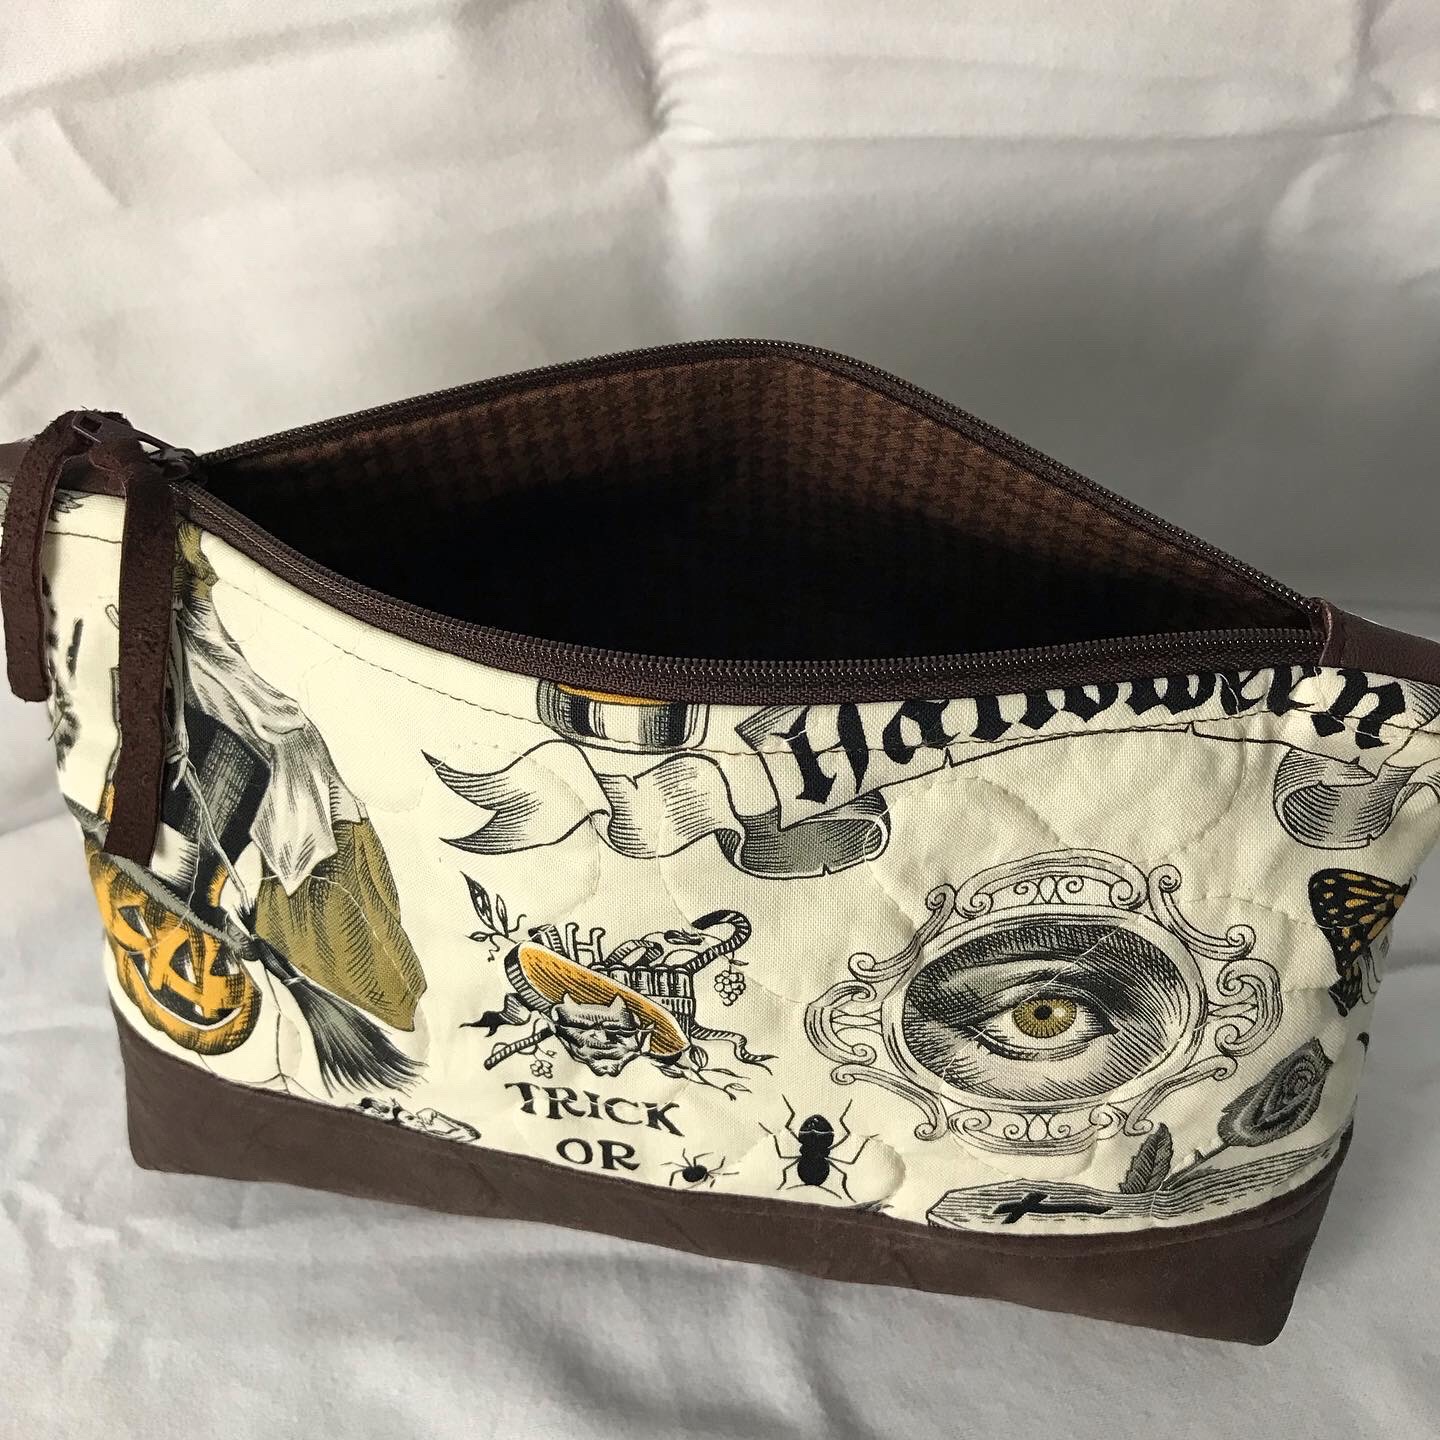
I started with a few smaller pouches as ‘warm up’, and then I dug out some leather hides I’ve been storing for a few years and paired it with some Halloween fabric from Alexander Henry. I am really liking the combination! What do you think??
I’m thinking there are so many design possibilities with all the fabrics, and bases I’ve accumulated throughout the years that I’m looking forward to seeing what I come up with. I have about 6 bags cut out on my cutting table, and am waiting on some labels that I will sew into the bags – because I’m trying to be legit here.
I’ll be listing these zippered pouches on my Etsy page as I complete them so if you are interested in any let me know.
Happy New Year! So glad we made it to 2021… things can only go up from here – right? I usually set a bunch of goals at the start of the New Year, I try to have a creative goal, a fitness goal, financial goal and spirituality goal. This year was no different… I set a bunch of goals – one of them to be to journal more. So I cracked open the journal that’s been sitting on my night stand for at least a year and see that one of my last three entries was from Jan 1, 2019…. where I wrote down the same goals for 2019 that I set for 2021!! I decided right there that I needed to find a way to meet those goals…. or let them go.
One of my sewing goals is to use up enough of my stash to make it more manageable. I’ve got fabric in two rooms … I would really like to get that down to one! So, to do that my goal is to sew smaller stash busting projects such as bags, totes, napkins etc. I”ll also make a few quilts… but I want to first finish up some of my UFOs before starting any of those. I’m also going to refrain from buying anymore quilting fabric … I will work through what I have ….or work on getting rid of it. (I mean it this time). So with that said watch my Etsy store for some bags, and bowl covers that I’m currently working on!
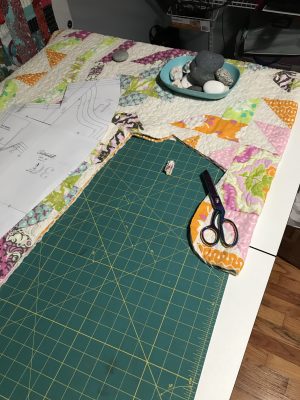
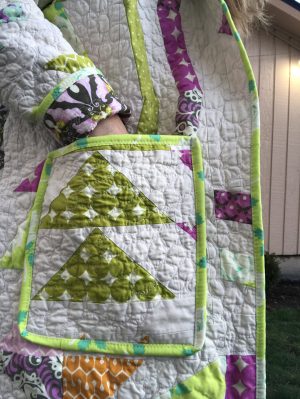
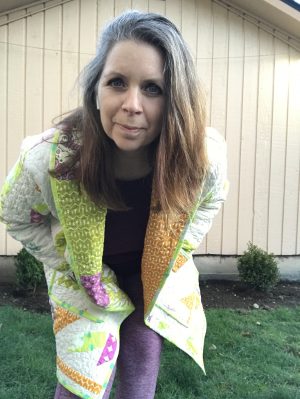
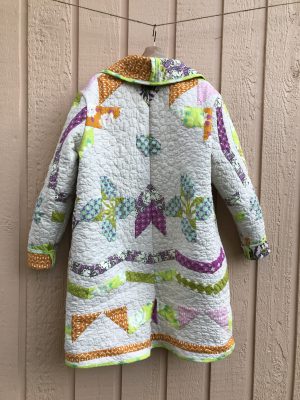
Speaking of my Etsy store – I made a quilt a few years ago as part of a Mystery quilt sew along with the Minneapolis Modern Quilters. Even though I liked it… it was not really my style nor my favorite so I listed it in my Etsy shop. I’ve been seeing all the quilt coats on Instagram lately and that inspired me remove the listing and do what I NEVER thought I would do: cut up one of my quilts.
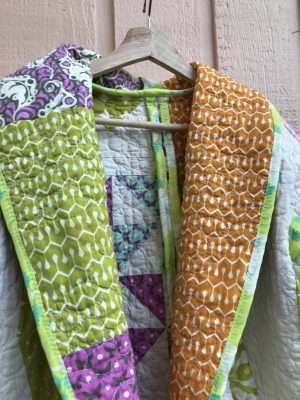
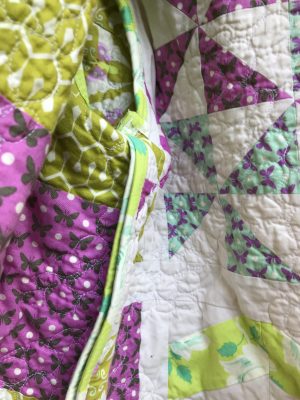
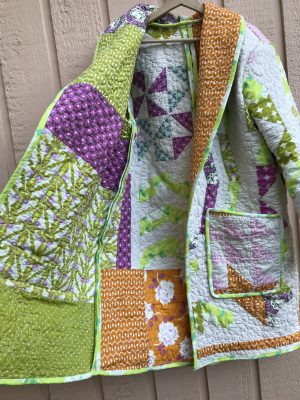
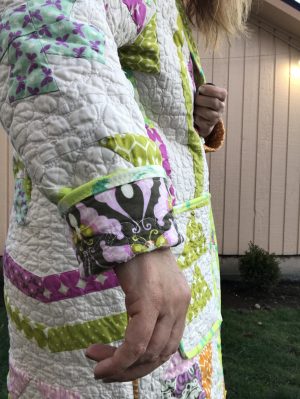
However, I’m SO glad I did… because I made a quilt coat that I absolutely love! The pattern is the Jill coat pattern from Seamwork. The coat isn’t lined which means that I had to deal with the raw edges. I chose to add binding to the seam – which I learned was called a “Hong Kong Seam”. I’m so glad I had a yard of fabric left in this line in my stash … I used pretty much all of it! (Yay for using up my stash).
I added big patchwork pockets because … well… I wanted big pockets. I could have planned the collar a bit better, there is a seam on the outside, but that’s because the pattern calls for a facing – which I ended up not using because it would have been way too bulky! By the time I realized it I decided it was too much effort to rip it all apart – and nobody would notice anyway.
I was going to make a cuff for the sleeves, but after attaching them I realized that they were long enough that I could just fold them up and call it good. Overall, I absolutely love this coat – it’s the perfect house coat for 2021!
So I did this thing, I wasn’t planning on doing it, but once I started I found myself on a roll and unable to stop.
What did I do? Welllll, it started with ripping the carpet out of my bedroom. It was this icky lavender color that I had to clean every 6 months because the dogs were constantly tracking in stuff on their paws. It was gross and it had to go, so I tore it up! And I felt much better.
My intention after I got all the carpet out was to maybe throw some rugs down until I figure out what kind of permanent flooring I wanted…. and then I though, maybe I should paint the floor because it was bare wood and already I was getting little slivers in my hands and feet from crawling around on it while tearing up the carpet. But then I thought – if I’m going to paint it I should do something fun … like that time I painted a mandala on my deck.
My deck Mandala
Down to the subfloor
A blank canvas (with primer)
But then I thought – why don’t I try painting a mural – I’ve always wanted to do a big mural on my walls, but have been too chicken to do it. On the floor though I thought ‘what’s the worse thing that could happen?? I don’t like it and I cover it up with rugs (my original idea) until I decide on longterm flooring?” and just like that I decided to paint a mural on my floor!
I started by finding an inspiration image on Pinterest, then picked out my colors, and painting supplies from Home Depot. When I got home I prepped the floor with two coats of primer. Once that dried I marked where the flowers should be and began with painting the background (aqua) first.
I then added white for the flowers, and one at a time, I added the different layers (detail) of the flowers. I usually had to wait a few hours for the paint to dry between adding layers, so all told it took me about 3 days to paint the floor and another 2 days to apply the 3 coats of polyurethane.
Paint caps
outline of flowers
Aqua and white
first layer
leaves
flower details
centers and more details
final touches
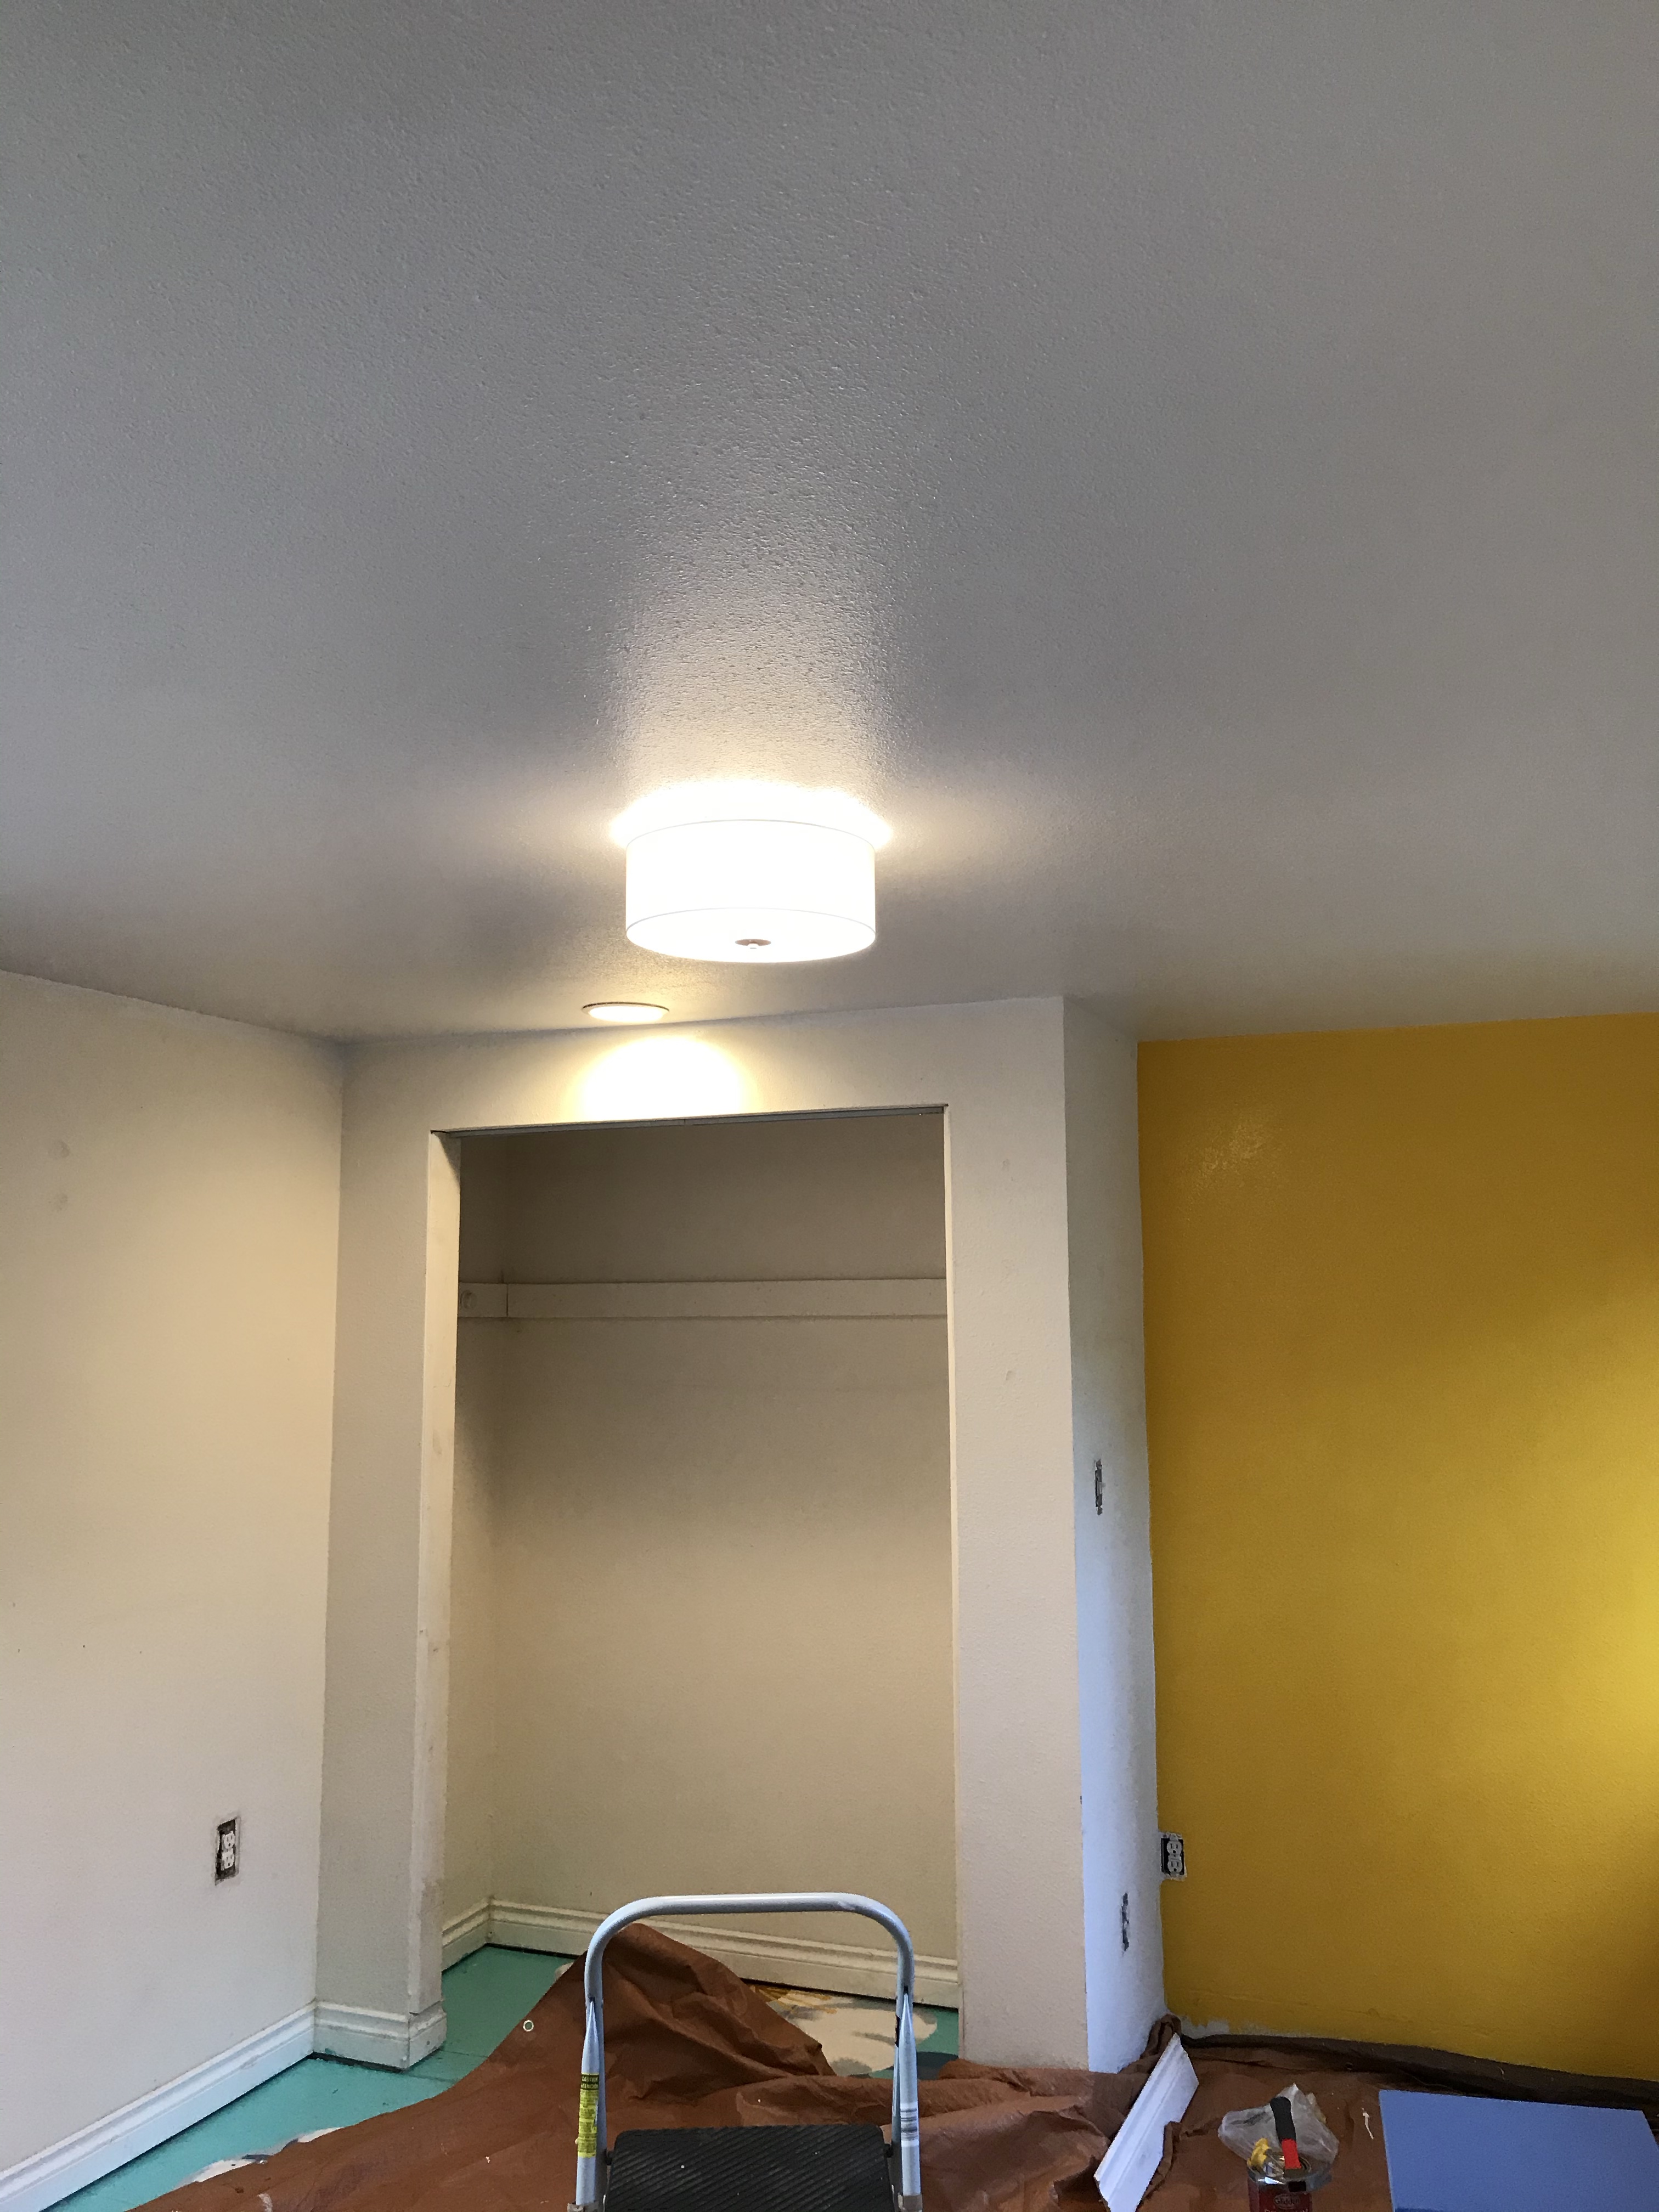
But I couldn’t stop there…. now that I had this beautiful floor I wanted the rest of my room to be just as beautiful. So I took EVERYTHING out, got more paint and started painting the walls, baseboard, and trim. I used the same color palette that I used in the mural … creating an accent wall with the crazy mustard color used in the center of the flowers. I’m glad I took that plunge… I really love it. My closet wasn’t very efficient, so I tore out the bar and shelf, and installed a new closet system with 3 bars and a shelving system. I was going to paint the closet doors, but decided to install mirrored doors instead to save wall space from a hanging mirror.
Mustad accent wall
new lighting
mirrored closet doors
The walls turned out a little darker than I had hoped so I decided to make white curtains to ‘brighten’ the room up a little bit. I lined them with blackout fabric because in the summer the afternoon sun beats through the window and heats the room up like nobody’s business.
Finally, I switched out the ceiling light, painted my side tables, and signed my artwork.
Kostas Kitty
artist signature in the corner
Complete
I’m really happy with my bedroom makeover! I’m glad I took the risk and painted a mural on the floor – its definitely the prettiest DIY home improvement project I’ve ever done.
I haven’t been sewing too many outfits lately… besides working on my photo greeting cards, I’ve also been working on a UFO that has sat around for way too long. I’ll reveal it soon – but for now I am keeping it under wraps for reasons I’ll reveal later.
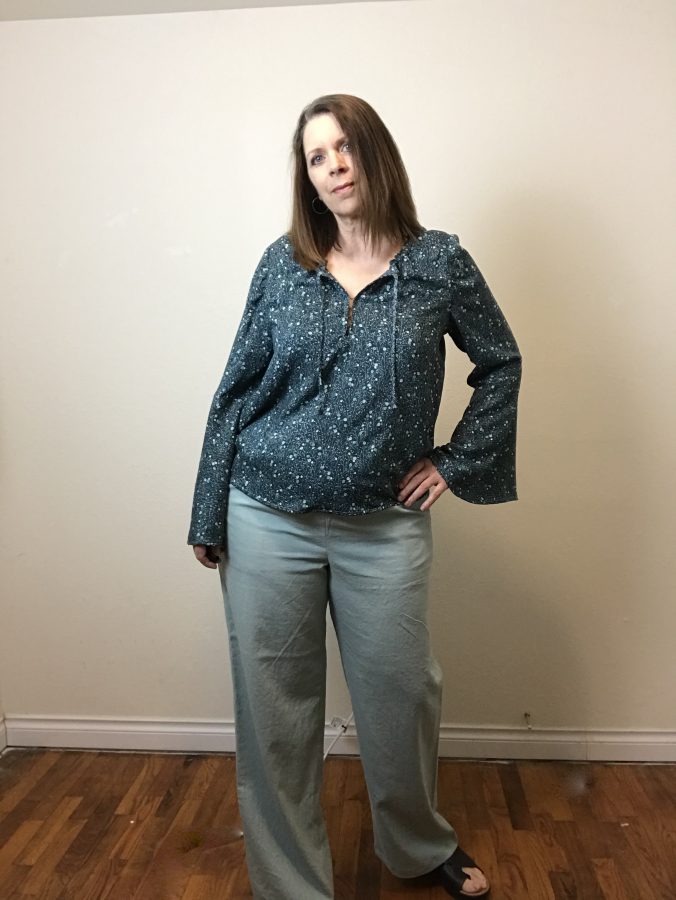
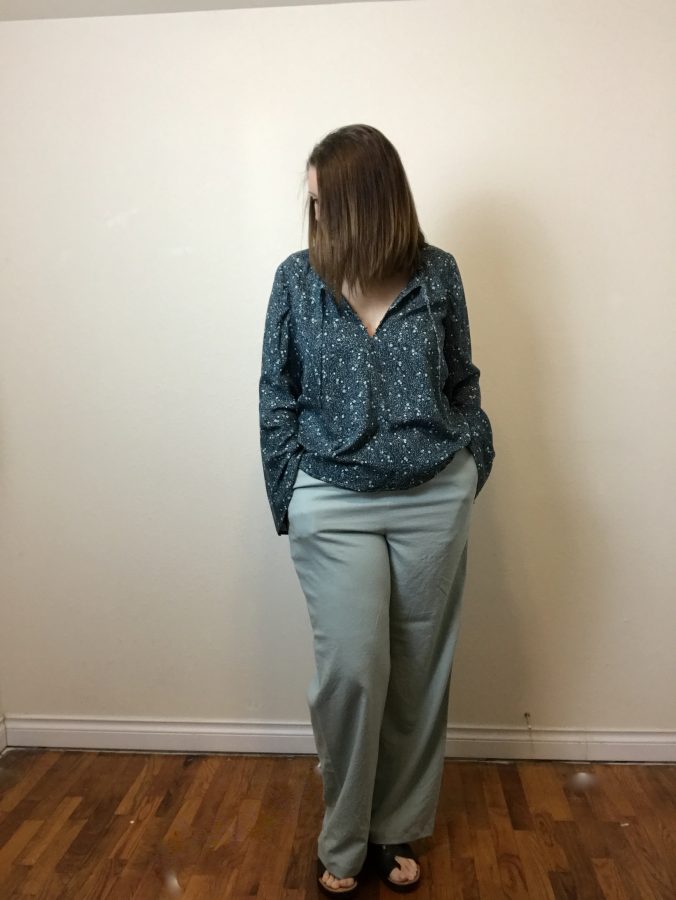
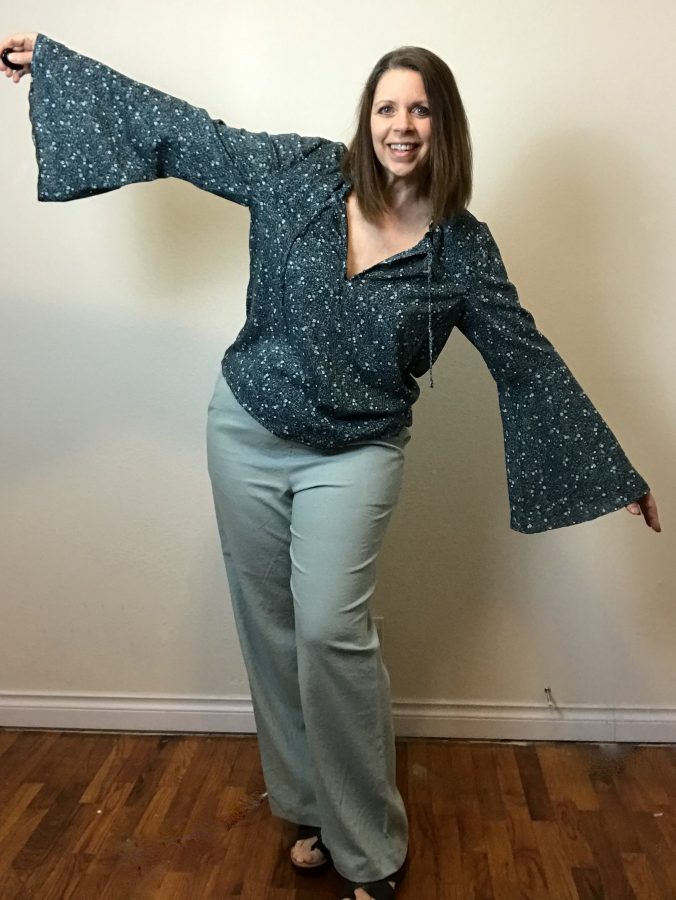
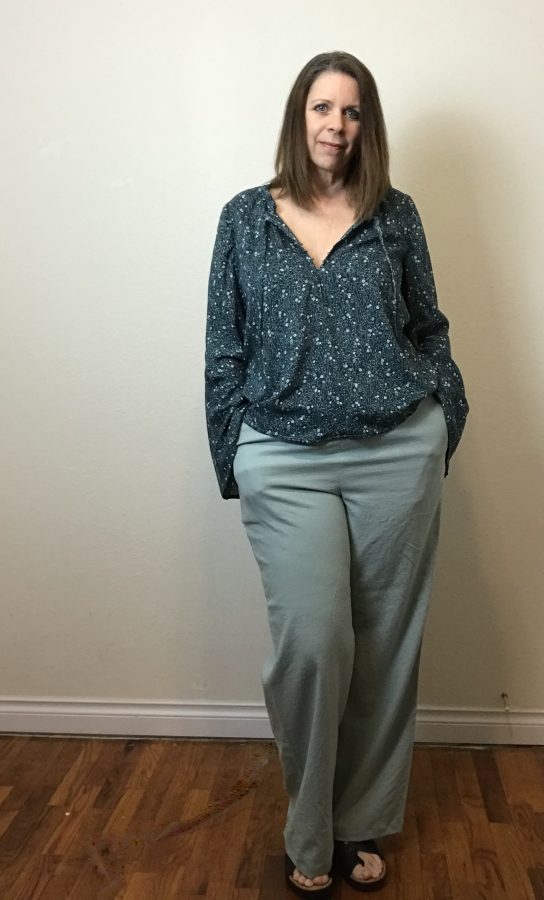
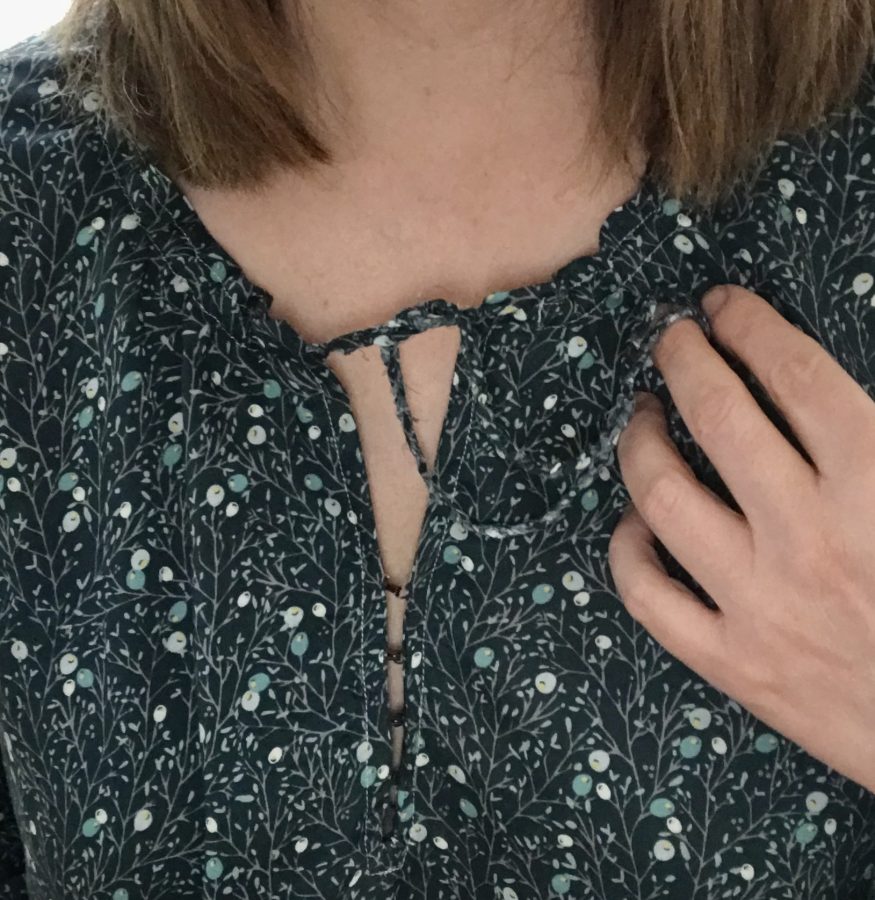
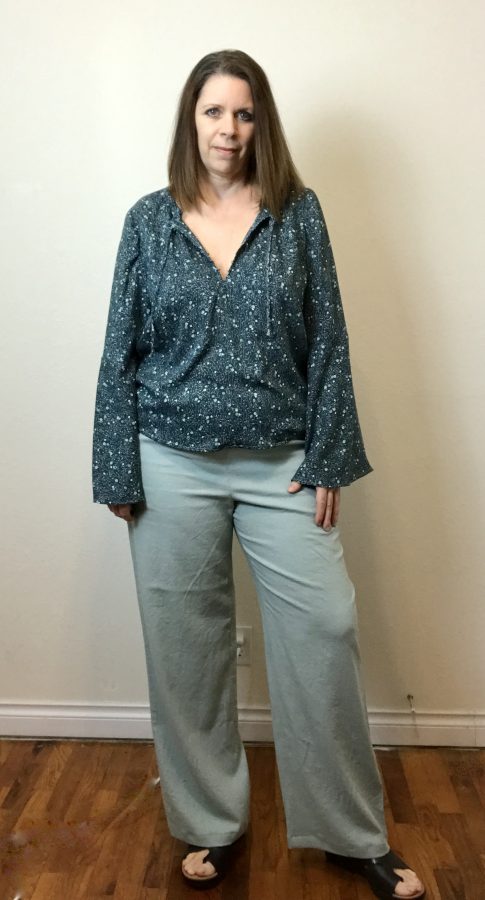
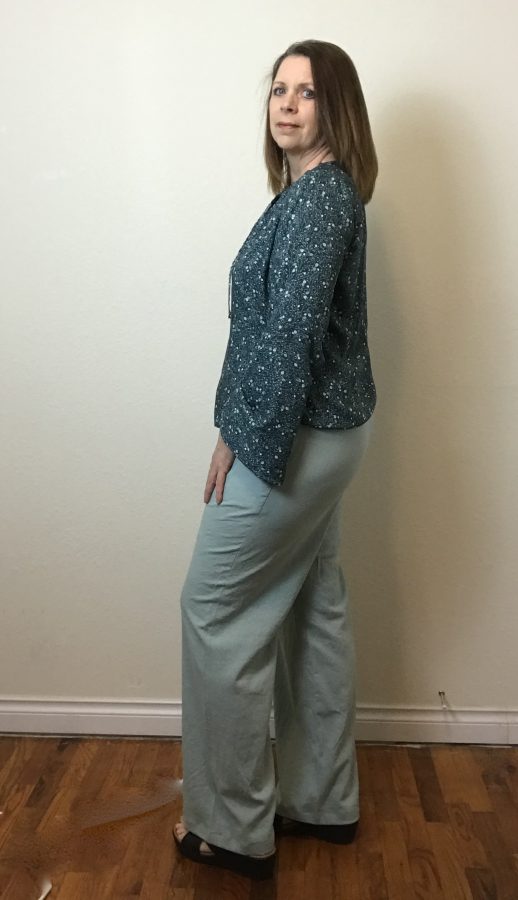
Anywhoo – I wanted to share an outfit I made back in March/April with fabric I picked up from the Sewing Expo. This is the Emmie top, with bonus sleeve modification, from Seamwork Patterns. I love this top so much! I ‘believe’ the fabric is a voile from Art Gallery Fabrics and was purchased at the Pacific Fabric booth (if I remember correctly). It’s my color and has these tiny little olives on it – it practically called my name as I passed by!
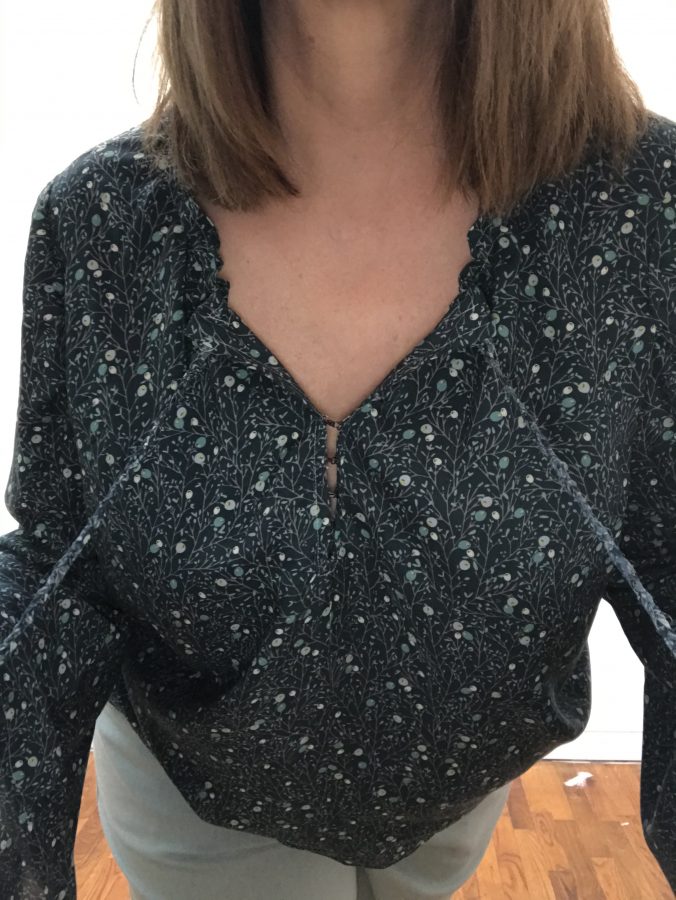
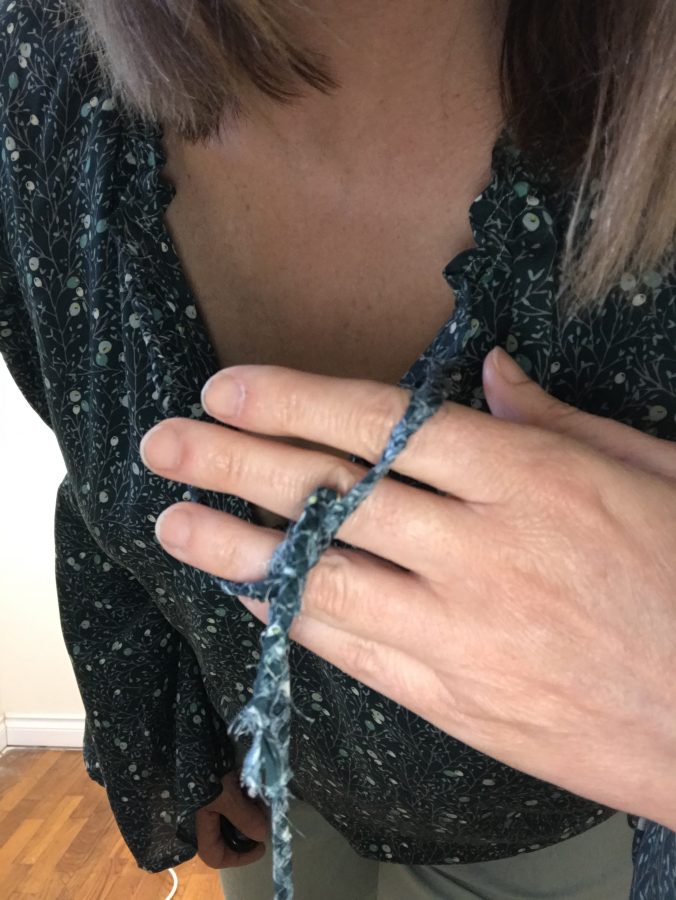
I love the little details – such as the hook and eye; and since I didn’t have access to cording I made my own by braiding strips of fabric.
This top reminds me of a prairie style top of the 70s with the bell sleeves and open neck – I’m really happy with the way it turned out!
The pants are from an old McCall pattern that I modified to add pockets. The fabric is a linen fabric also bought at the Pacific Fabrics booth – primarily because it matched the top fabric. Since this is the 3rd or 4th time I’ve used this pattern the pants went together fairly fast. The modifications include the pockets and elastic waist, front and seat adjustments.
Years ago I lived in Seattle for about a year or so… In fact, Seattle was where I joined the Air Force from. At the time I was working for TGI Fridays and just ‘surviving’ as the saying goes. I wanted to go to school, but couldn’t afford school and rent, so I decided to join the Air Force. I remember telling the recruiter that I wanted to leave as soon as possible because I didn’t want to think about it and worry that I had done the wrong thing. Committing myself for four years was such a huge commitment back then.
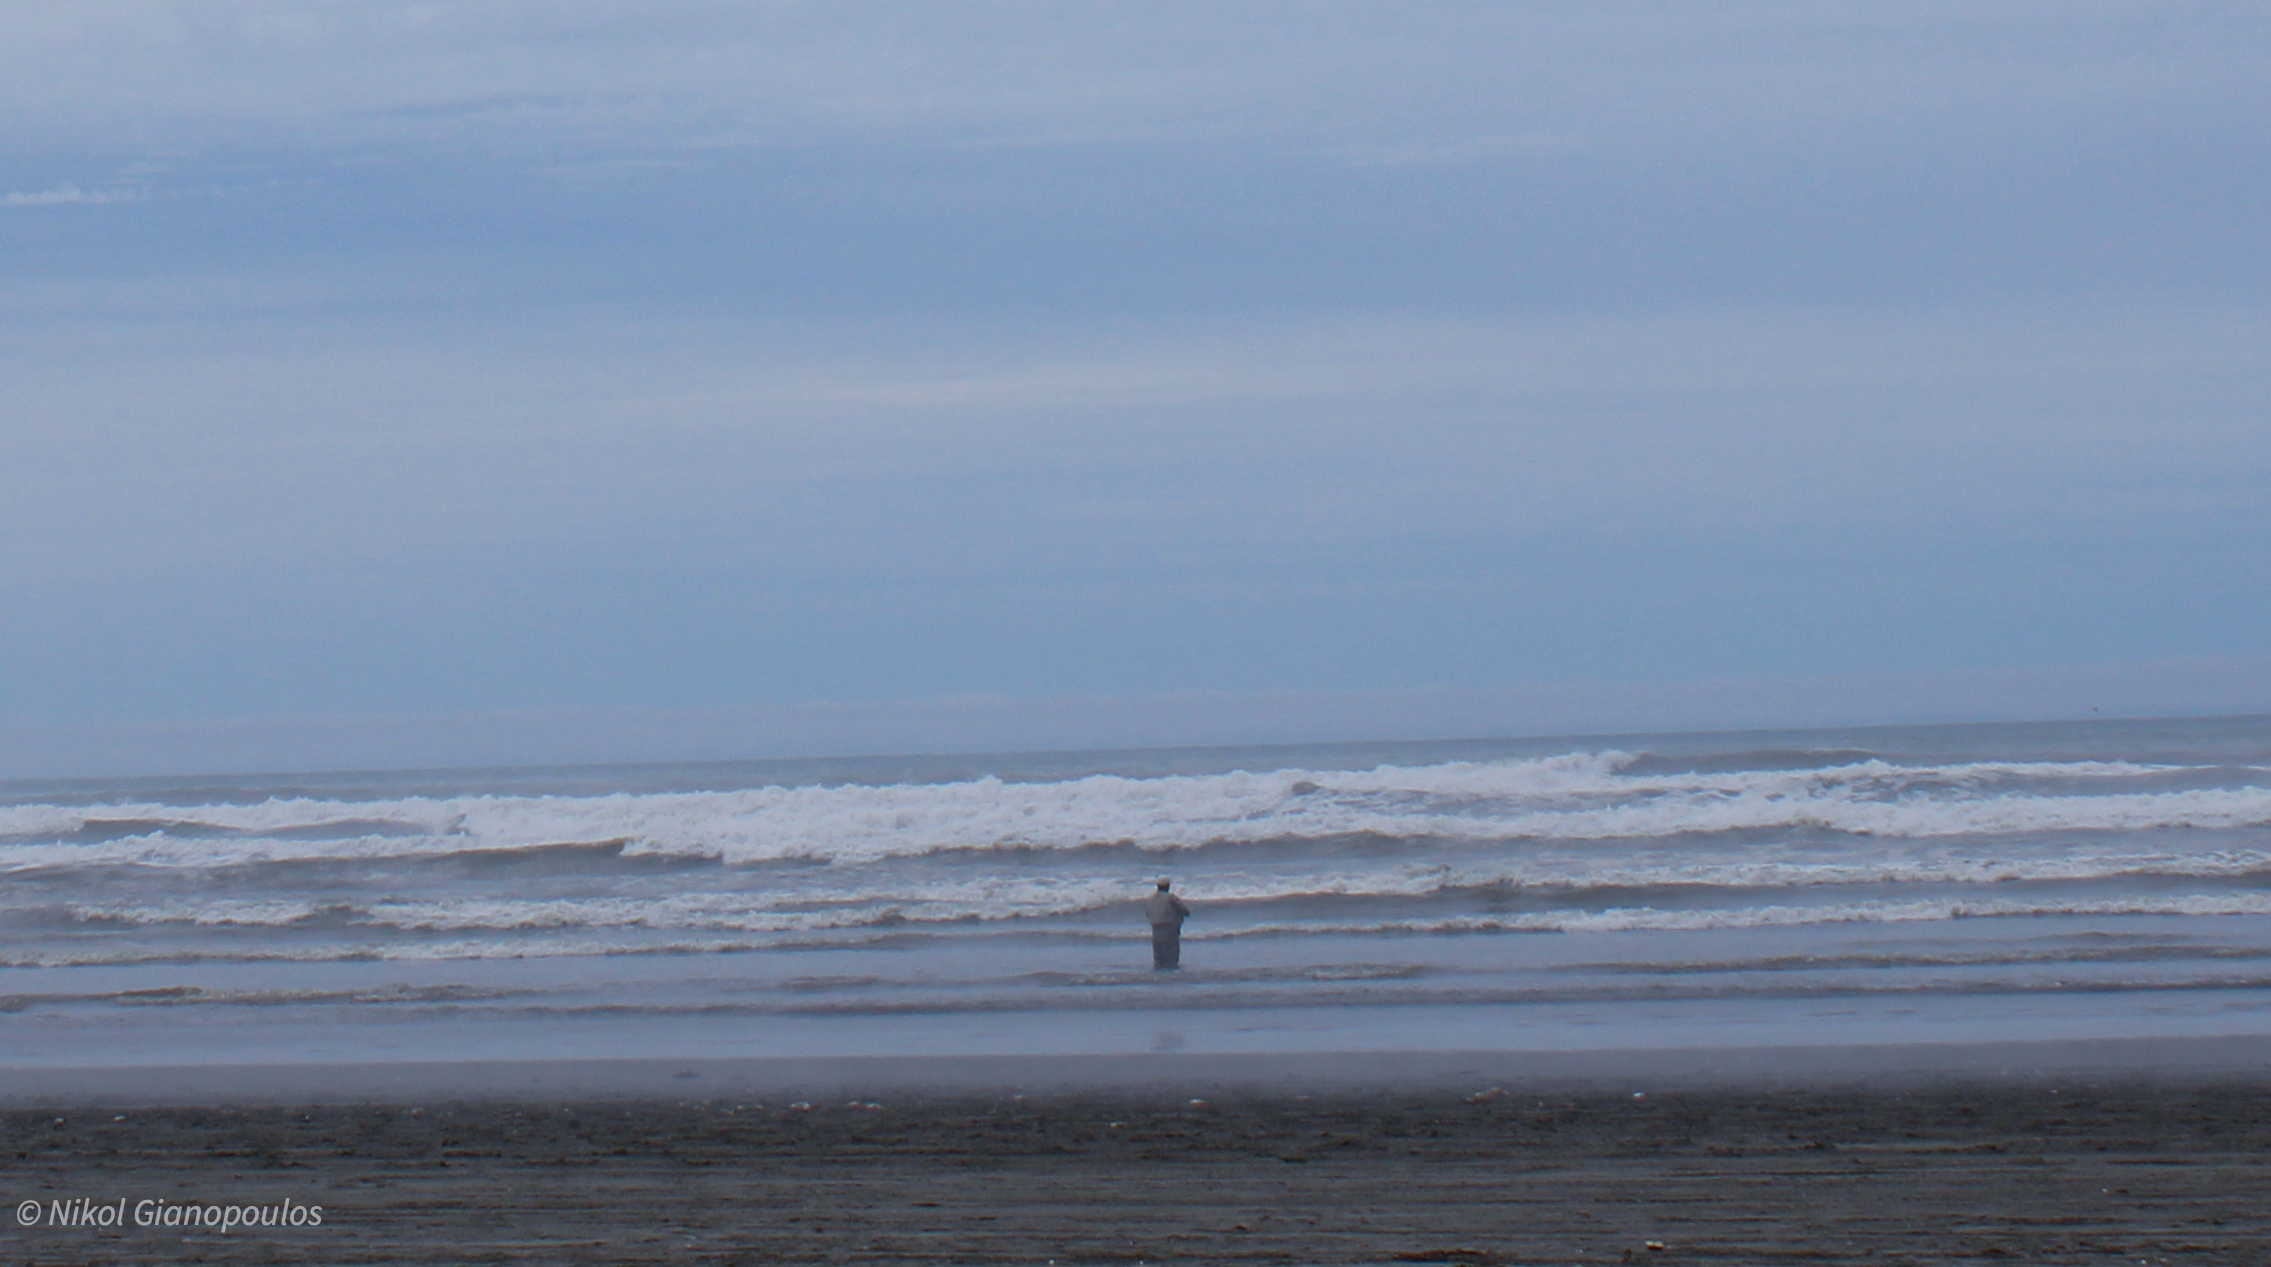
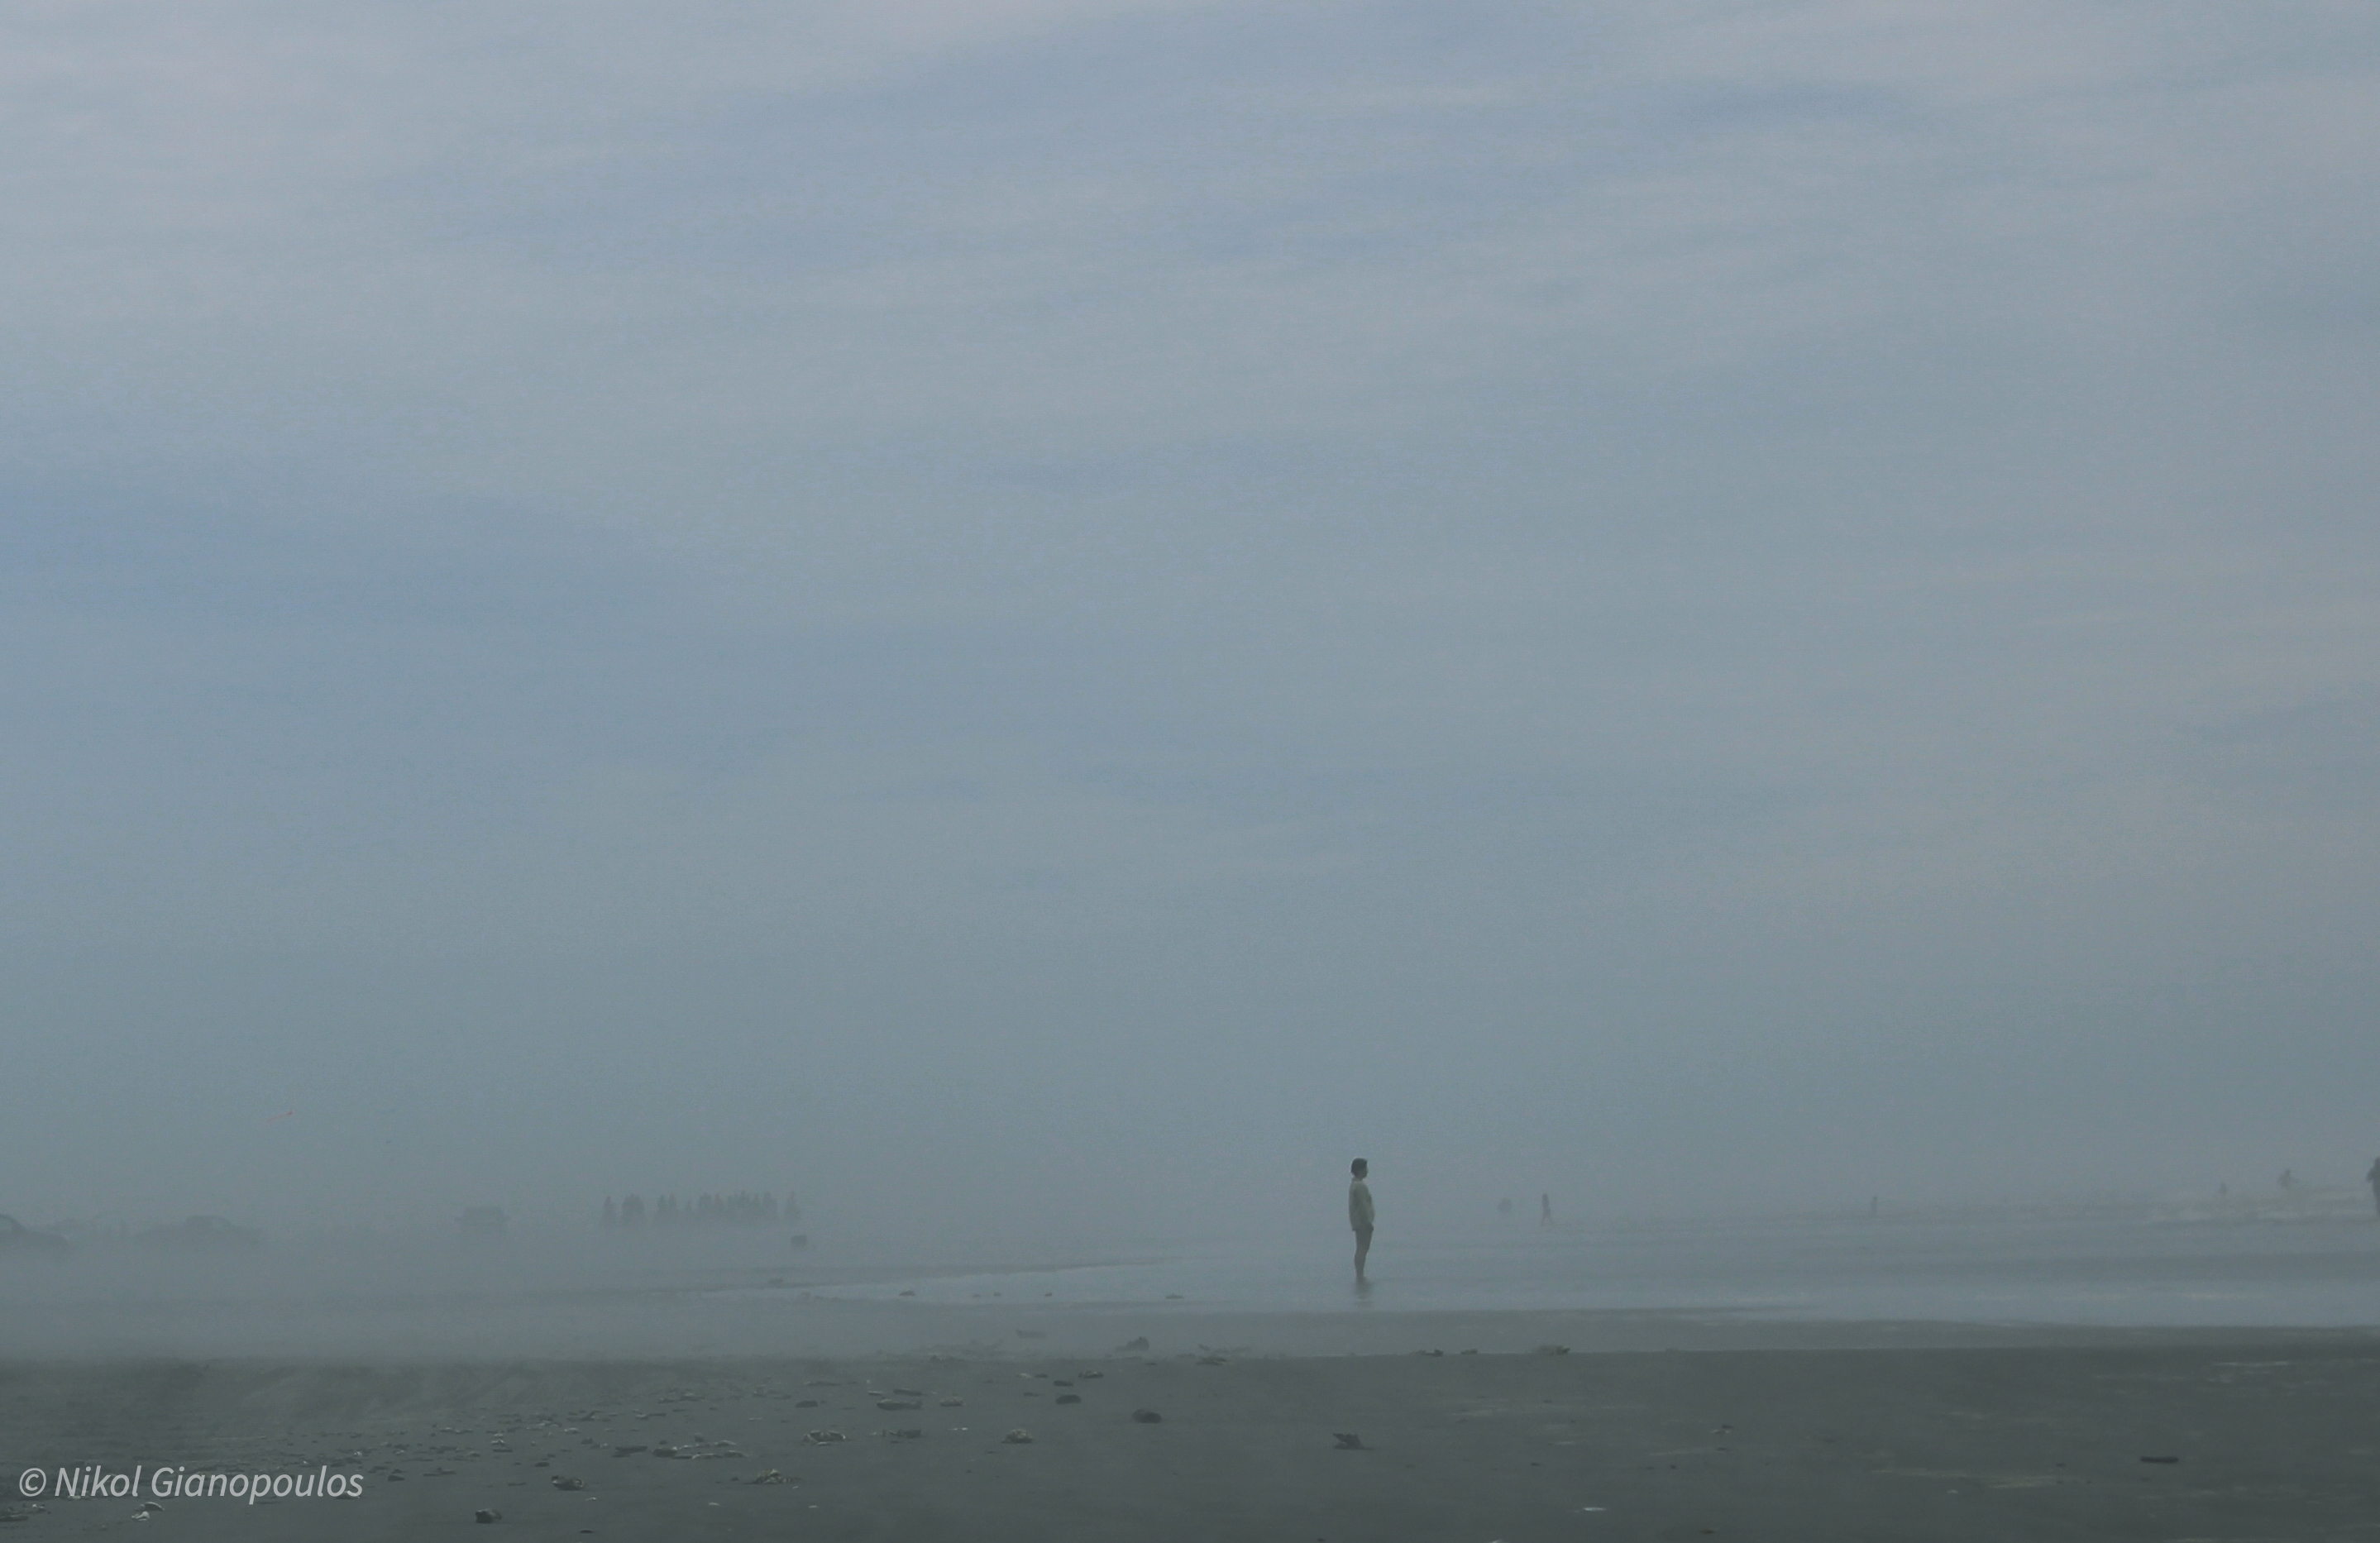
The weekend before I left I decided to take a drive around the Washington Peninsula. I left early enough, but got side-tracked with all the sights to see along the way and before I knew it I wasn’t even half way around when I realized it was 8p.m. I didn’t plan on making it a overnight trip – and there was no way I could afford to extend my drive to two days – back then I didn’t have the money, and I think I had to work the next day anyways. So, I high-tailed it back to Seattle as fast as I could, catching the very last ferry from Kingston into Edmonds.
During one of my stops I got out and walked the rocky beaches just as the sun was setting and thought about what it was I was about to embark on. I’m not going to lie, I was scared, but I knew that joining the Air Force was my ticket out of having to struggle all my life. On that rocky beach I prayed to God I was making the right decision… I even asked him/her to give me a sign that I was doing the right thing, and when I looked down the beach I saw a couple of twinkly things. I had no idea what it was – but I knew it was my sign and so I walked down the beach to see what was twinkling, and when I got there I realized it was a rock…. just like all the other rocks on the beach. It wasn’t even twinkling by the time I go to it – so I knew that God had given me a sign that I was doing the right thing and that I was going to be okay. I kept that rock for YEARS – and I always remembered that drive as being one of my favorite.
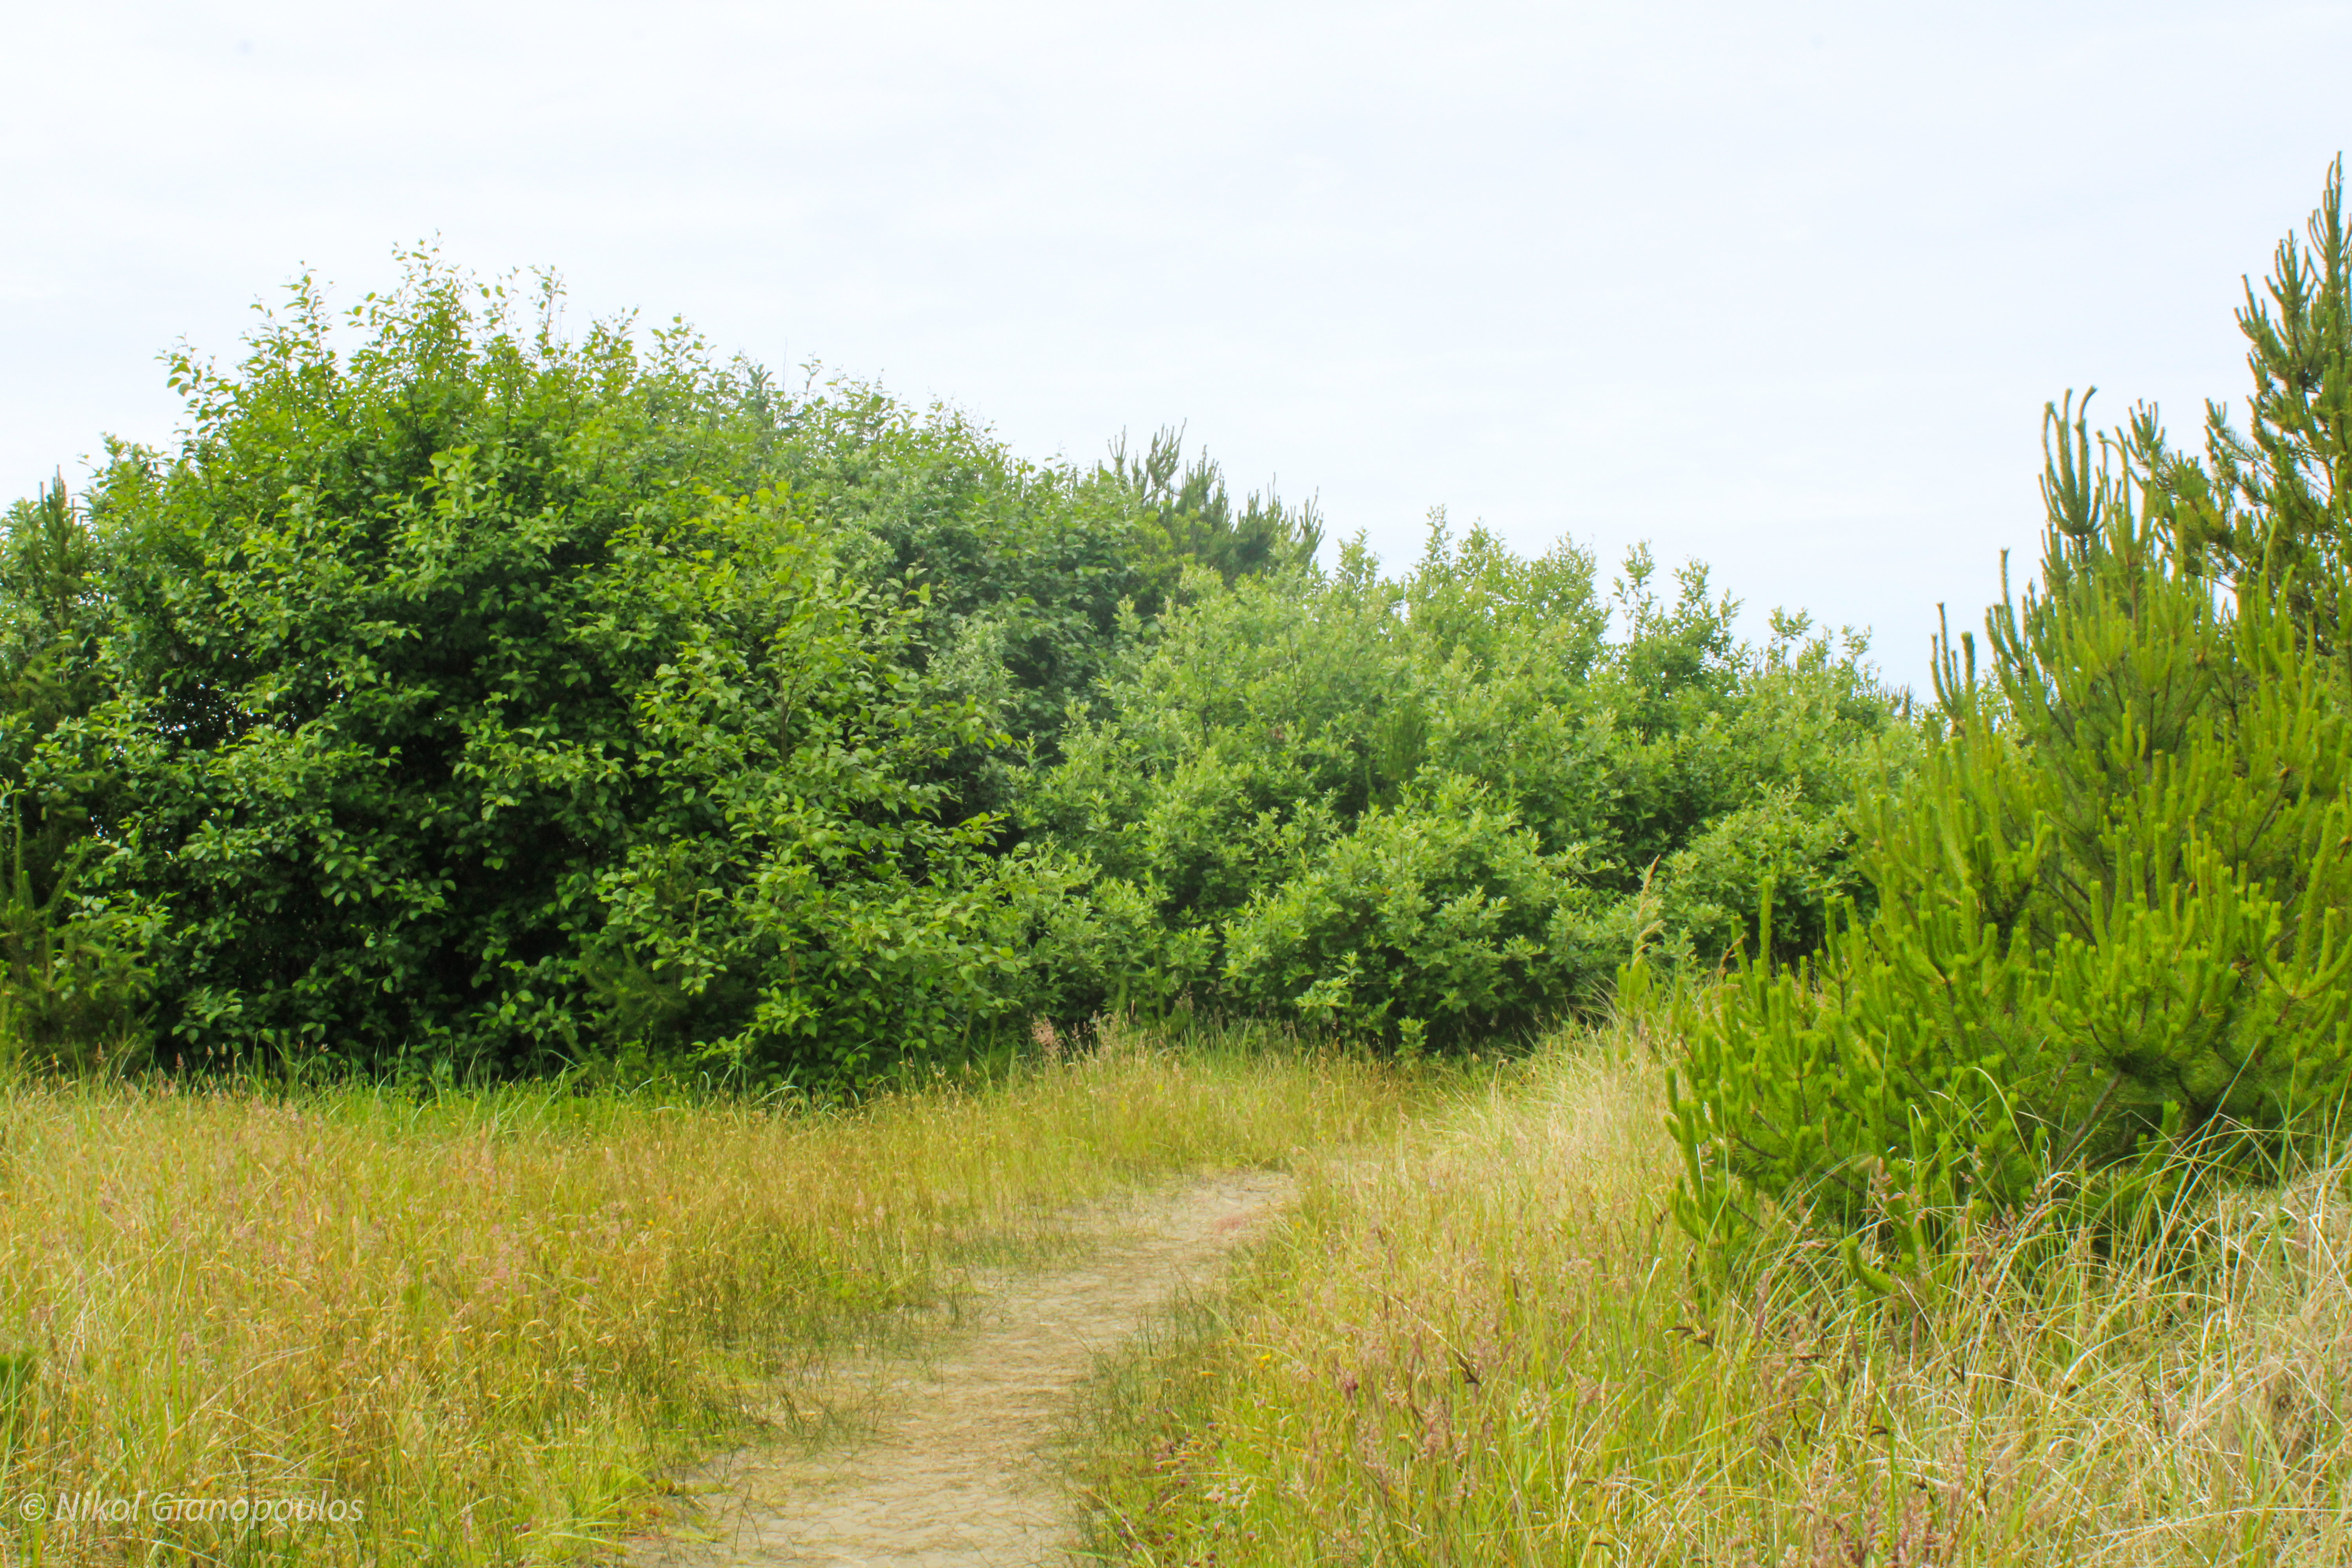
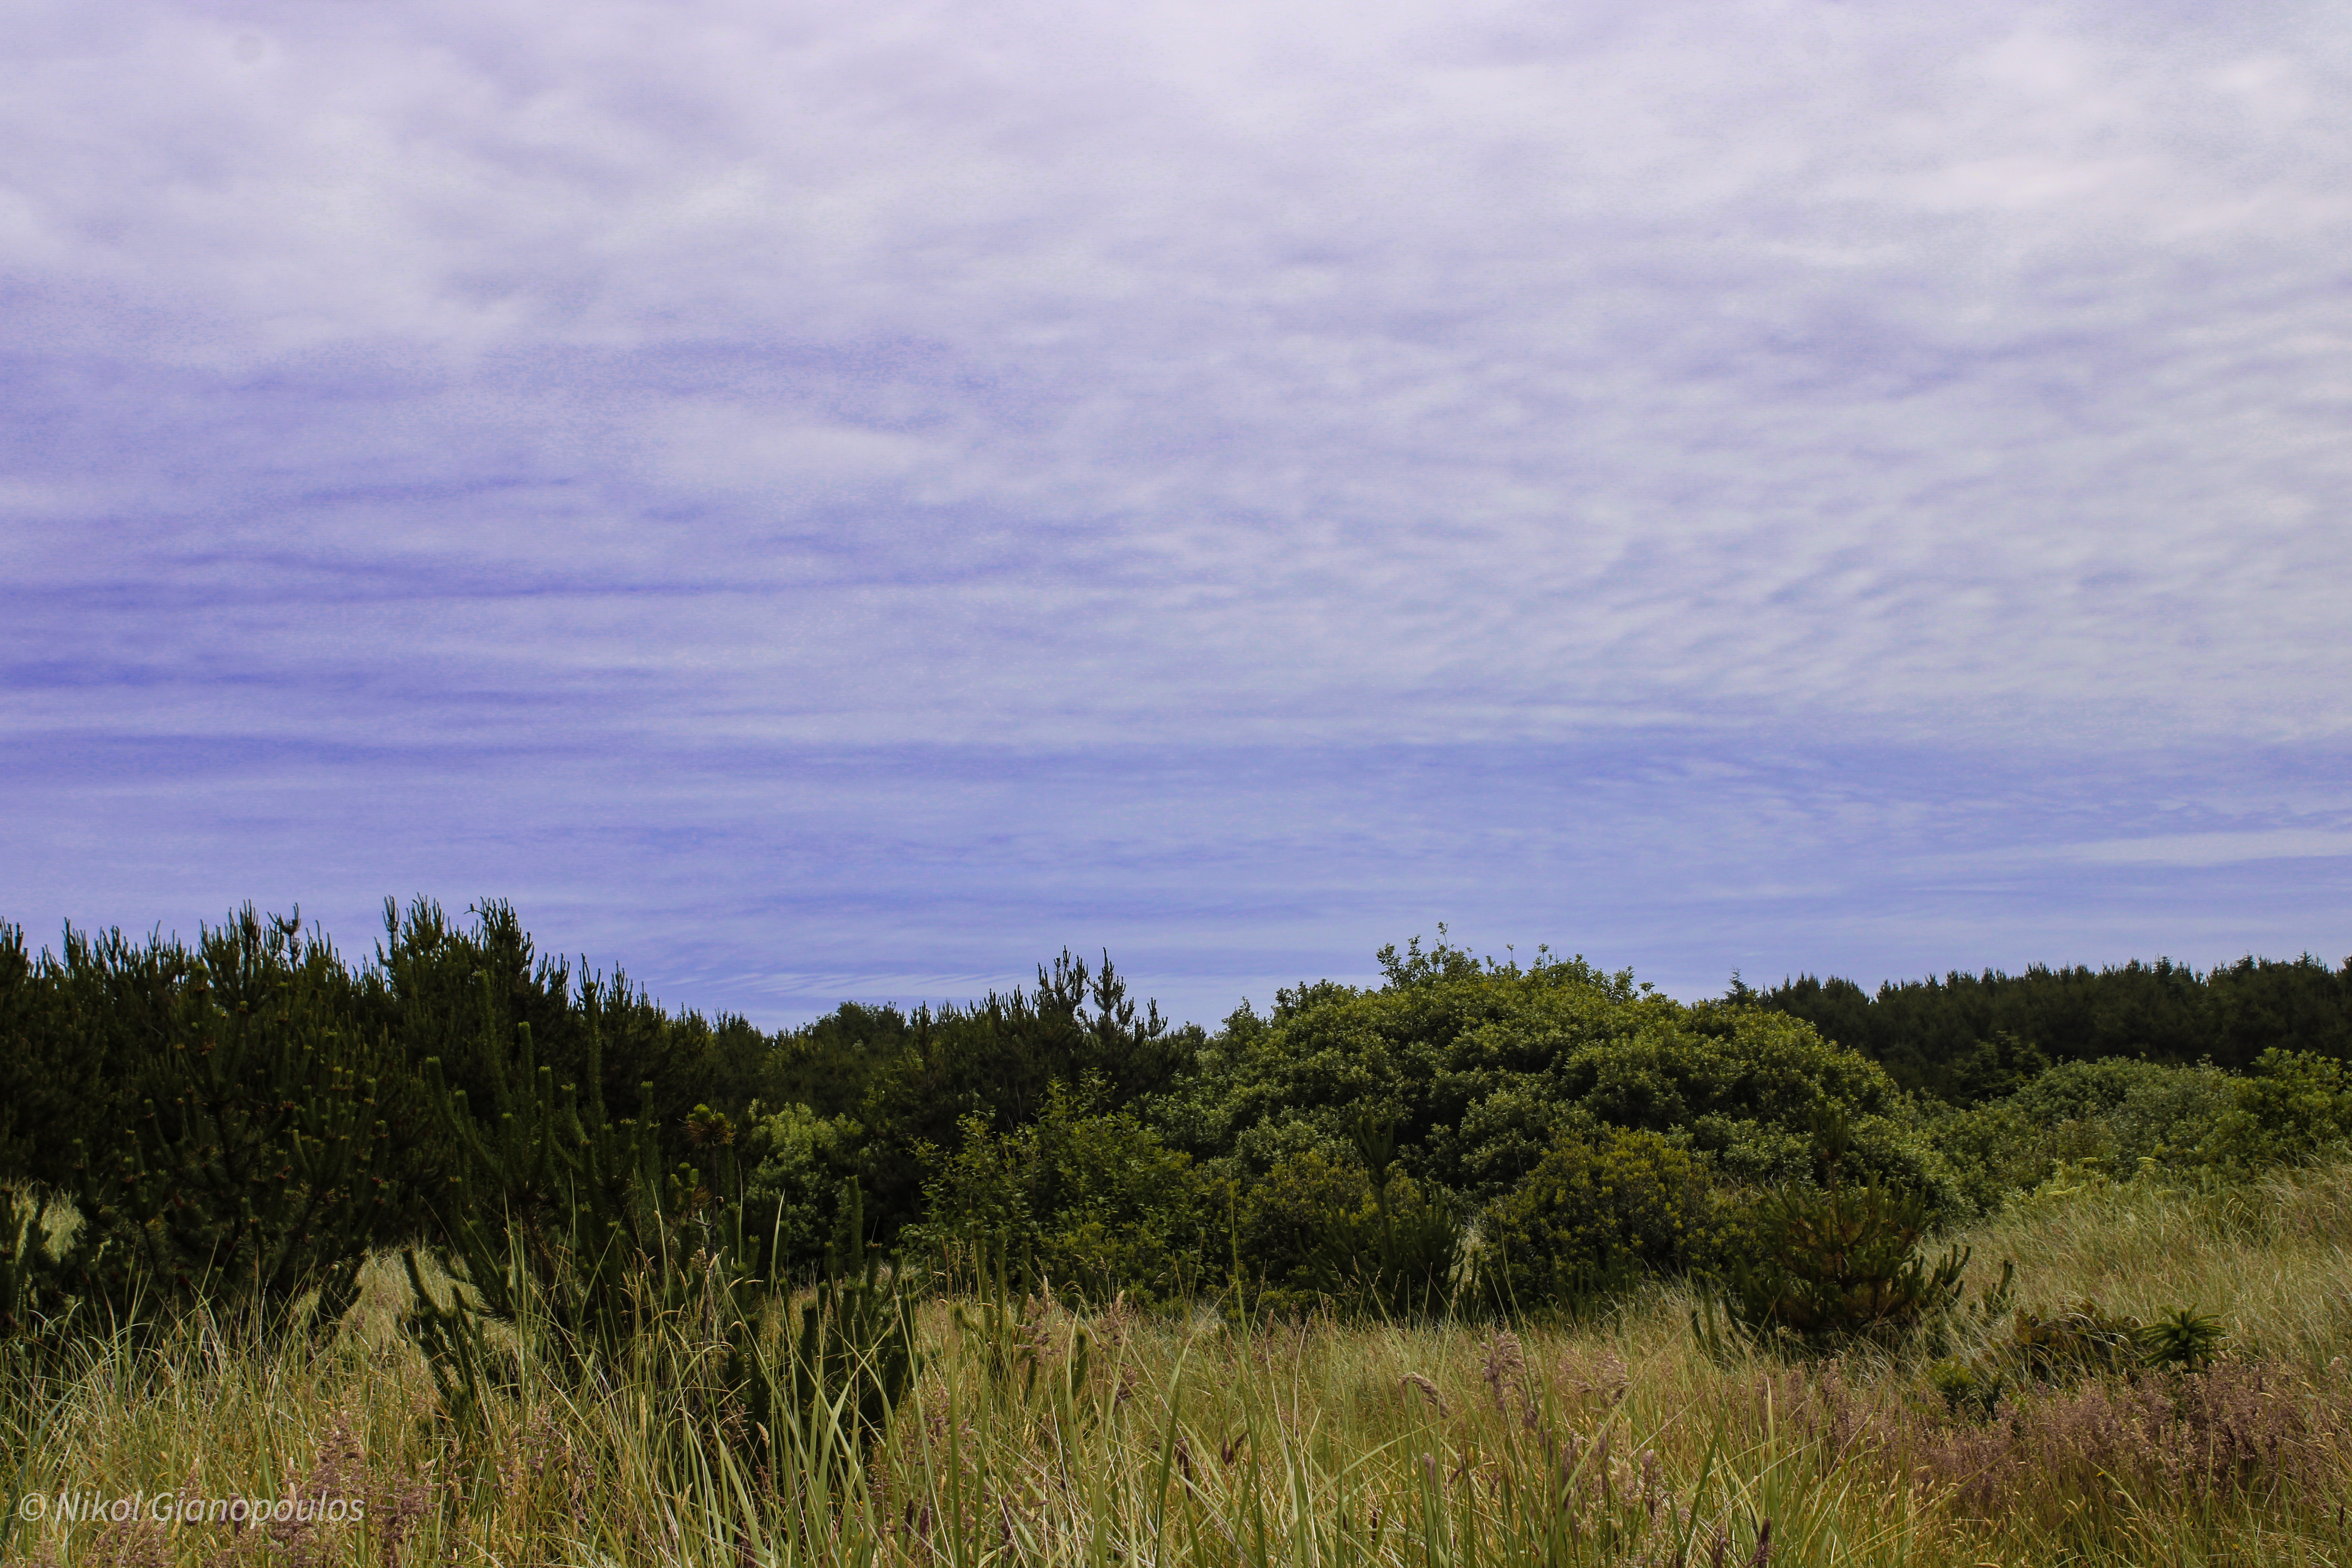
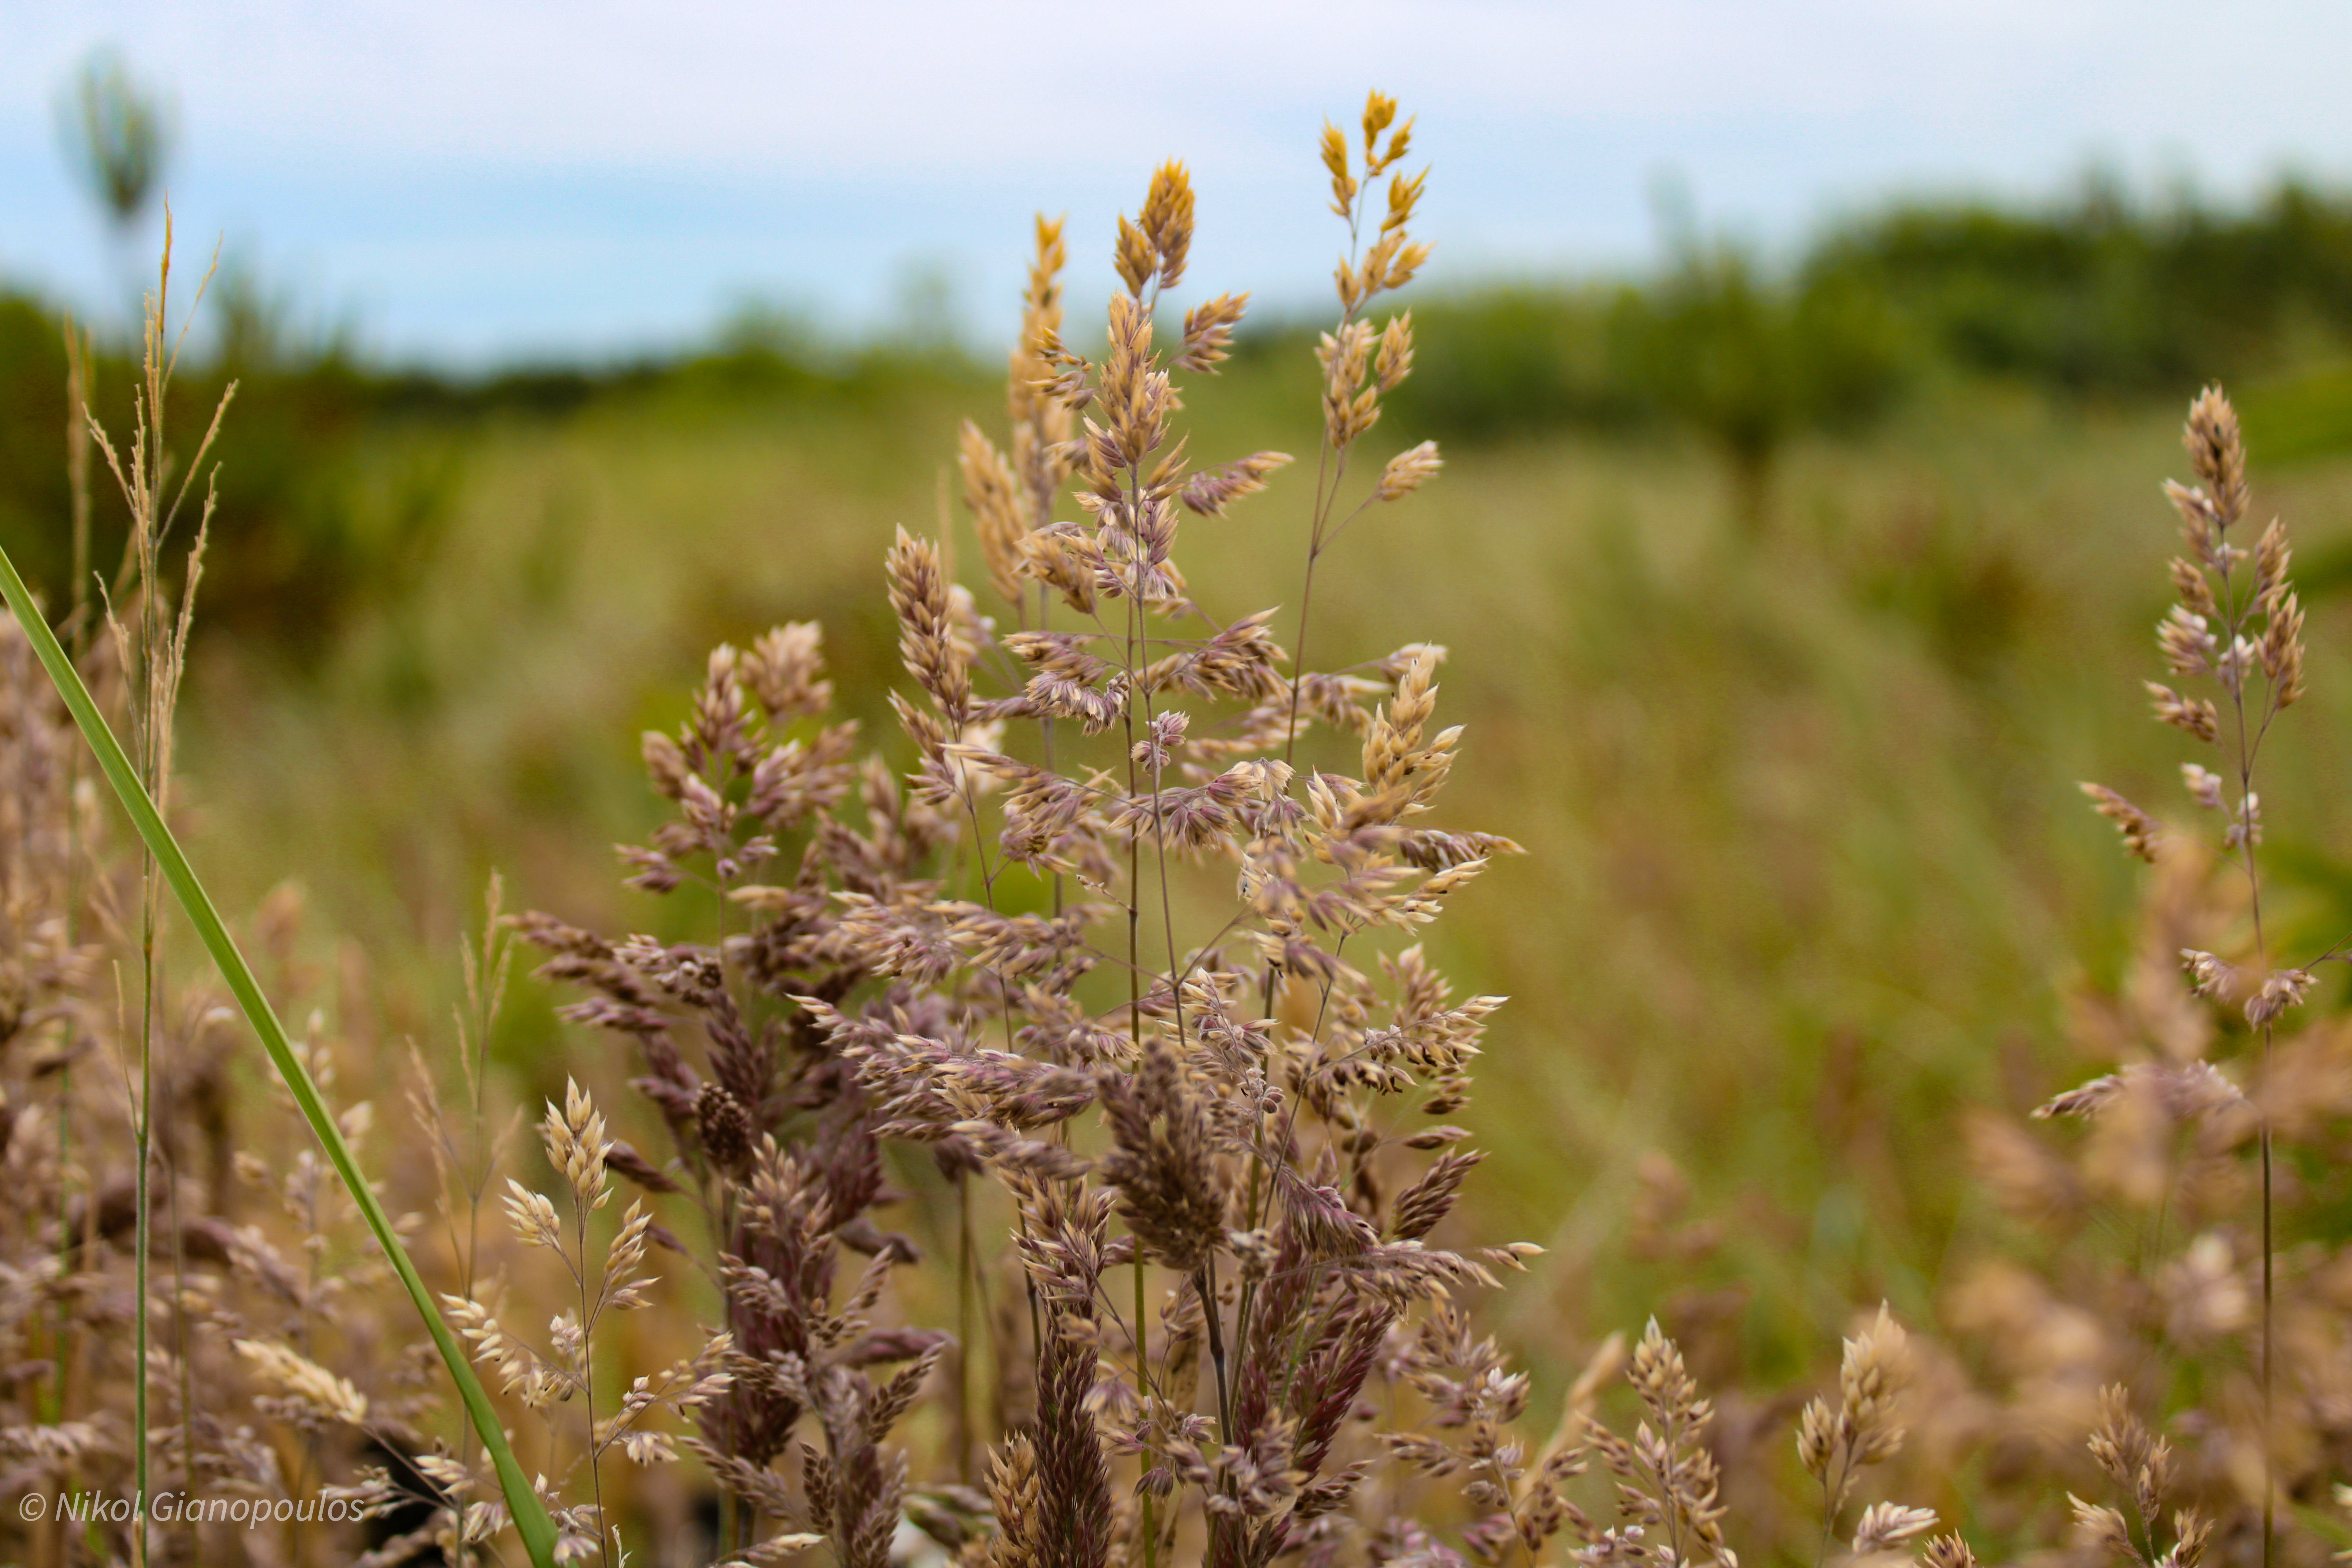
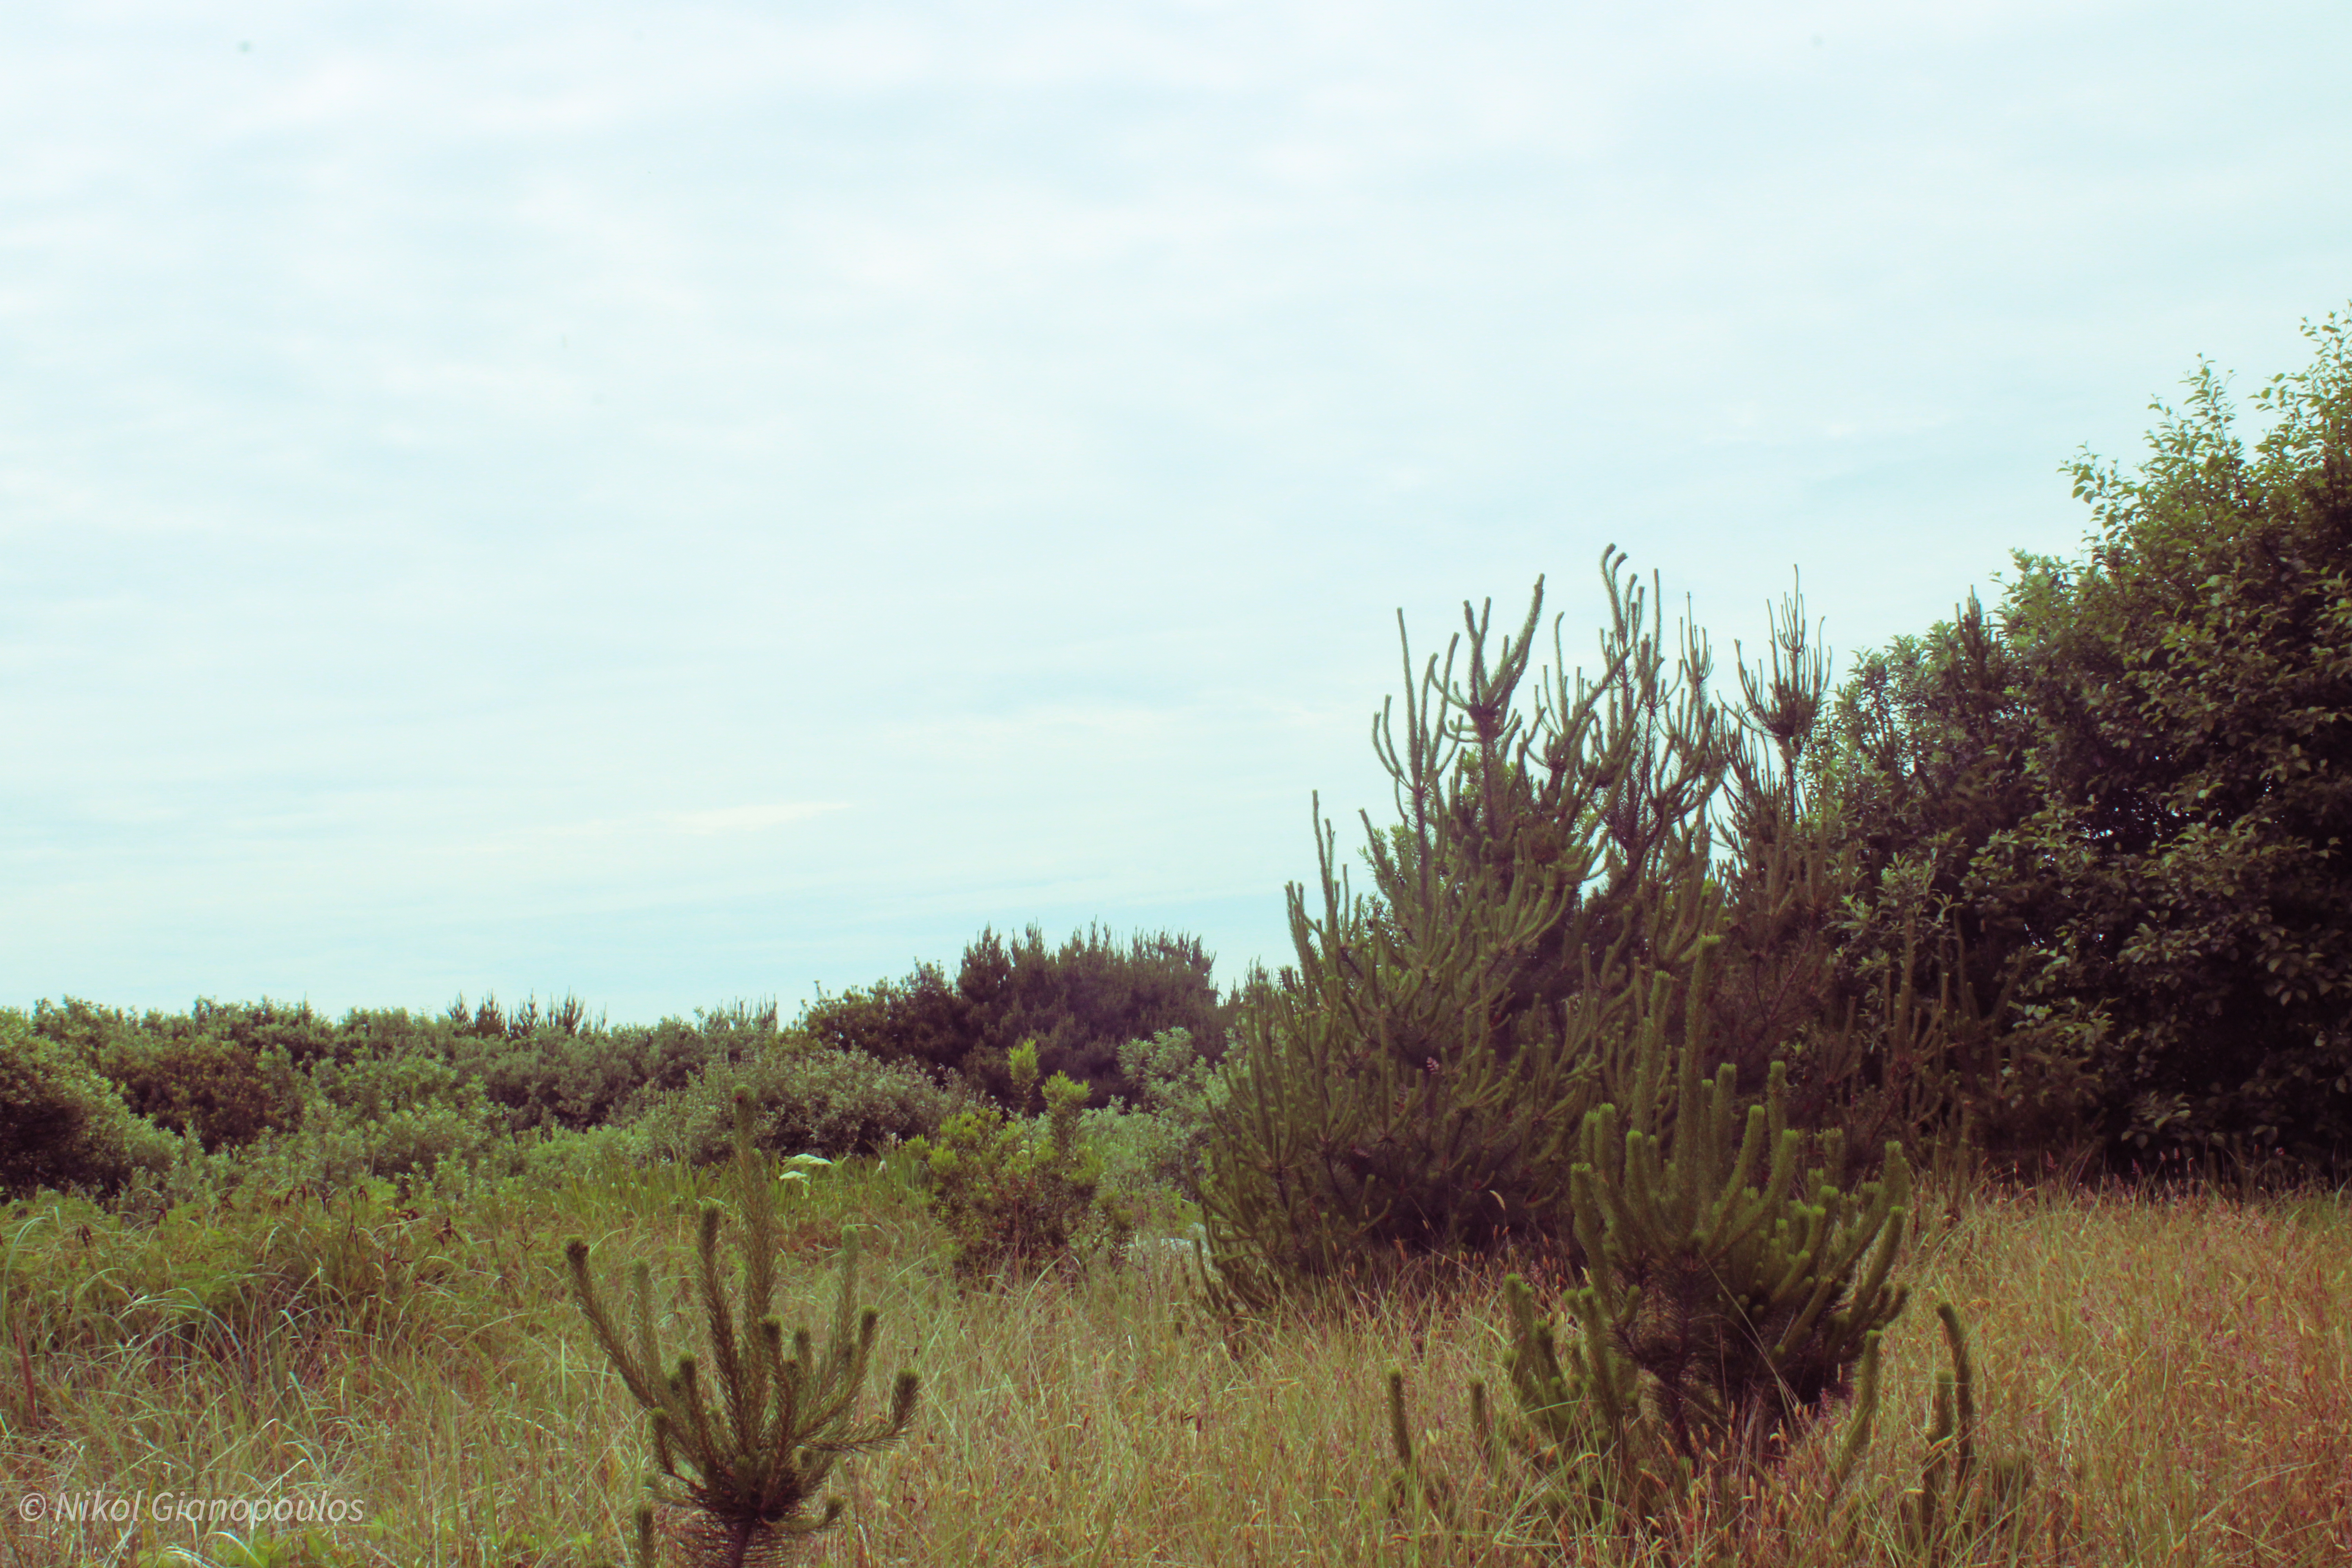
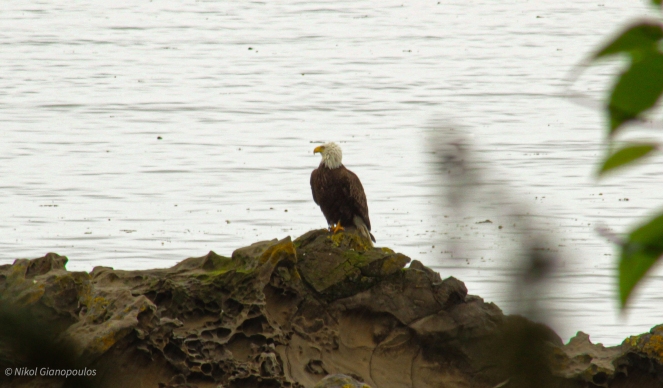
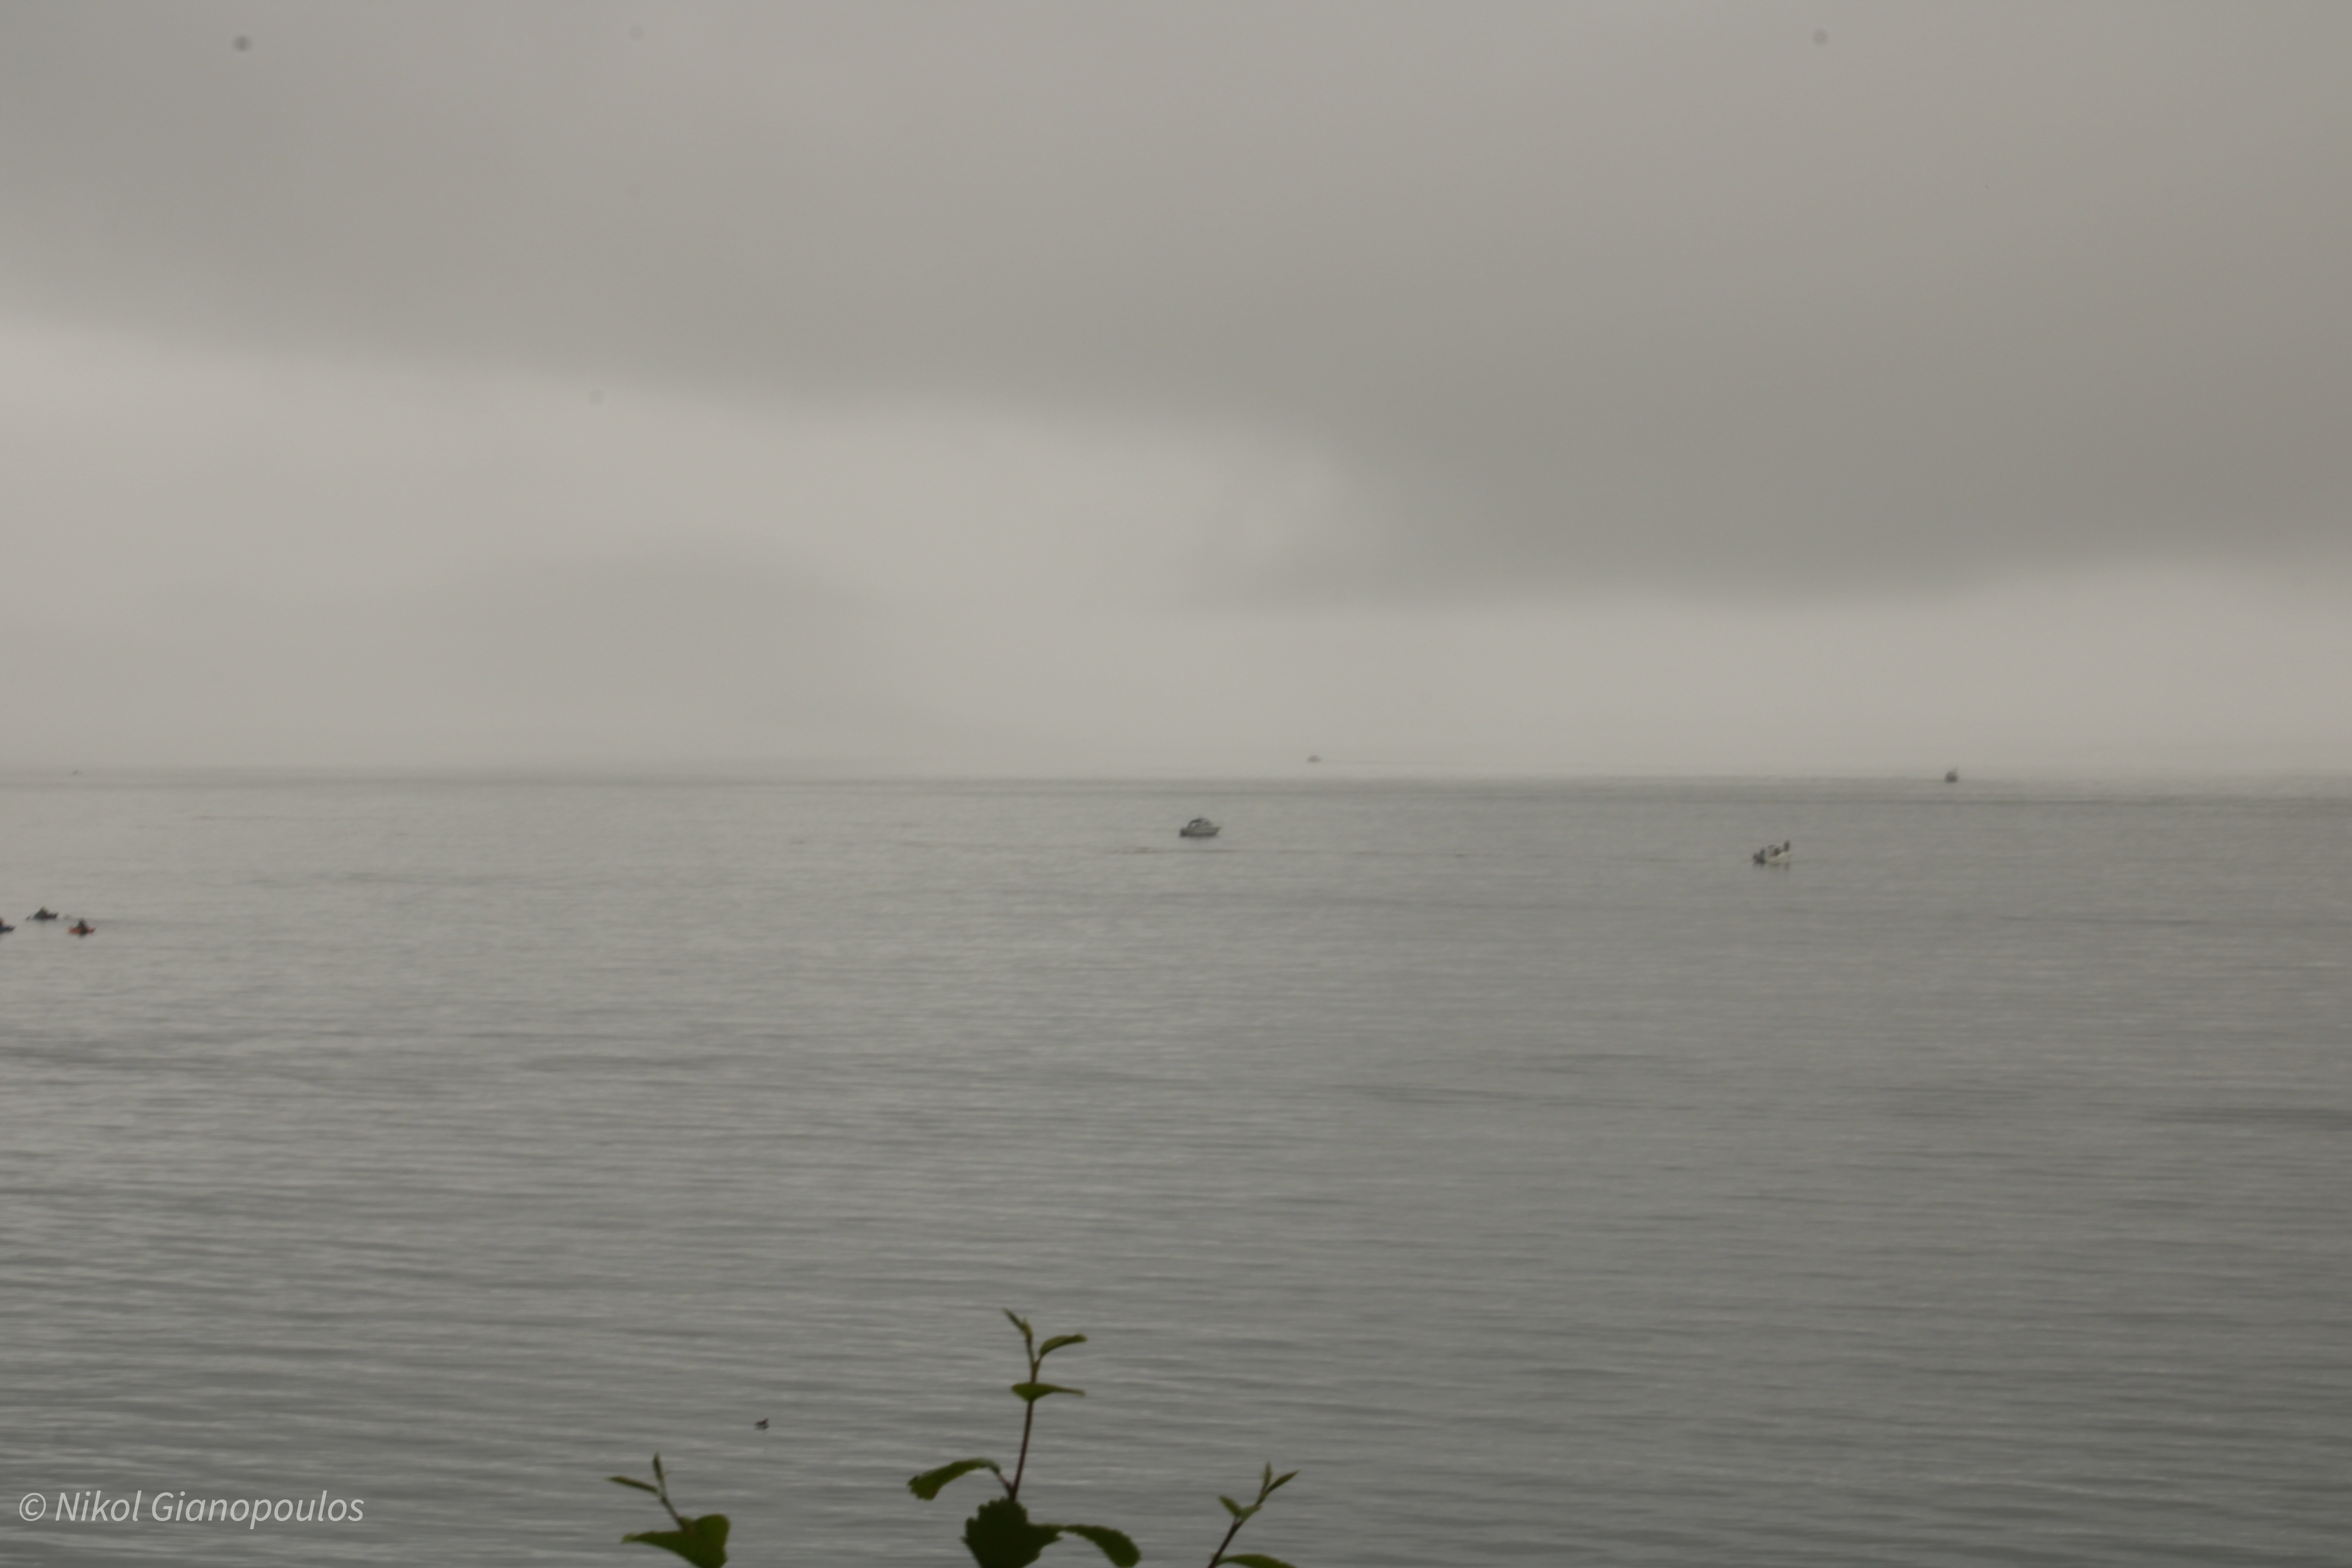
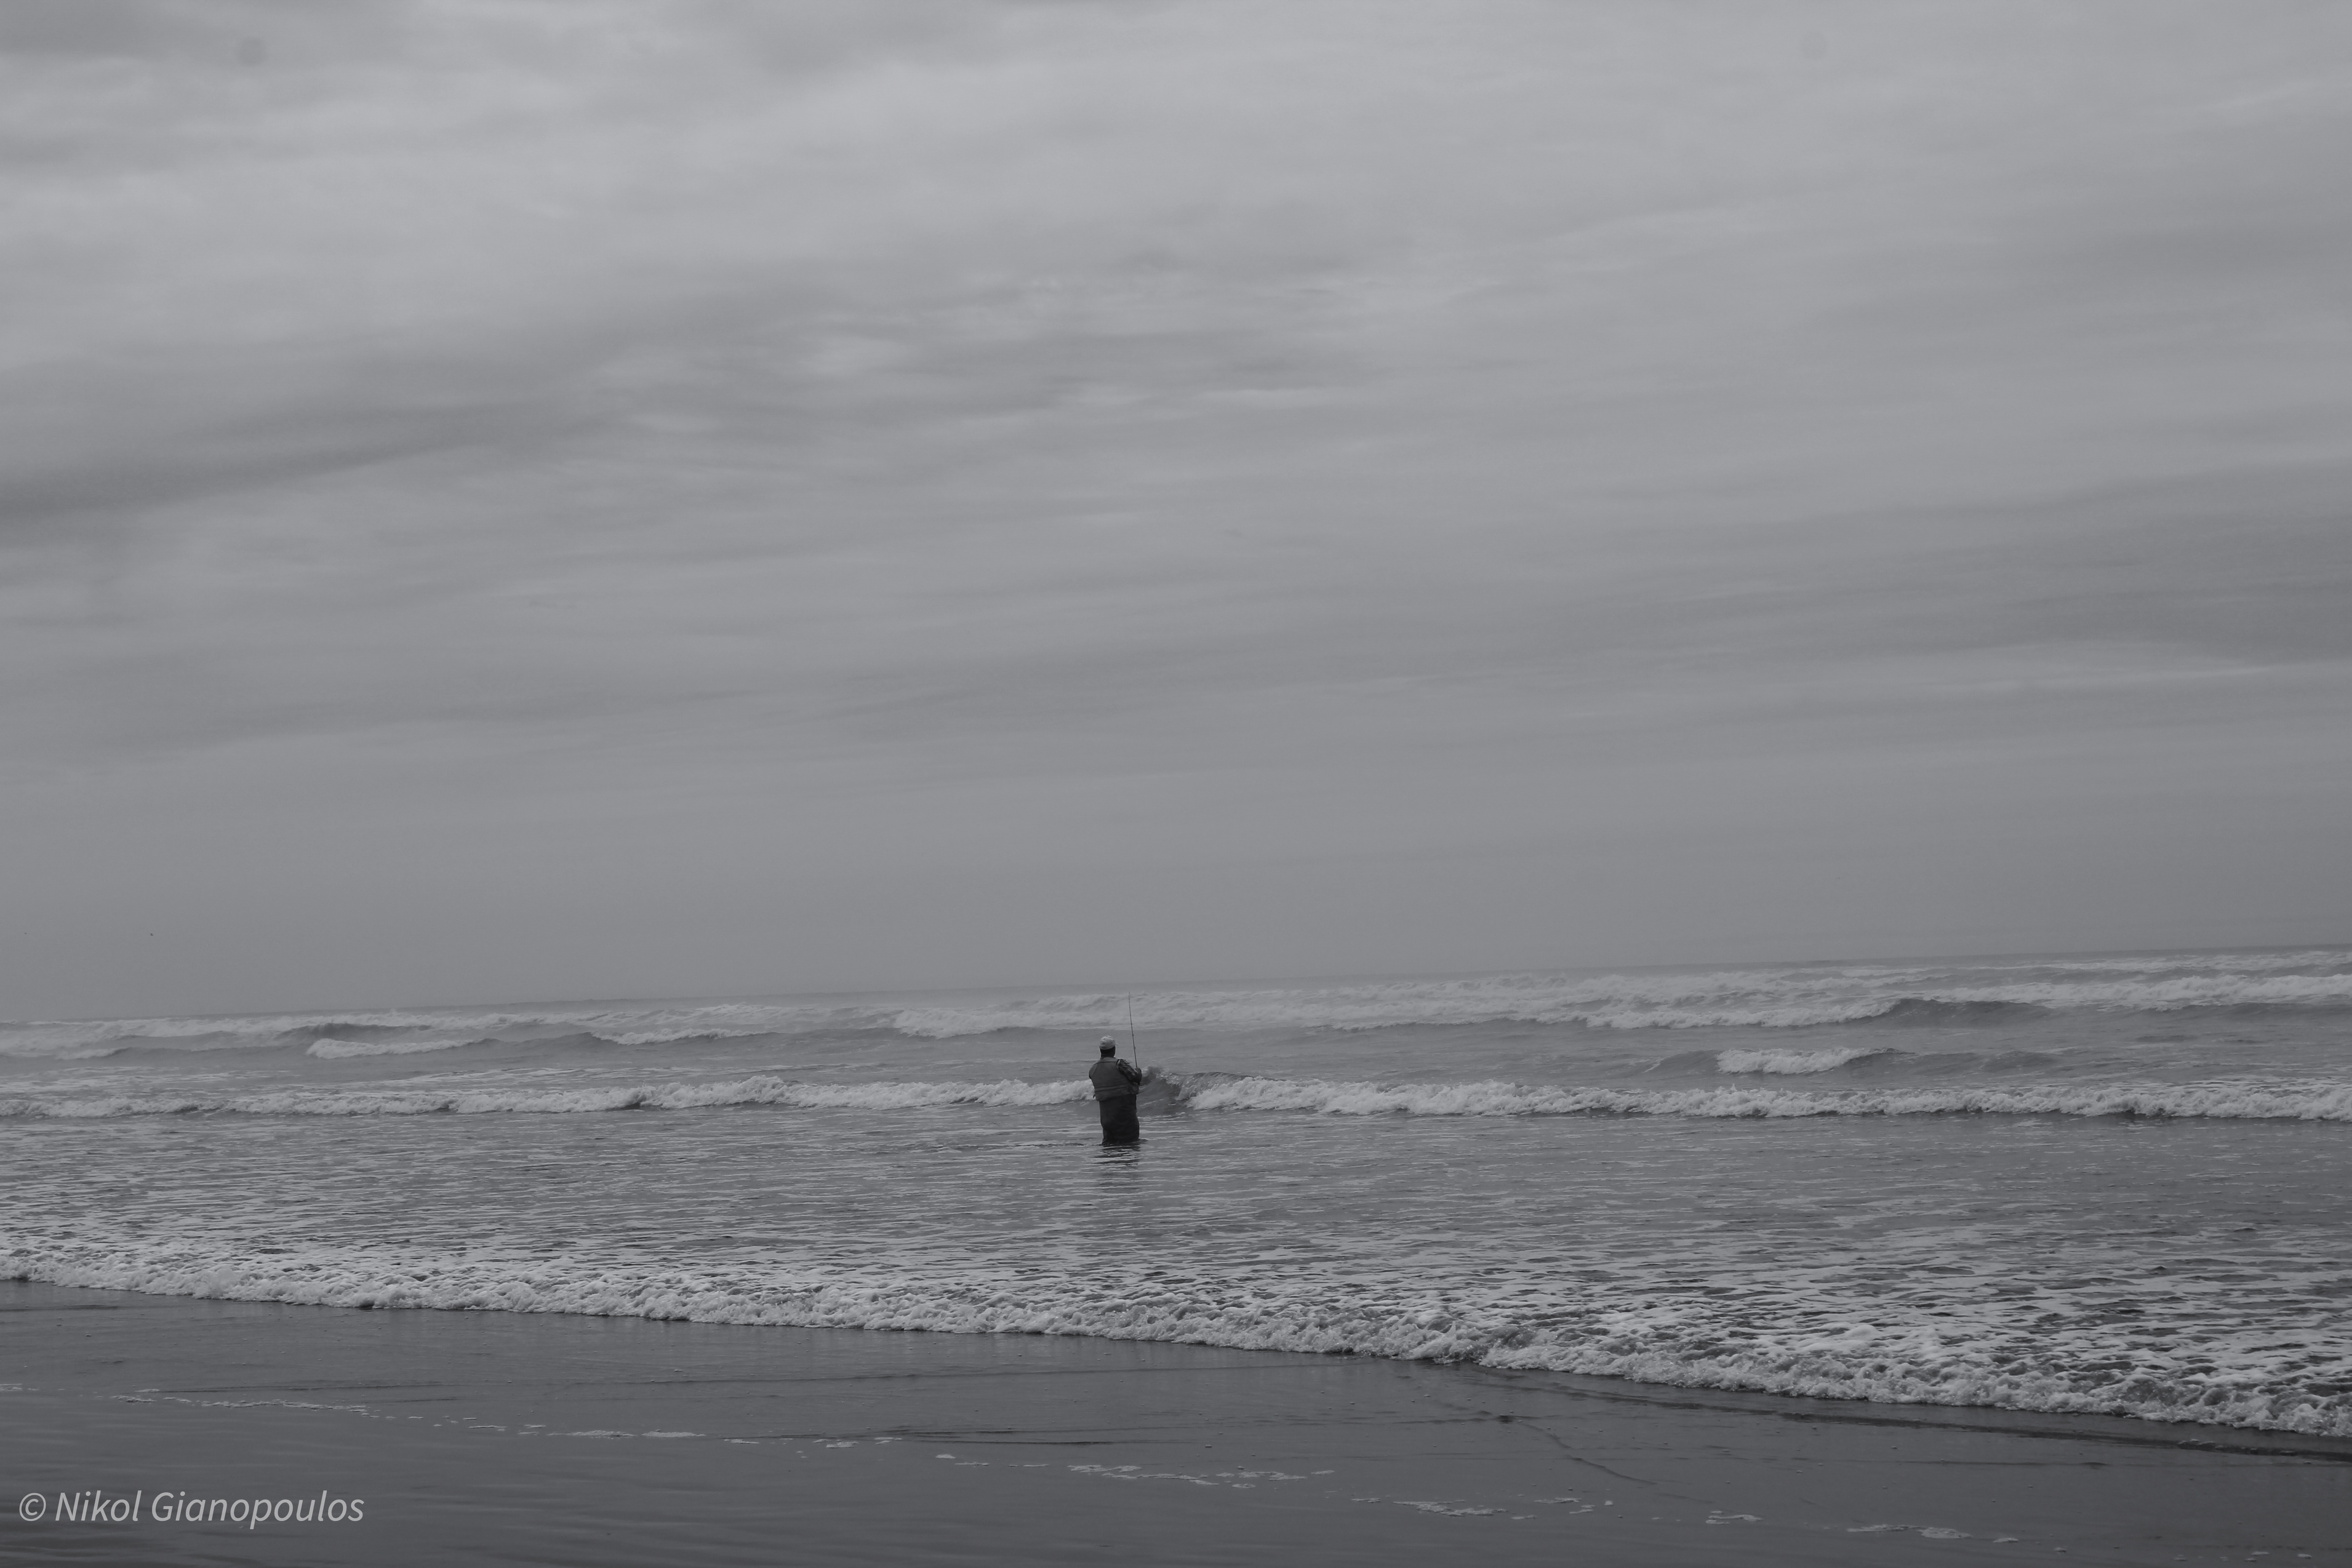
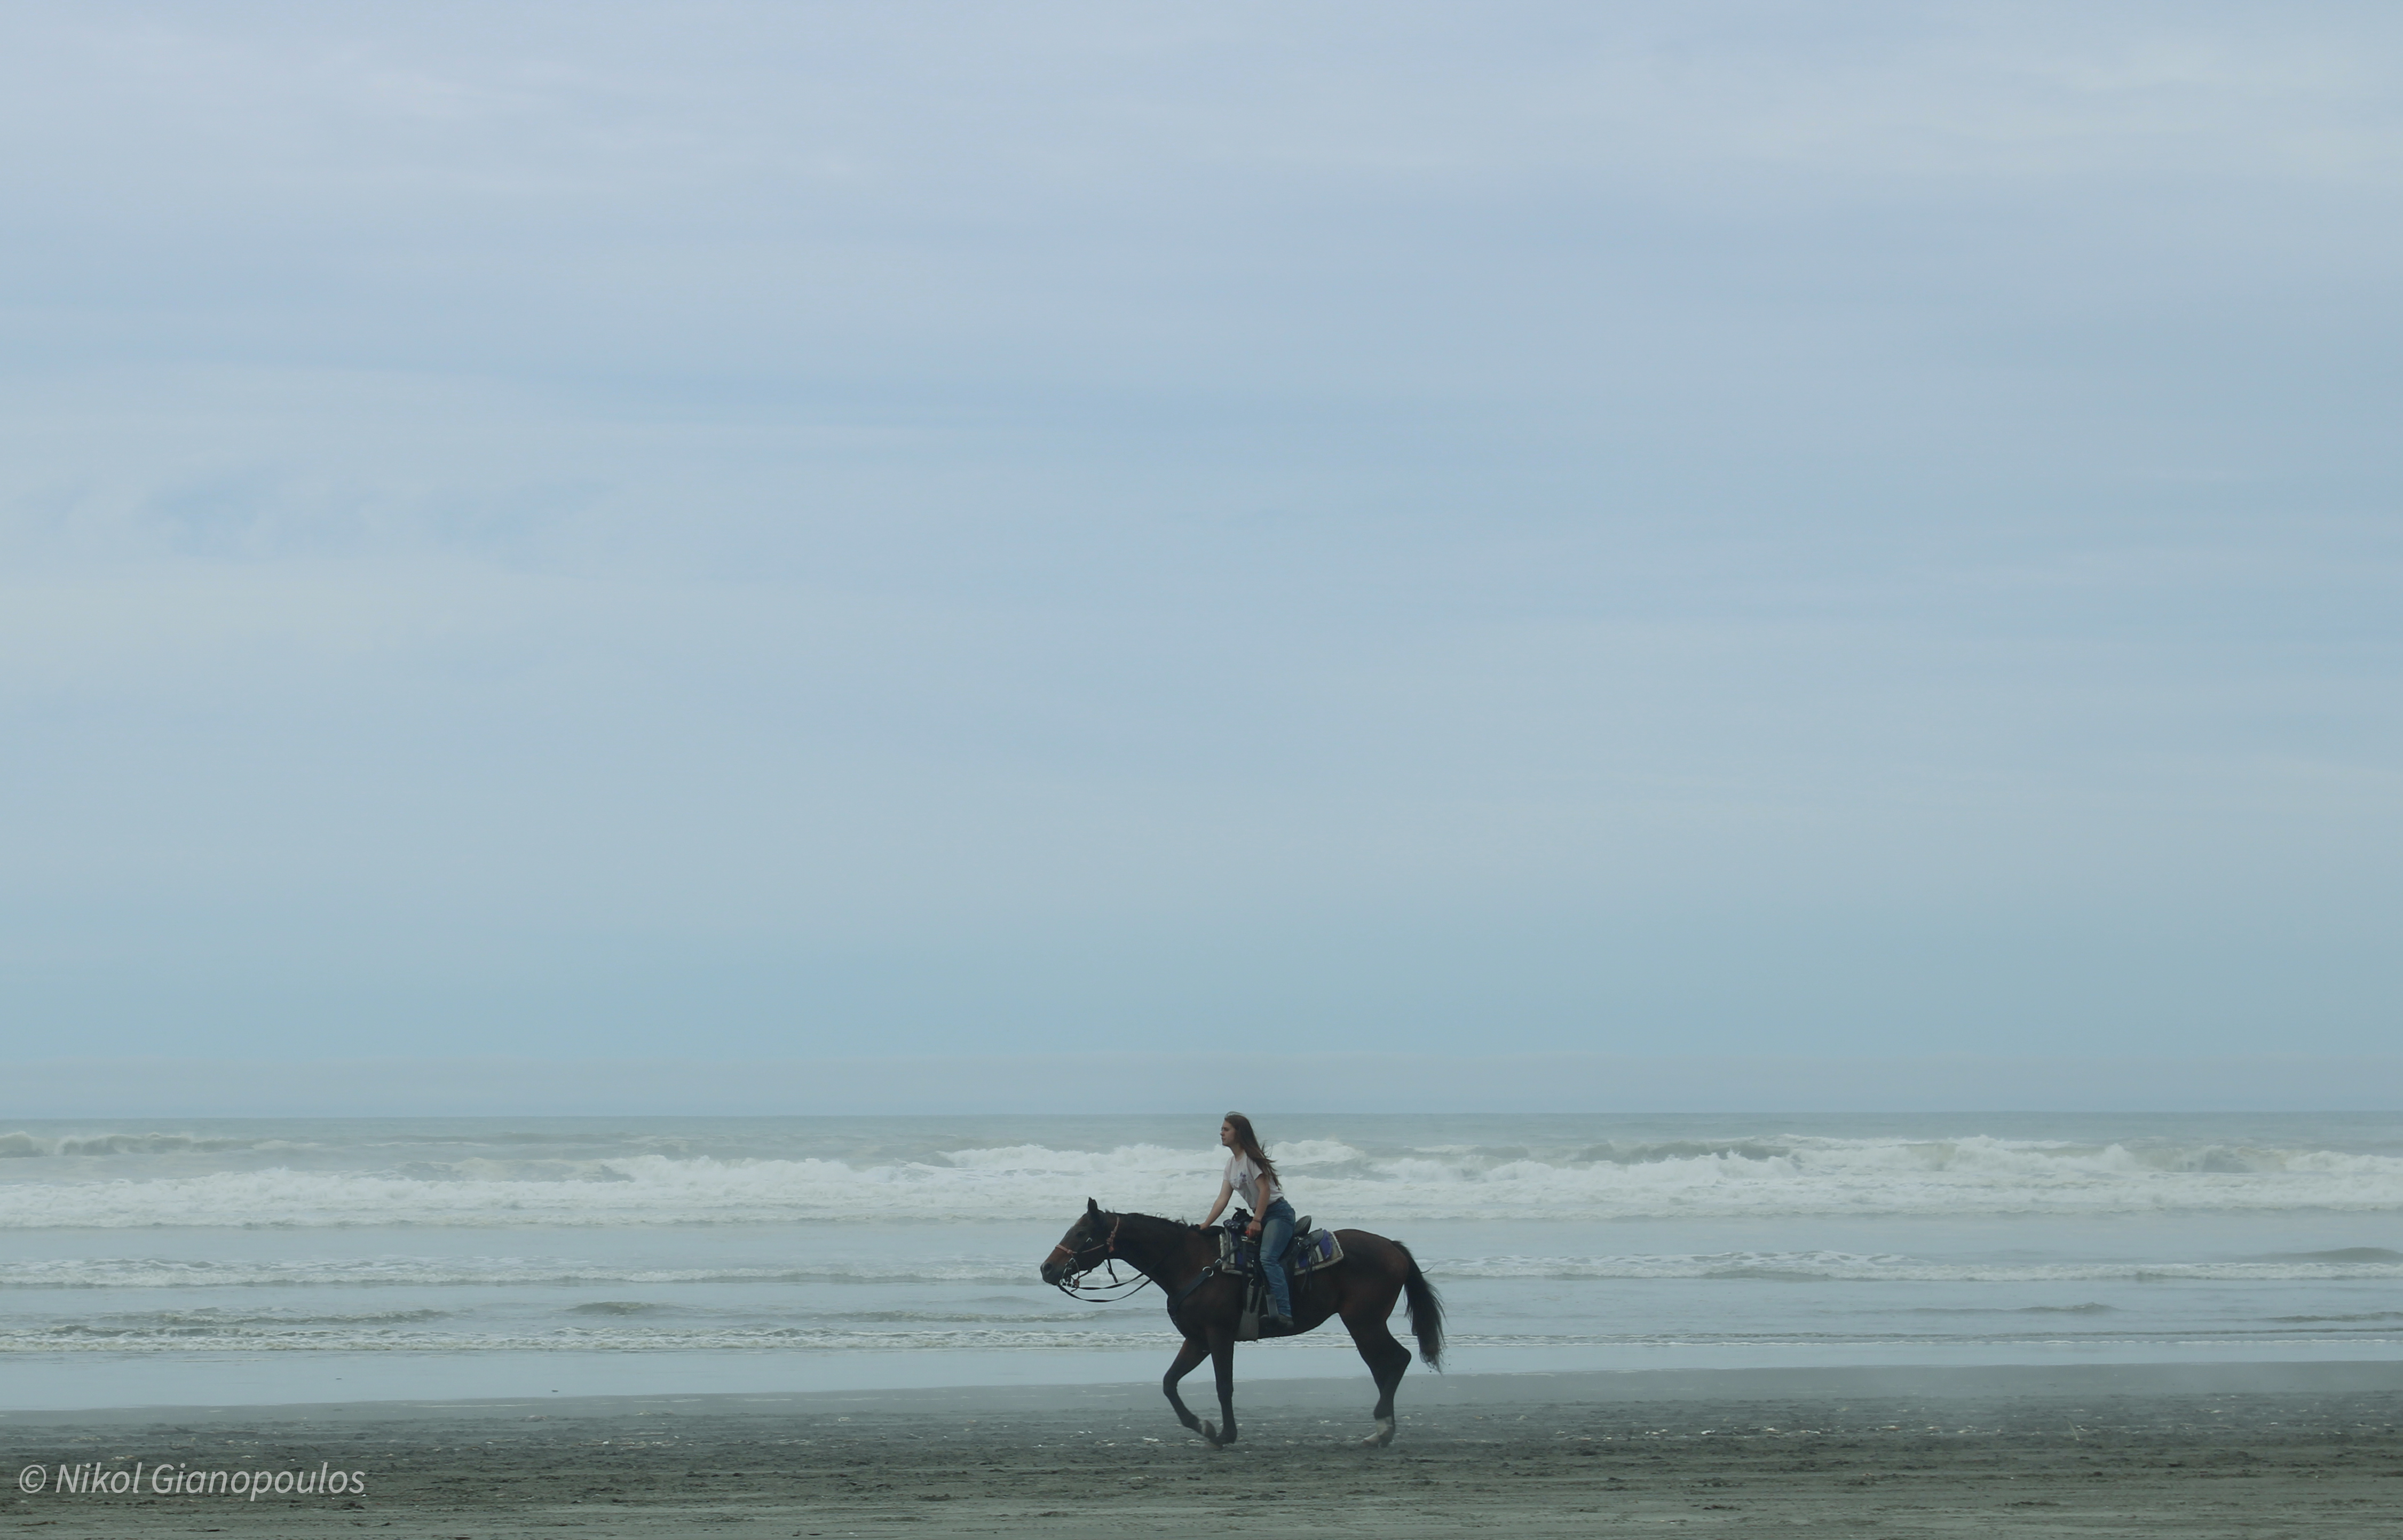
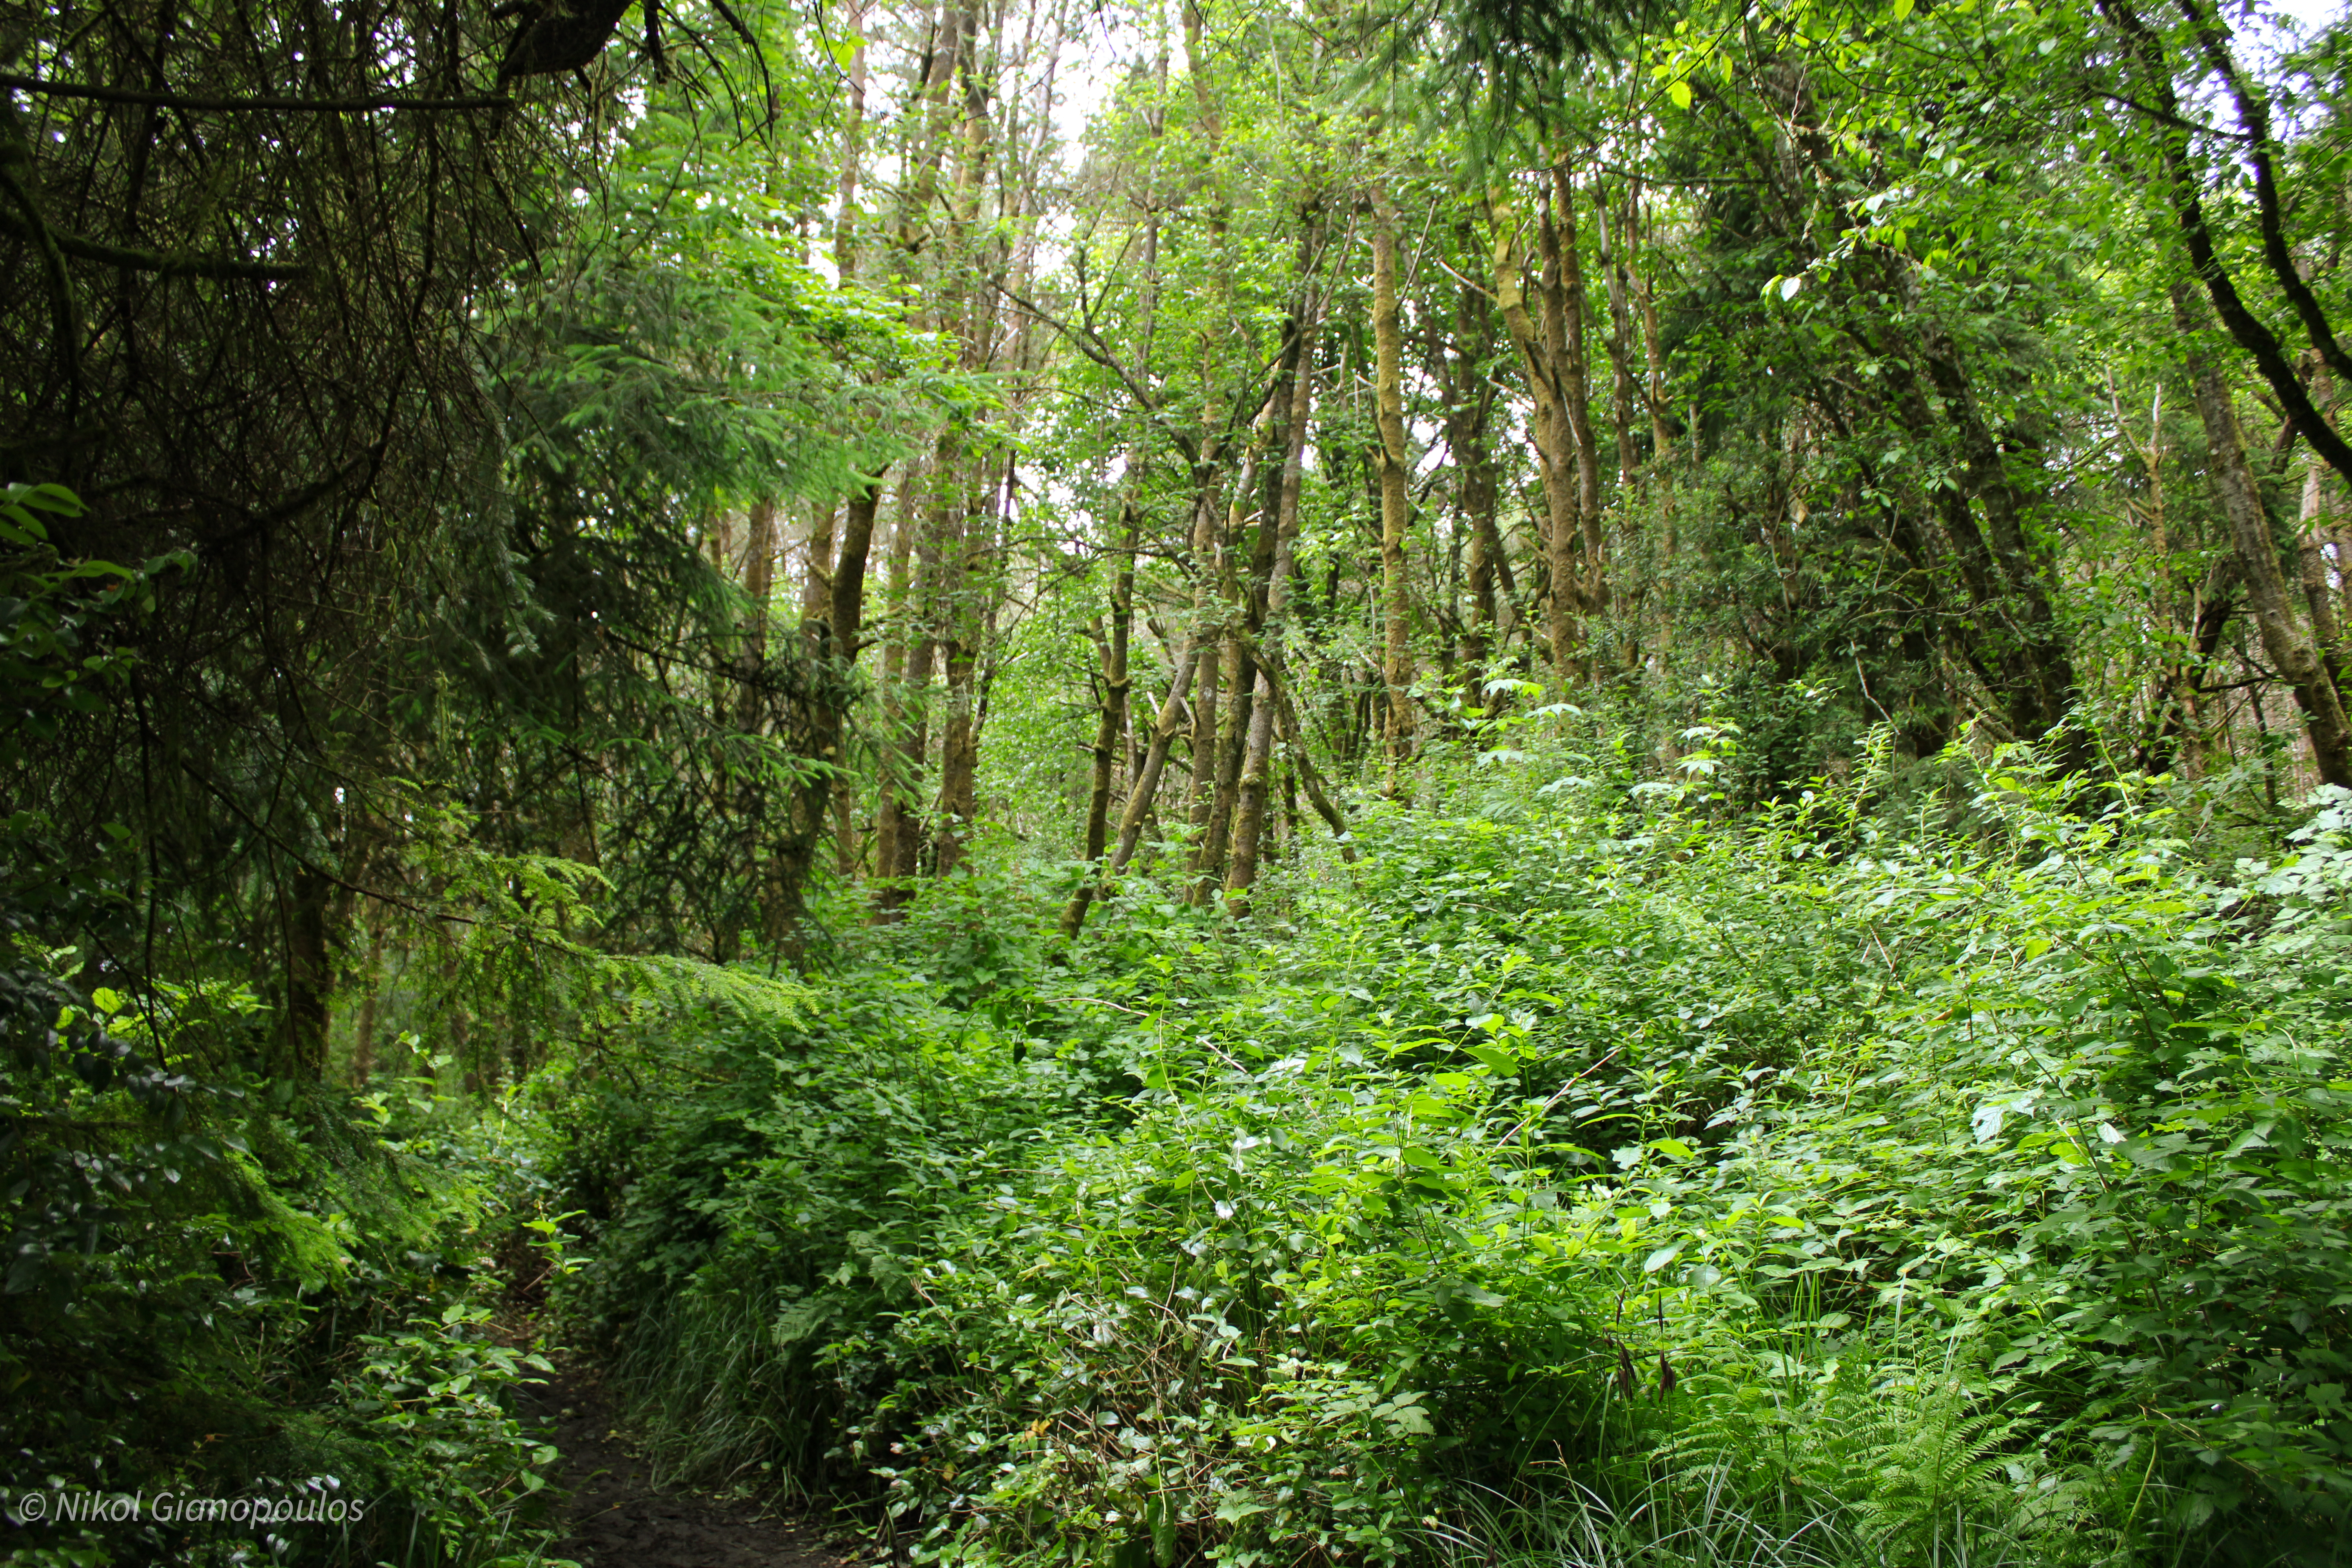
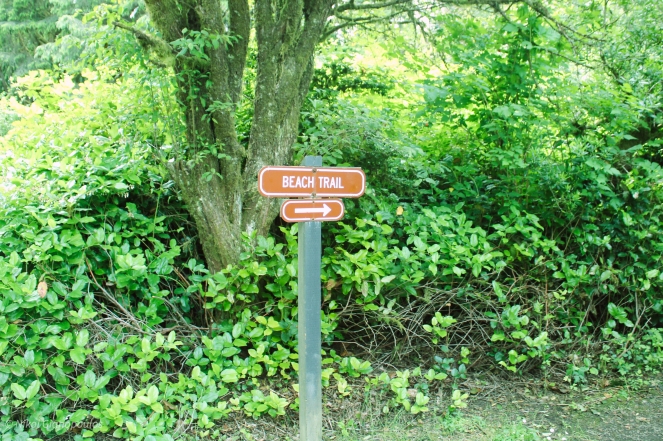
Flash forward to today – and I decided I really needed to get out of the house! So, I made some camping reservations, packed my tent, some snacks and my dogs and off we went to drive around the Washington Peninsula! This time I gave myself plenty of time, 3 days – but decided that two was plenty given that most everything was closed. The first day I made it to Ocean City State Park and pitched my tent. I took the dogs to the beach and we pretty much had it all to ourselves. I lit a campfire, read a book, worked on a crocheted blanket, and relaxed!
The next morning we got up, took down the tent, visited the beach again and then were on our way. I drove up the coastline for the most part, until the roads closed and I was diverted back to the 101. I really wanted to see Cape Flattery, but it sits on the Neah Bay Indian Reservation which was closed to outsiders. So, I turned around and headed home, catching the ferry while it was still day light.
The trip was exactly what I needed. It felt good to get out of the house for longer than an hour at a time. You can check out some of the photos I took here. I’m in the process of making greeting cards with them. But more to come on that later.
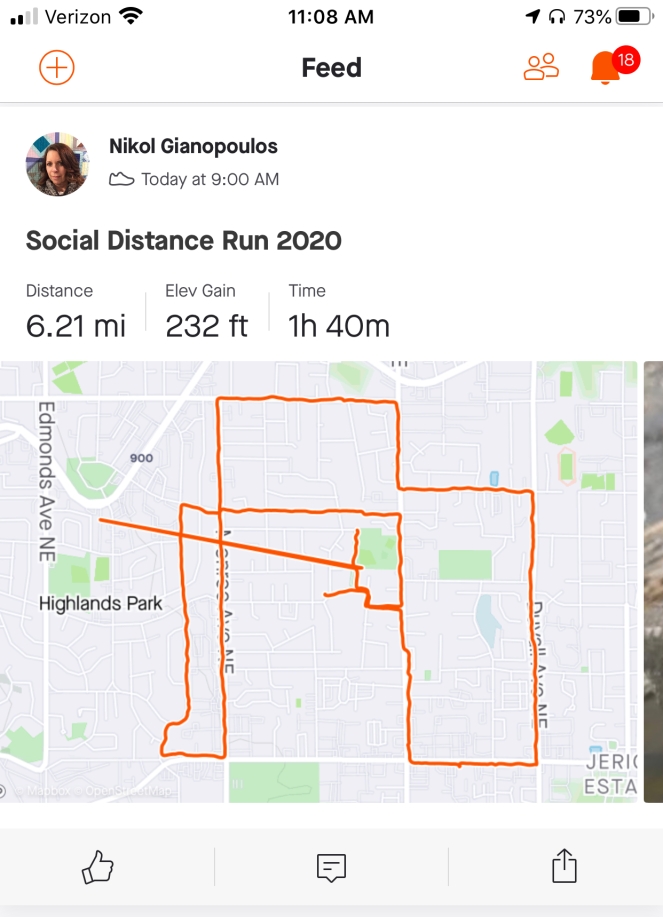
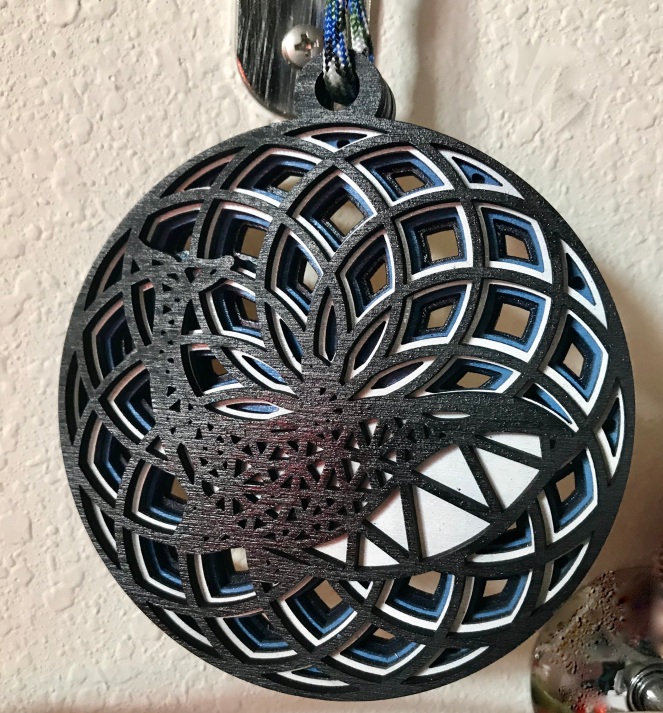
It’s Memorial Day weekend – and I had no plans for camping or gathering with friends… so I sewed (for the most part). Saturday I participated in a Social Distance Run … except I walked because I haven’t exactly trained for anything these past few (8) weeks. I walked early while it was still cool and not a lot of people were out. I actually enjoyed the walk (urban hike) – plus I got a pretty cool medal for playing along.
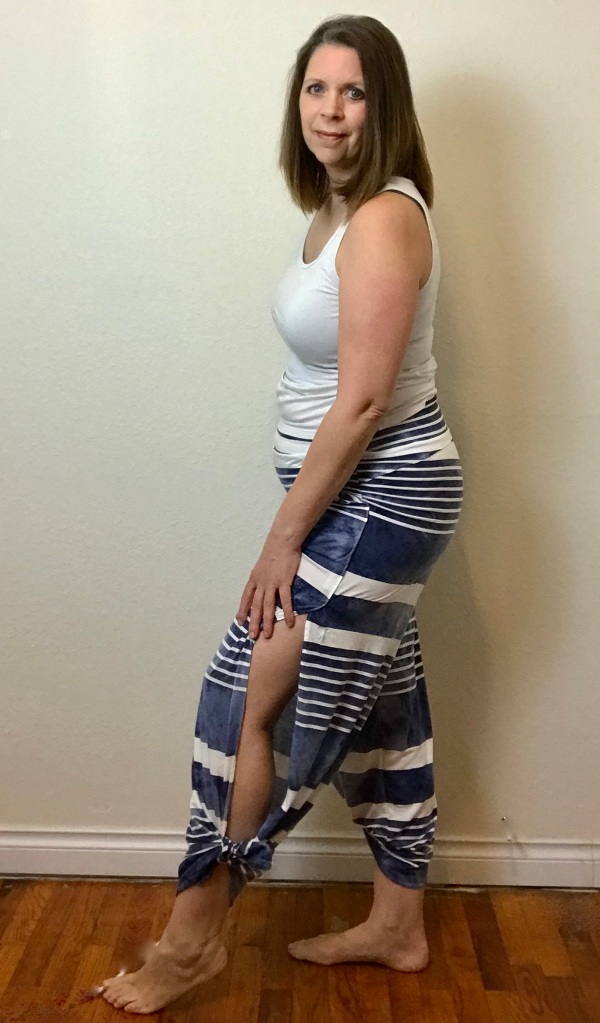
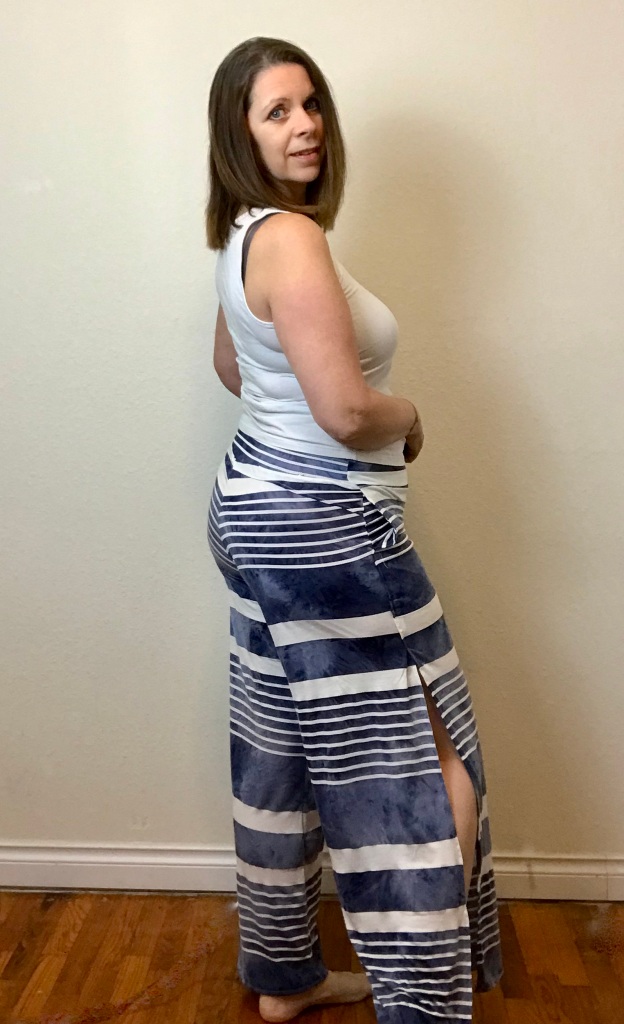
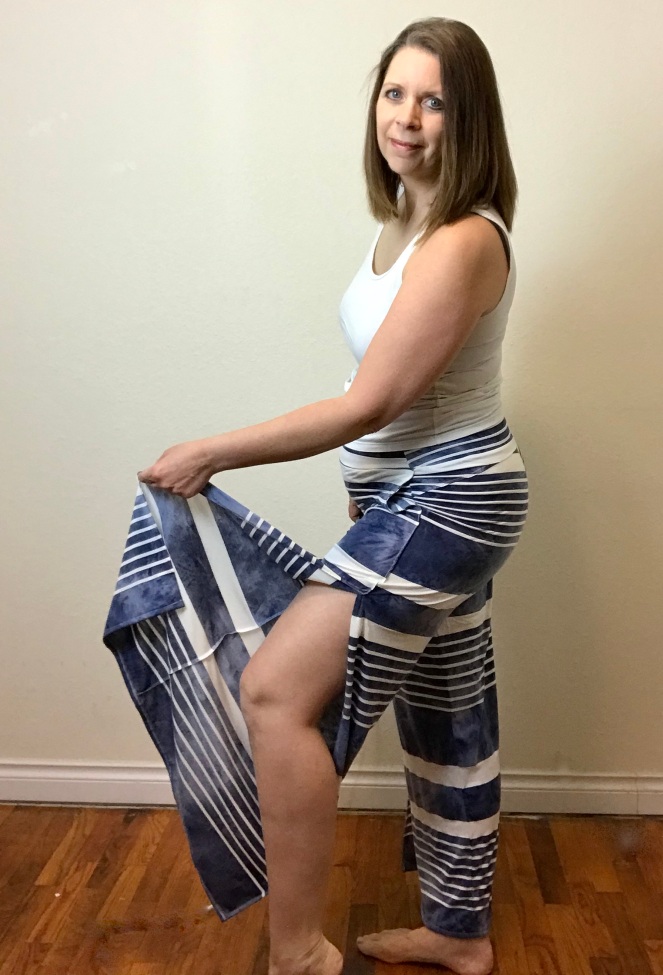
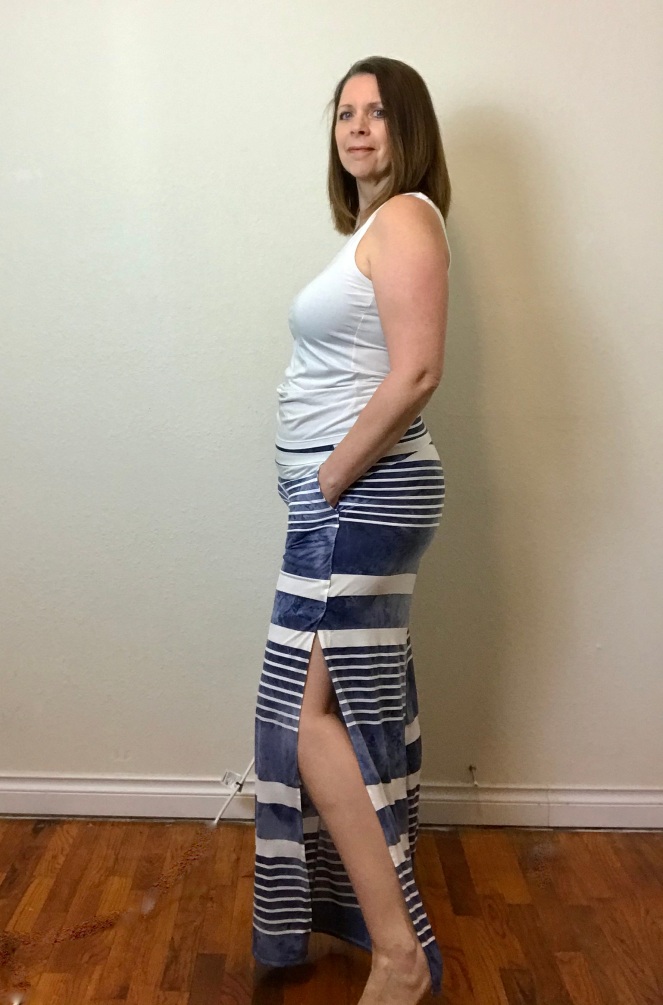
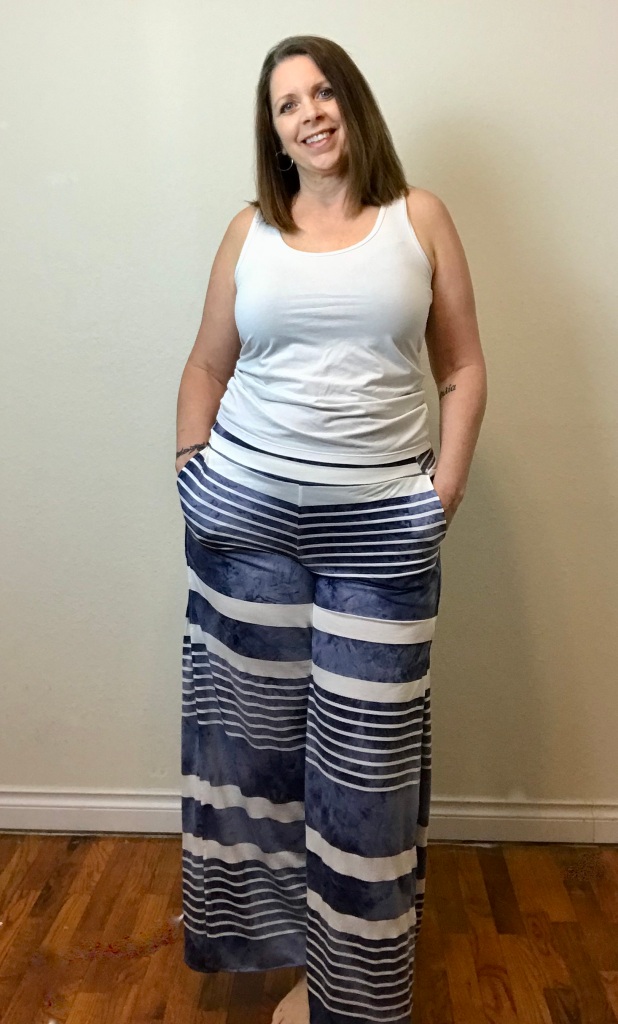
I also spent time in my yard pulling weeds, studying and of course sewing! I’ve paused my summer sewing while I work on my lingerie/loungewear sewing. Now that I’m also going to school my time is very limited and I like working on smaller/shorter projects so that I still feel like I’m accomplishing something. I’ll share what I’ve made in the coming weeks, in the meantime I still have pieces I want to share from my summer wardrobe including these Warrior pants from GreenStyle Creations!
Can I just say I love these pants! I REALLY want the weather to warm up so I can add them to my summer rotation! (I’m still wearing jackets). I’ve had the fabric for a while so I can’t say where I got it with 100% certainty. It’s not quite the right fabric for these pants – it’s a little on the thin side, and not quite stretchy enough, but it works for my first try at these.
These pants are definitely not a beginner project mainly because of the the way the pockets are put in. I can’t even describe how it’s done…. just that I’m thankful there was a video tutorial I could watch to help me figure it out. I had to add about 2″ to the length (which I do on almost all my pant patterns), and it took some concentration to get the stripes to line up – both with the front/back… but also matching the legs themselves. it’s not perfect, but I’m happy with the outcome. I’ll definitely be making these again as soon as I have more time on my hands!